Route lighting/seed box leads, Adjust air box pads, Route lighting/seed box leads adjust air box pads – Great Plains 3PYPA Predelivery Manual User Manual
Page 32
28
3PYPA
Great Plains Manufacturing, Inc.
401-647Q
2012-08-08
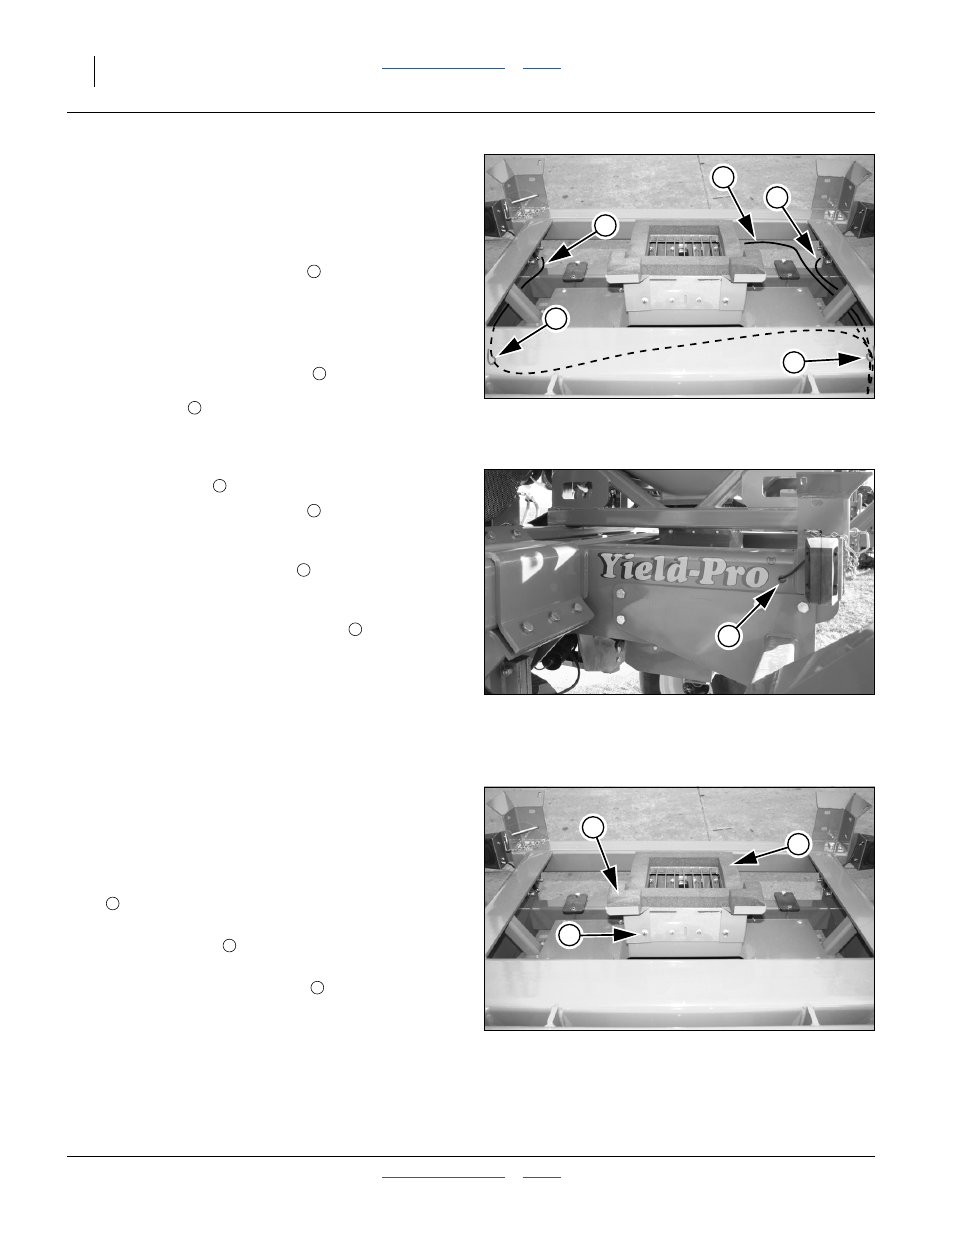
Route Lighting/Seed Box Leads
Refer to Figure 47
67. Uncoil the lighting and seed box sensor harnesses.
Route them along the steering hoses, and under the
main cart cross tube.
Note: There are two cable clamps
attached to the
inside of the cart side frames, near the main cross
tube, shown as gray “J” shapes in Figure 47.
68. Using a cable tie, loosely secure the harness bundle
to the left cable clamp.
69. Identify the Right light harness
. Route it along the
back side of the main cross tube, to the right side
cable clamp
. Using a cable tie, loosely secure the
harness at that side.
Refer to Figure 48
70. At each tail light assembly, route the lead through
the nearby hole
in the cart side frame.
71. Route the Right light harness
along the inside of
the right side frame and connect it to the right tail
light lead.
72. Route the Left light harness
the left side frame and connect it to the left tail light
lead.
73. Route the seed box sensor harness
along the left
light harness, and then to the seed box sensor lead.
Use a cable tie to secure the sensor harness to the
light harness. Plug sensor harness and cable
together.
74. Check that steering hoses, and all cables have
adequate slack for parallel arm movement (at both
ends or arms). Tighten the other cable ties.
Adjust Air Box Pads
Refer to Figure 49
If the planter was delivered without a hopper, verify pad
positions.
If the planter was ordered with a seed hopper, two corner
pads
will have been lowered to allow transport
mounting of the hopper.
75. Loosen two bolts
on each corner pad bracket.
76. Raise the pads until their top surfaces are 1 inch
higher than the perimeter pad
.
77. Tighten the bolts.
Figure 47
Lighting and Seed Box Harnesses
25371
R
S
L
C
C
Figure 48
Tail Light Lead
29169
H
L
Figure 49
Air Box Pads
25371
1
2
3
1
2
3