Wheatheart X Series 13 Augers User Manual
Page 66
3. A
SSEMBLY
W
HEATHEART
- X13 S
ERIES
A
UGERS
3.16. I
NSTALL
L
OW
P
ROFILE
I
NTAKE
H
OPPER
X1374, X1384, X1394
66
30787 R1
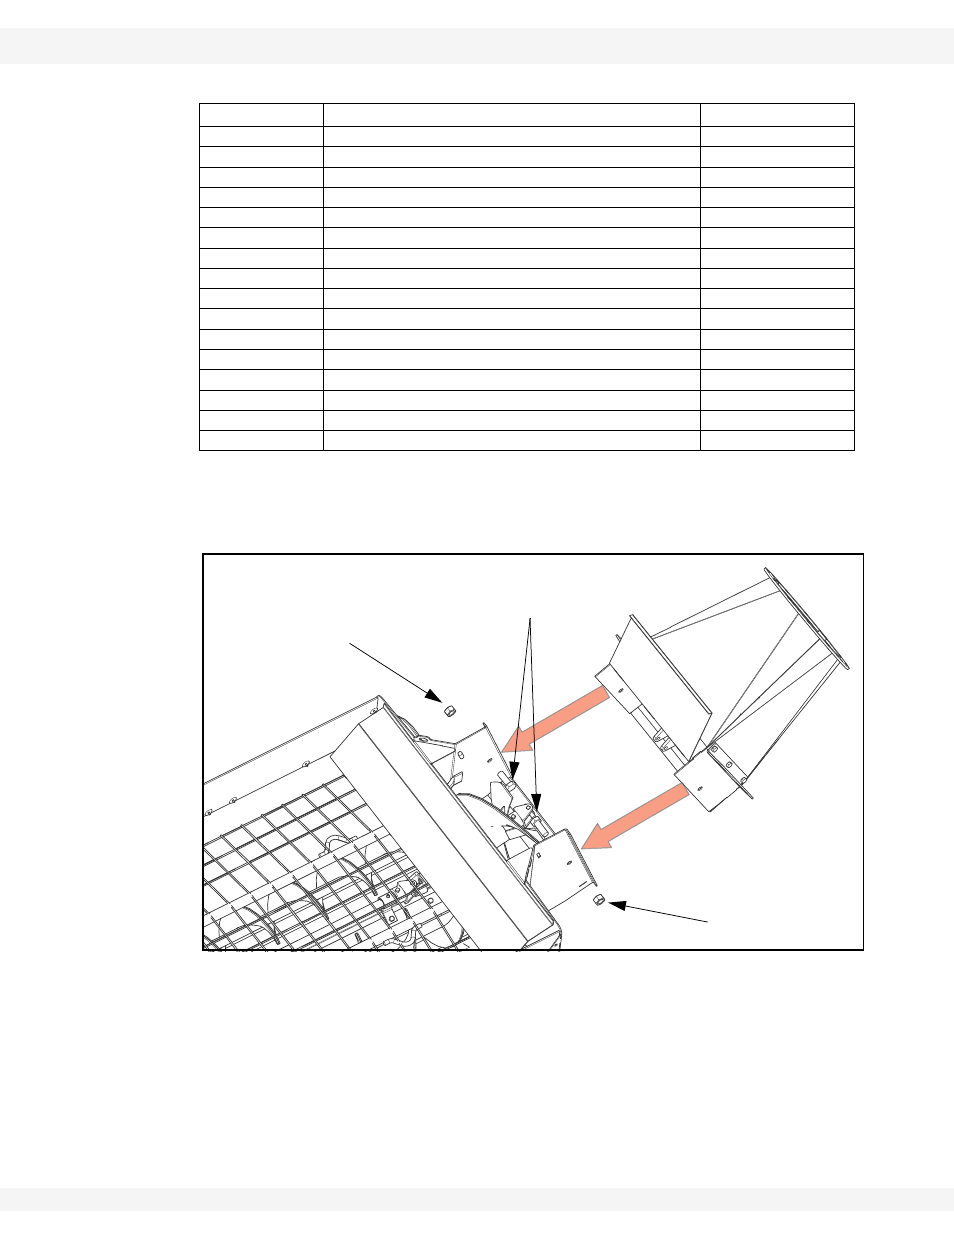
1. Attach the transition to the intake hopper with two 5/8” x 1-1/2” bolts and 5/8”
locknuts (19600). DO NOT over-tighten; tighten to a slightly loose fit only as
these bolts act as pivot points (Figure 3.33).
Figure 3.33 Installing the Transition
2. Clean dirt and paint from inside the u-joint and flighting shaft end, grease the
shaft end, then insert a Woodruff key (Figure 3.34).
3. Raise and support the hopper tube spout head on a stand about 50” high.
4. Open the service door on the transition, then bring the tube and transition
together guiding the flight shaft into the u-joint (Figure 3.34).
5. Secure the tube to the pivot-connector on the hopper with twelve
7/16” x 1-1/4” bolts and 7/16” locknuts.
6. Tighten set screws on u-joints, then close and secure the service door.
Table 3.14. Parts Required, Install Low Profile Intake Hopper
Part Number
Description
Amount
29978
Low profile hopper
1
20013
Spout head and tube
1
29977
Transition
1
20051
Cable attach bracket
1
17522
Wheel
4
-----
Wheel pins
4
29980
Inspection hatch bar
1
-----
Hairclip connectors
1
19224
Woodruff key
1
29166
Spout head retainer
4
29152
Spout head spacer
4
19538
5/16” x 3/4” bolt
10
18698
7/16” x 1-1/4” bolt
15
17593
7/16” locknut
15
19590
5/8” x 1-1/2” bolts
2
19600
5/8” locknuts
2
5/8” X 1-1/2” BOLTS
5/8” LOCKNUT
5/8” LOCKNUT
TRANSITION