Apply logo and model decals – Wheatheart X Series 13 Augers User Manual
Page 34
3. A
SSEMBLY
W
HEATHEART
- X13 S
ERIES
A
UGERS
3.9. A
PPLY
L
OGO
AND
M
ODEL
D
ECALS
X1374, X1384, X1394
34
30787 R1
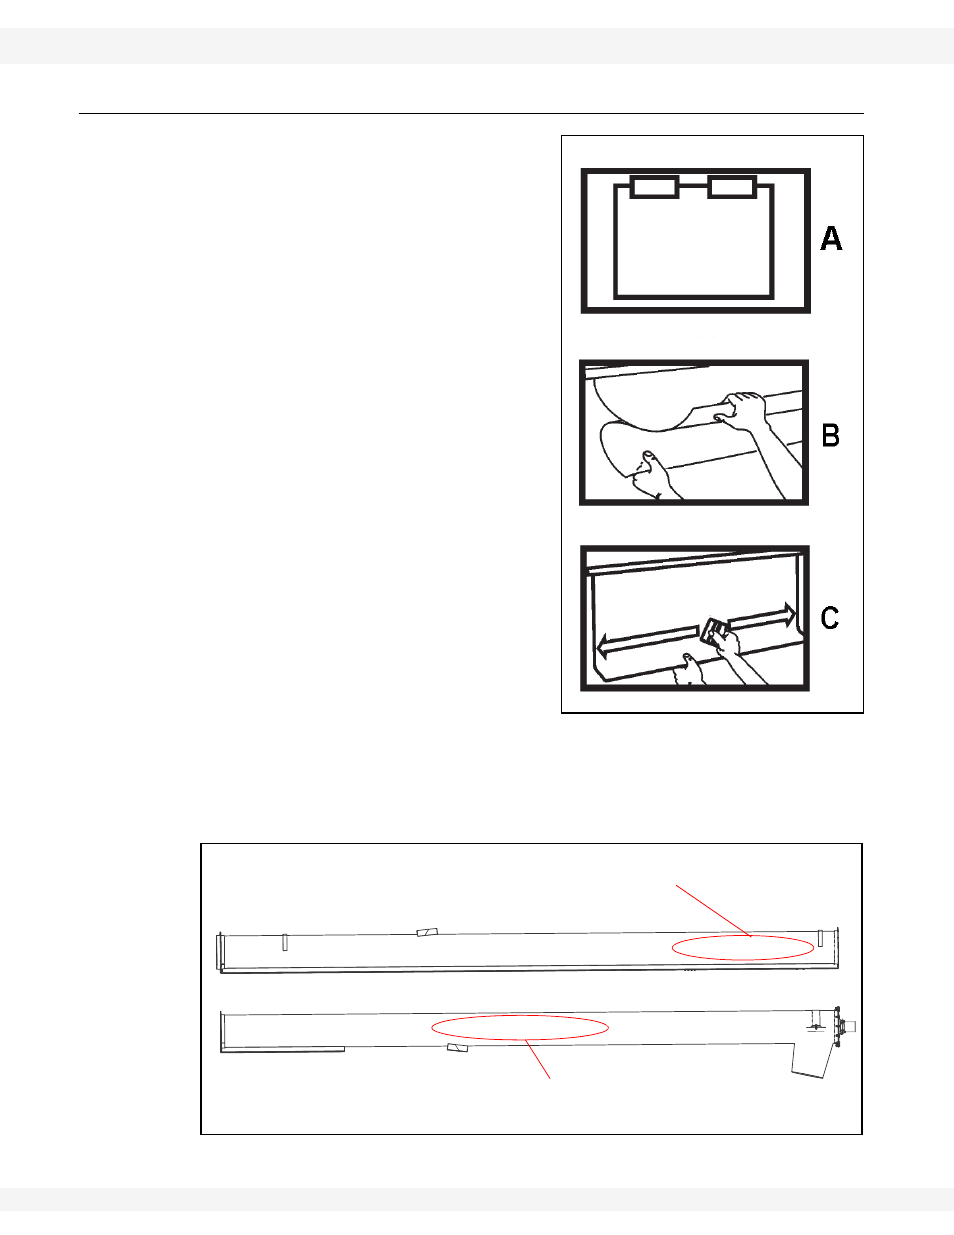
3.9. APPLY LOGO AND MODEL DECALS
1. Prepare surface by cleaning
thoroughly with soap and water.
Surface must be clean and free of dirt,
grime, rust and oil. To clean oily
surface, wipe with clean cloth and
solvent cleaner or isopropyl alcohol.
2. Position
the
decal on the tube and
apply masking tape along the top,
creating a gate hinge. Figure A
demonstrates.
3. Remove backing paper from decal 6"
from the top and use the squeegee to
adhere decal to the tube, as seen in
Figure B. Start at the top center of the
decal and work your way outward both
left and right using overlapping
strokes.
4. As you work your way down the decal,
peel back the backing paper 6" at a
time. Repeat Step 3 until the entire
decal has been applied to the tube.
See Figure C as an example.
5. Once
the
entire decal has been
properly adhered to the tube, carefully
remove tape.
6. Inspect the decal for air pockets; if
found, remove them by punching a tiny
hole with a pin and then squeegee the surface flat.
7. Squeegee the corners and edges of the decal to ensure proper adhesion and
to prevent premature peeling.
Figure 3.11 Logo and Model Decal Locations
LOWER MIDDLE TUBE
UPPER TUBE
WHEATHEART LOGO, CENTRED ON SIDE OF UPPER TUBE
AUGER MODEL
(DISCHARGE SIDE)