Installing the at10.1 – Exide Technologies Section 94.20 User Manual
Page 9
INSTALLING THE AT10.1
PROCEDURE
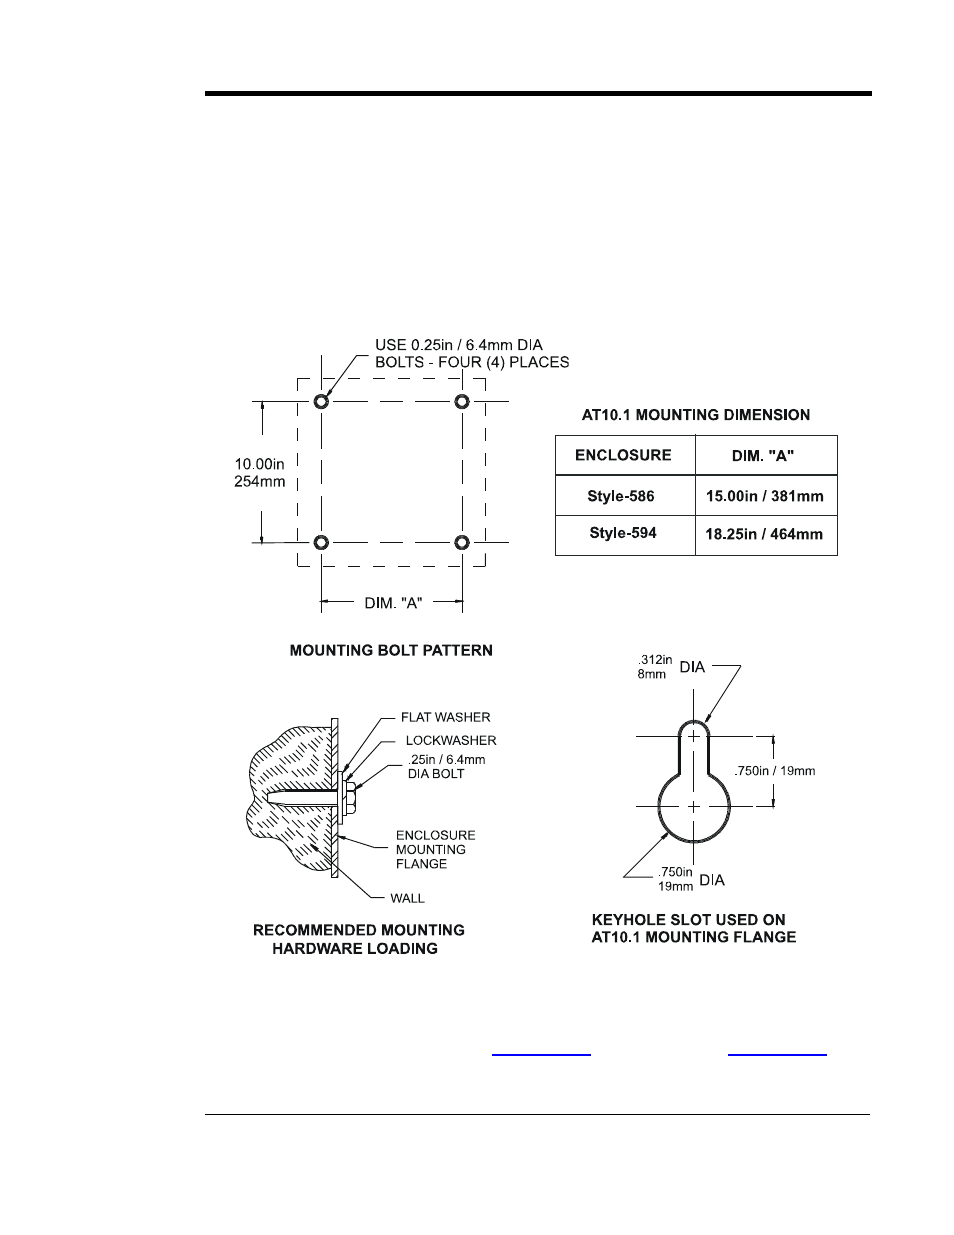
To wall-mount the AT10.1, install four (4) .25in / 6.4mm bolts on the wall
rated to support the charger weight plus a safety factor of at least two (2)
times. Place the AT10.1 on the bolts, add appropriate mounting hardware
and tighten. Refer to the graphics below for mounting dimensions and
specifications.
WALL-MOUNTING THE AT10.1 - GRAPHICS
NOTE
1. For further AT10.1 standard cabinet information, see the outline
drawings for the Style-
)
enclosures in Appendix C on pages 72 and 73.
5