08 hf tig (gtaw) setup (201 ts only) – Tweco 201 ts Thermal Arc User Manual
Page 27
INSTALLATION
THERMAL ARC 161 STL, 201 TS
Manual 0-5203
3-9 Installation
11. Set the weld current control knob to the desired amperage.
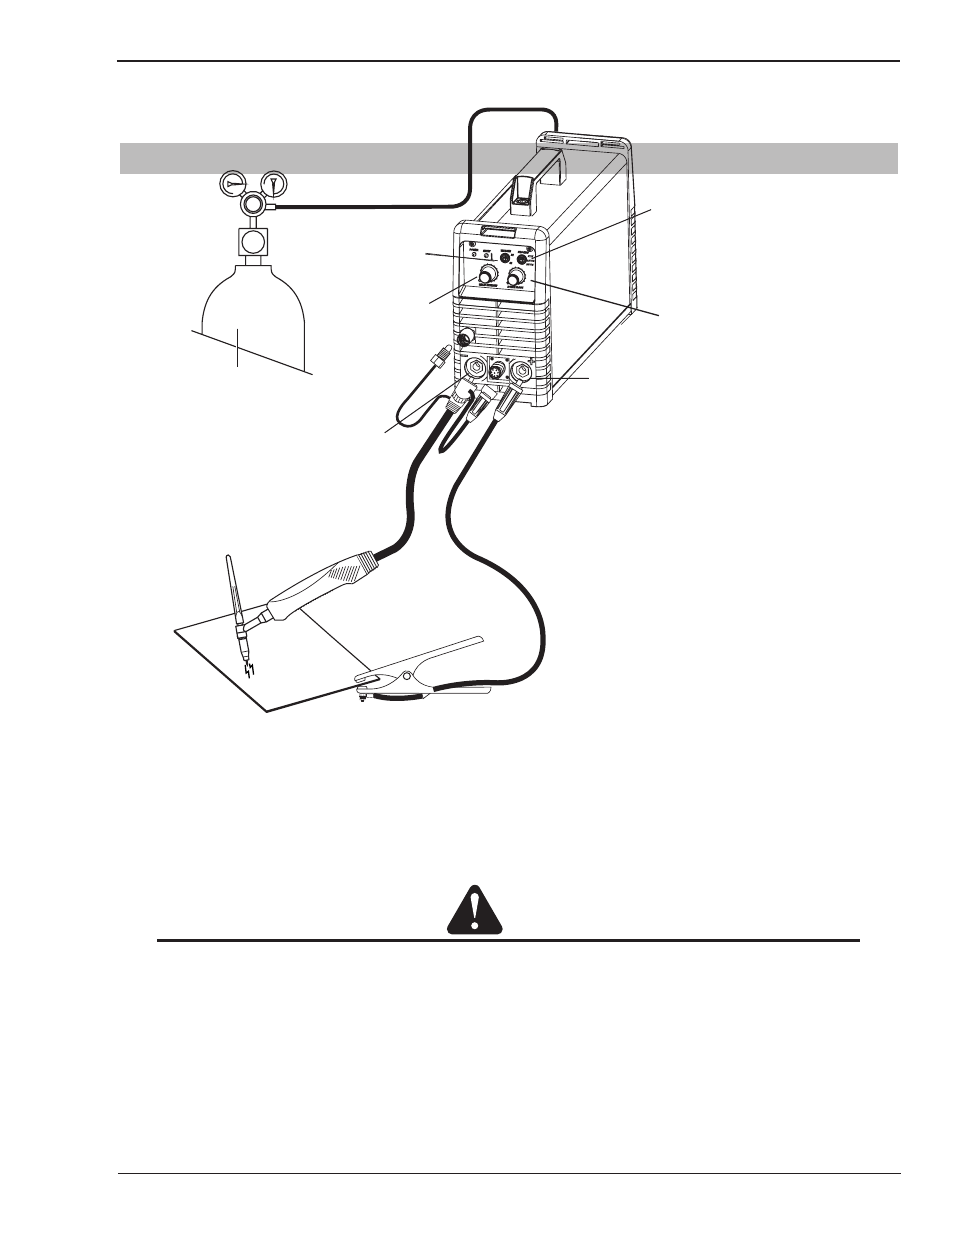
3.08 HF TIG (GTAW) Setup (201 TS Only)
Figure 3-4: Setup for HF TIG (GTAW) Welding of 201 TS
HF TIG (GTAW) Sequence of Operation
CAUTION
Before any welding is to begin, be sure to wear all appropriate and recommended safety equipment.
1. Switch the ON/OFF Switch (located on the rear panel) to OFF.
2. Connect the ground (work) clamp cable to positive output terminal. It is essential that the male plug is inserted
and turned fully clockwise until connector locks in place to achieve reliable electrical connection.
3. Connect the TIG torch as follows:
a) Place the power cable into the negative output terminal. It is essential that the male plug is inserted and turned
fully clockwise until connector locks in place to achieve reliable electrical connection;
Set Process Selection
Switch to LIFT TIG or HF TIG.
Positive Output
Terminal
(Dinse™ 50)
Negative
Output
Terminal
(Dinse™ 50)
Art # A-10100_AB
Set Welding Current
as specified by the
Electrode Manufacturer.
Secure the gas cylinder in an
upright position by chaining it
to a stationary support to prevent
falling or tipping.
Switch to 2T/4T
Set DOWN Slope