Tweco PCM - 102 Machine Torch User Manual
Page 39
Manual 0-2818
5-7
SERVICE
2. Disconnect both torch head wire connectors.
3. Slide the insulation sleeve on the Pilot Lead back
towards the Lead.
4. Remove the screw and star washer securing the
Pilot Lead to the head assembly.
5. Slide the insulation sleeving on the Negative /
Plasma Lead back towards the Lead.
NOTE
Some units may have shrink on tubing instead of
insulation sleeving. If this is the case, remove the
shrink on tubing from the Negative / Plasma Lead,
being careful not to damage the lead under the
shrink on tubing.
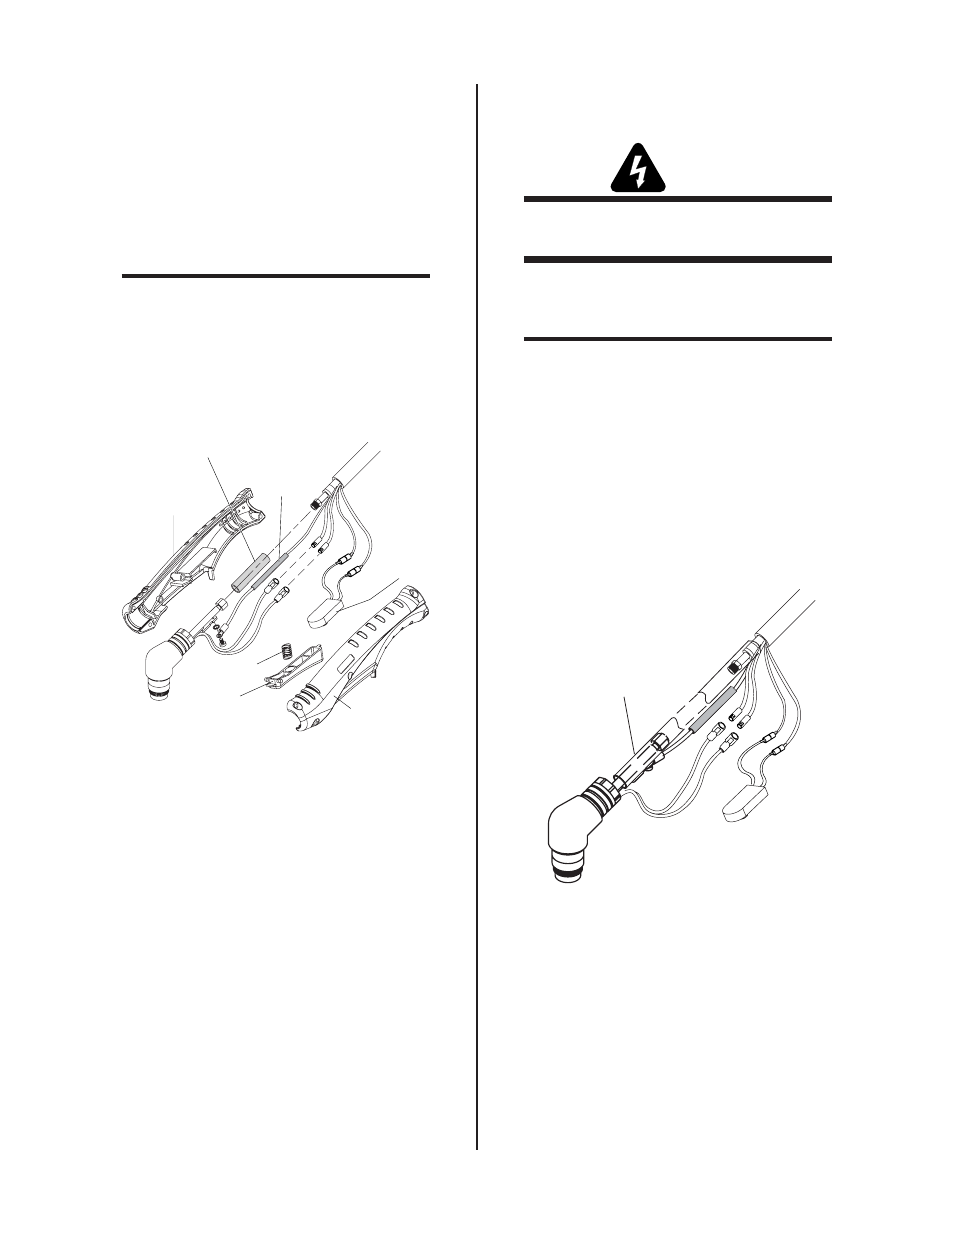
Handle Shell
Handle Shell
Spring
Trigger
Torch
Switch
Negative / Plasma Lead
Insulation Sleeving
Pilot Lead
Insulation
Sleeving
A-03544
Figure 5-6 Hand Torch Assembly
6. Disconnect the Negative / Plasma Lead from the
Torch Head.
7. Remove the defective Torch Head.
B. Reassembling the Hand Torch Head
Assembly
WARNING
Disconnect primary power to the system before dis-
assembling the torch, leads, or power supply.
To install the Torch Head Assembly use the following pro-
cedure:
IMPORTANT
The insulation sleevings are critical for safety. Be
sure both are properly installed and not damaged
during reassembly.
1. Slide the replacement insulation sleeving over the
Negative / Plasma Lead.
2. Connect the Negative / Plasma Lead to the re-
placement Torch Head Assembly.
3. Carefully position the insulation sleeving over the
connectors as shown below.
A-03545
Negative/Plasma
Lead Insulation Sleeving
Figure 5-7 Insulation Sleeving Position for the
Negative / Plasma Lead
4. Insert the screw through the Pilot Lead lug and
then install the star washer before securing it to
the Torch Head Assembly.
5. Carefully position the Insulation Sleeve over the
Pilot connection.