Connecting and checking the hardware, Position and connect the gpm-216 – Glyph GPM-216 User Manual
Page 11
Glyph GPM-216
11
Connecting and Checking the Hardware
The GPM-216 can be rack-mounted or used on a tabletop.
Position and Connect the GPM-216
1.
Decide if the unit will be used in a rack or on a tabletop.
2.
If rack mounted, attach rack ears to the unit using supplied rack ear mounting screws. Mount the unit
into the rack using the four supplied rack-mounting screws.
3.
If used on a tabletop, position the unit on a flat, level surface. Attach the four supplied rubber feat to
the bottom of the unit.
4.
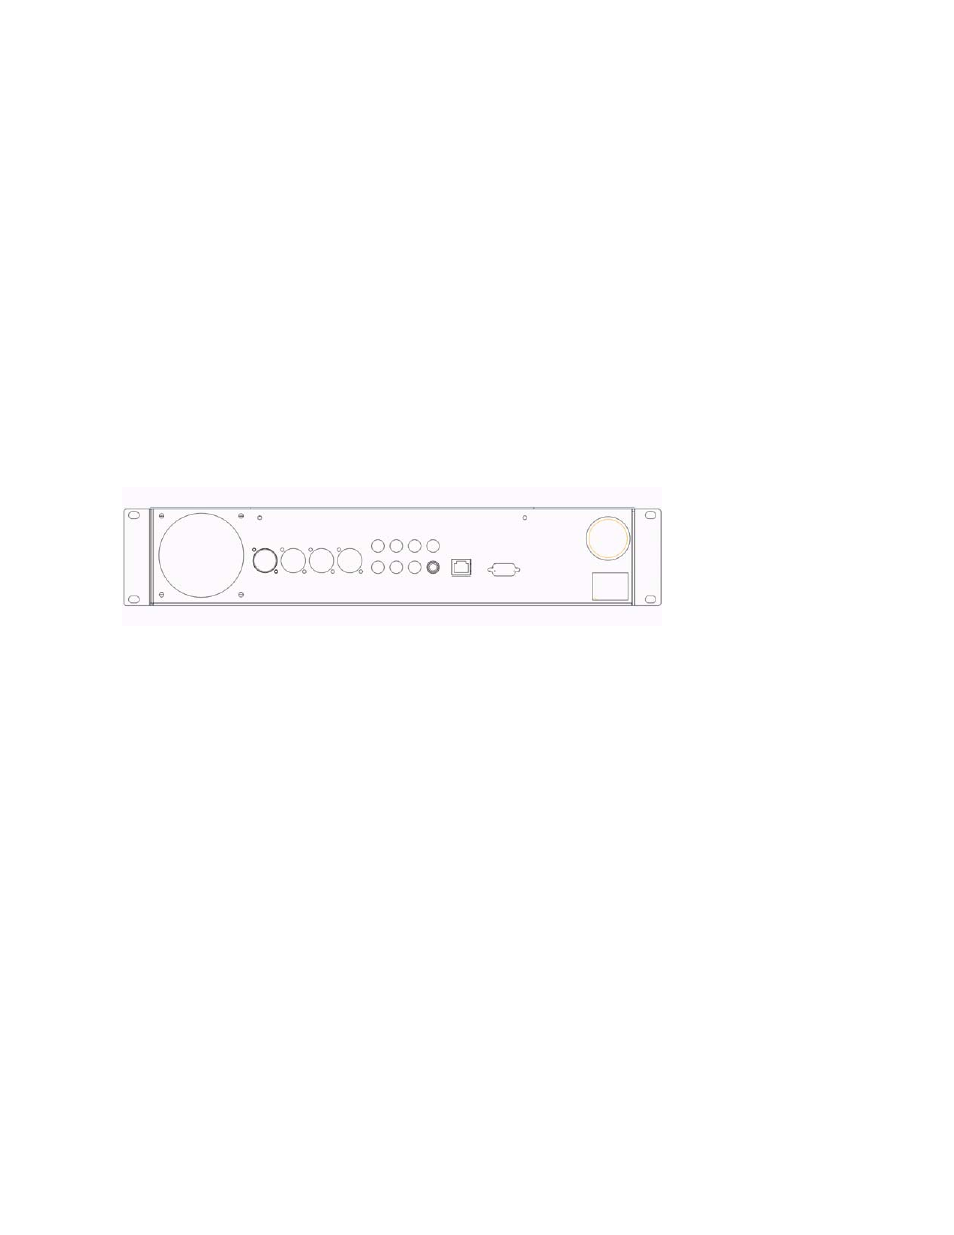
Insert the power cable to the power connector on the GPM-216 while the wall power is off.
Figure 1: GPM-216 rear view
Power
connector
Firewire ports
SCSI
tors
5.
Connect one end of the CAT5 cable to the GPM-216 and the other end to the Ethernet switch.
6.
Connect your instruments or microphones to the analog inputs, either on the front or the back of the
GPM-216.
Note: The front of the GPM-216 has two Neutrik “universal” inputs. These inputs can accommodate XLR
or ¼” TRS cables. The XLR pins of the input are wired directly to the XLR pins of the male and female
XLR jacks on the back of the unit. This essentially makes a cable split, so you can connect your XLR
input cables to the front or back of the unit, and use either of the two remaining XLR jacks as loop
outputs.
Note: The TRS pins of the input are wired directly to the TRS jacks on the back of the unit. When a ¼”
cable is inserted into the front panel universal input, it flips a switch that selects the output of the line
level preamp to go to the A/D converter, and therefore sent to the monitoring network. When there is
no ¼” cable in the TRS input, the output of the mic level preamp is sent to the A/D converter. The
front panel gain controls change the gain of both preamp outputs sent to the A/D converter.
7.
Connect the “loop-through” outputs to the mixing console or other downstream gear.
Note: If using XLR inputs on the front or back of the unit, the remaining XLR jacks can be used as loop-
through outputs. If using TRS inputs on the front of the unit, the TRS Thru connectors on the back of
the unit become the loop-through outputs. This allows the GPM-216 to pick off the signals and send
them to the monitoring network before they are sent to the mixing console.
8.
Connect a monitoring device of your choice, either headphones, earbuds or powered wedges.
9.
Power on the GPM-216. The power switch is a momentary switch like a computer power switch. Flip
the switch up and allow it to return to its original spot. The LEDs on the unit will flash as the unit boots
up.