E-flite RV-9 450 ARF User Manual
Page 17
17
E-flite RV-9 450 Assembly Manual
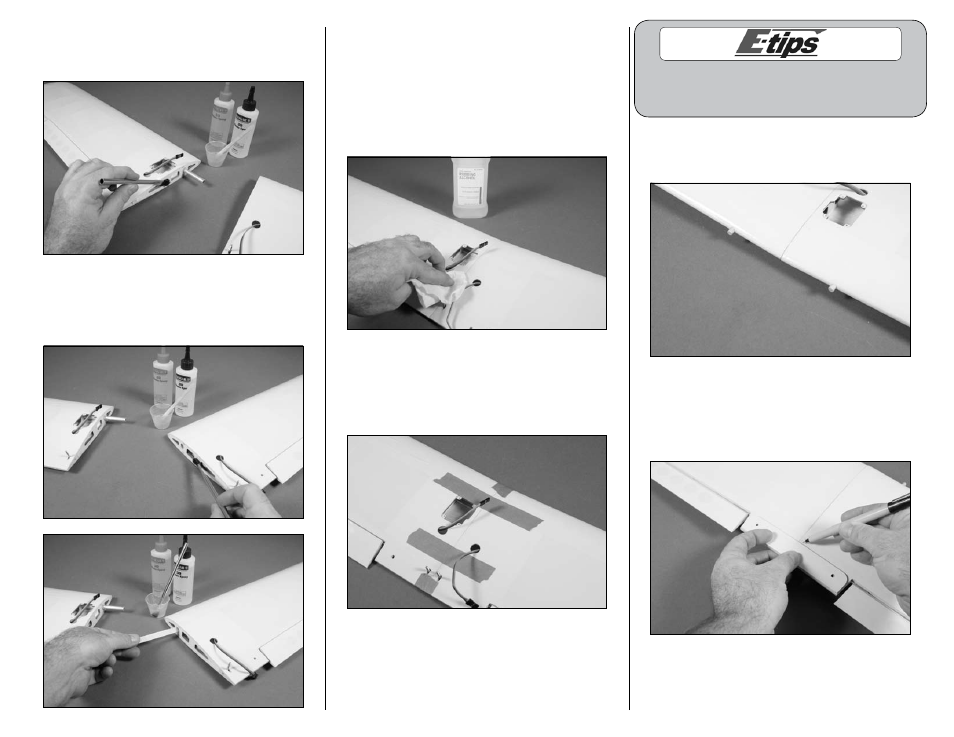
4. Use an epoxy brush to apply a thin layer of
epoxy to the exposed wood on the root rib of
the wing.
5. Use a mixing stick to apply epoxy in the tube of
the remaining wing panel. Use an epoxy brush to
apply a thin layer of epoxy to the exposed wood of
the root rib of the remaining wing panel.
6. Slide the wing panels tightly together. Epoxy
should ooze from the joint between the panels. If
not, you have not used enough epoxy and need to
apply more as described in Steps 3 through 5.
7. Use a paper towel and rubbing alcohol to
remove and excess epoxy from the outside of the
joint between the two wing panels.
8. Use low-tack tape to hold the two wing panels
together until the epoxy fully cures. Make sure
to wrap a piece of tape around the joint at the
leading and trailing edge to keep the panels in
alignment with each other while the epoxy cures.
Check the glue joint periodically while the epoxy is
curing. It is possible that some excess will run out of the
joint and will need to be wiped off with some alcohol.
9. Use medium CA to glue the wing dowels into the
pre-drilled holes in the leading edge of the wing.
Leave 1/4-inch (6mm) of the dowel exposed.
10. Position the wing bolt plate on the bottom of
the wing. Make sure to align the holes in the plate
with the holes in the wing. Use a felt-tipped pen to
transfer the outline of the plate onto the bottom of
the wing.