E-flite RV-9 450 ARF User Manual
Page 10
10
E-flite RV-9 450 Assembly Manual
5. Use the radio system to check the operation of
the rudder and elevator servos. It may be necessary
to bind the transmitter and receiver if you are using
a new receiver. Always select a blank model and
reset it to remove any programming or trim settings
when using a computer radio before starting the
linkage installation.
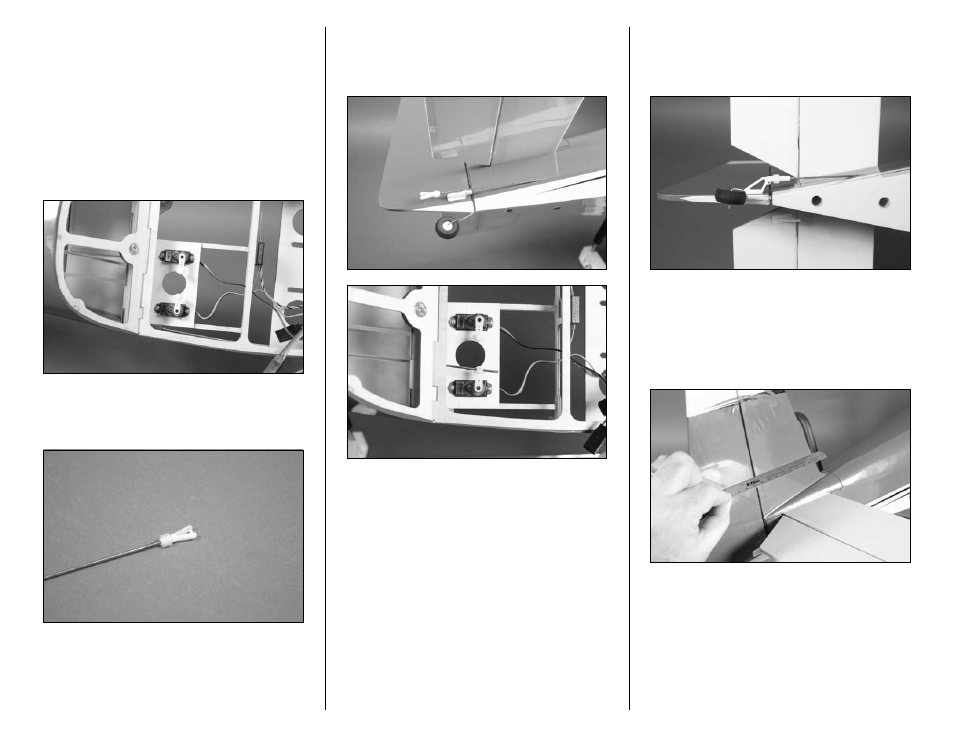
6. Use a #00 Phillips screwdriver to install the servo
horns to the servos. Make sure to position the horns
so they face each other as shown in the photo.
7. Slide a clevis retainer onto a clevis. Thread the
clevis 16-turns onto the 17
3
/
4
-inch (450mm) rudder
pushrod.
8. Slide the pushrod wire into the tube in the
fuselage that exits the same side as the rudder
control horn. Guide the wire through the pushrod
connector for the rudder servo inside the fuselage.
9. Connect the clevis to the outside hole of the
rudder control horn. Slide the clevis retainer over
the forks on the clevis to keep it from opening
accidentally.
10. Use a ruler to align the rudder with the fin.
With the radio system on and the rudder servo
centered, use a #1 Phillips screwdriver and a 2mm
x 5mm machine screw to secure the pushrod to the
pushrod connector. Use caution not to over-tighten
the screw and damage the pushrod connector.