Flight test – DJI Z15-GH4 (HD User Manual
Page 21
©2014 DJI. All Rights Reserved.
21
Zenmuse Z15-GH4
(
HD
)
User Manual
Flight Test
1. Ensure the batteries are fully charged for your TX, GCU, and all of the other devices on your aircraft.
2. Make sure all connections and wiring are in good condition.
3. Switch on the TX.
4. Adjust the camera to a level position on the roll axis of the gimbal.
5. Power on the gimbal and wait for the self initialization test to complete. The roll, pan and tilt axis will rotate
quickly at the same time.
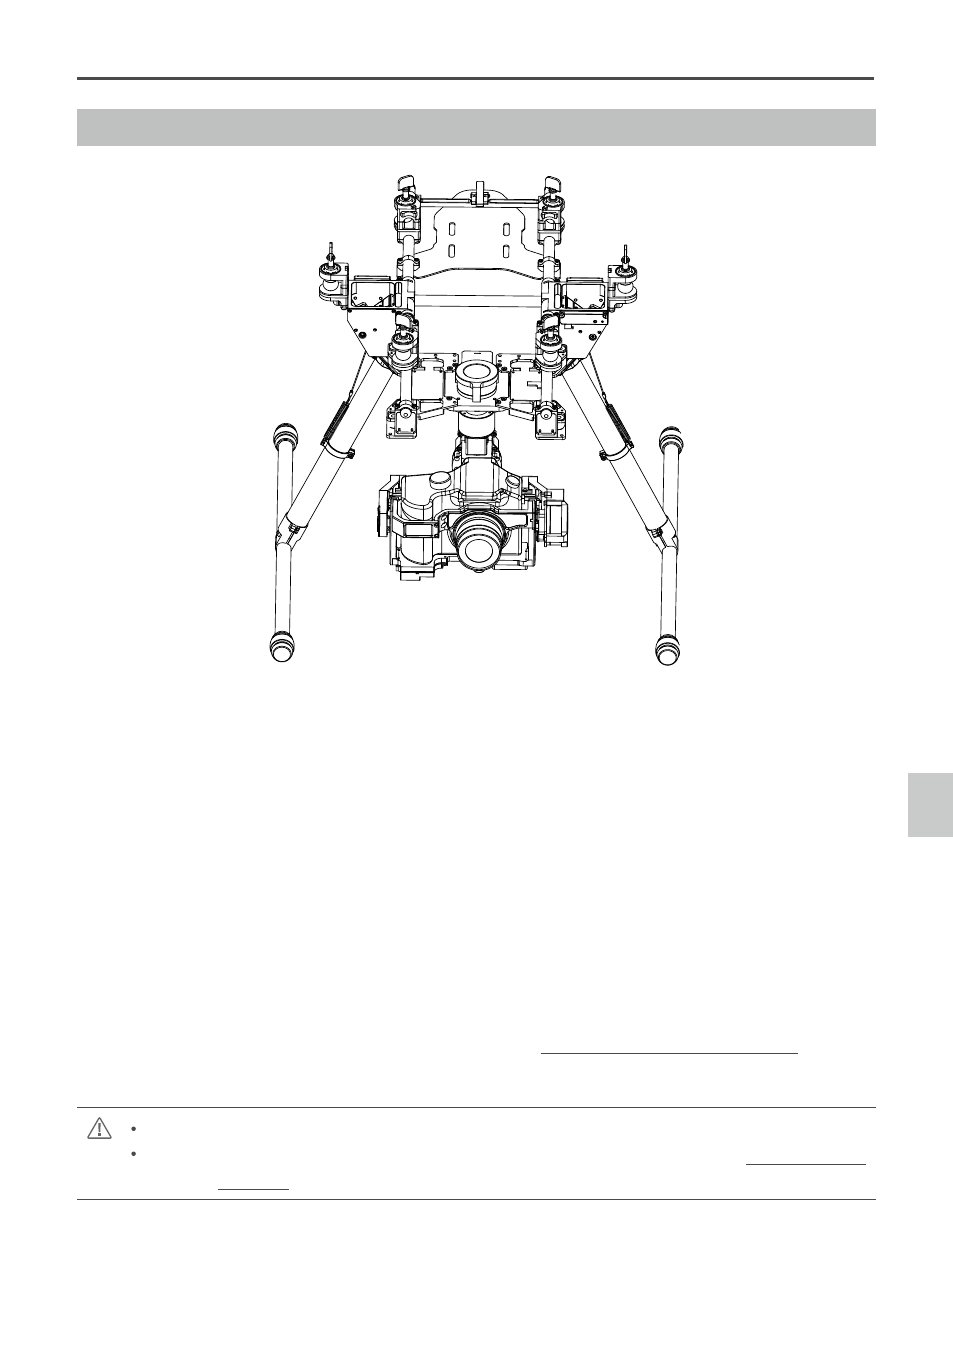
6. After self-initialization, the camera lens will point towards the aircraft’s nose and each axis of the gimbal
should be in the position illustrated above.
7. The gimbal will then go into a second stage of initialization. At this time, each axis will rotate very slowly.
8. Once each axis stops moving, the gimbal is fully initialized and ready to use.
9. Toggle the assigned Working Modes switch on your TX and make sure it is working properly.
10. Switch the Working Modes to Non orientation-locked, FPV Mode (Reset), and Orientation-locked Mode
respectively. Then push the controller sticks lightly in the Roll, Tilt and Pan directions to check that the
gimbal moves in the corresponding directions. If not, see Working Mode/AUX2 Switch Setup to correct
your settings.
Power off the camera during the initialization.
If the gimbal does not match the diagram after initialization, please refer to the Troubleshooting
section in Appendix.
Pre-Flight Check