Camera wiring and shutter control, Camera wiring, Shutter control – DJI Z15-GH4 (HD User Manual
Page 11
©2014 DJI. All Rights Reserved.
11
Camera Wiring and Shutter Control
Camera Wiring
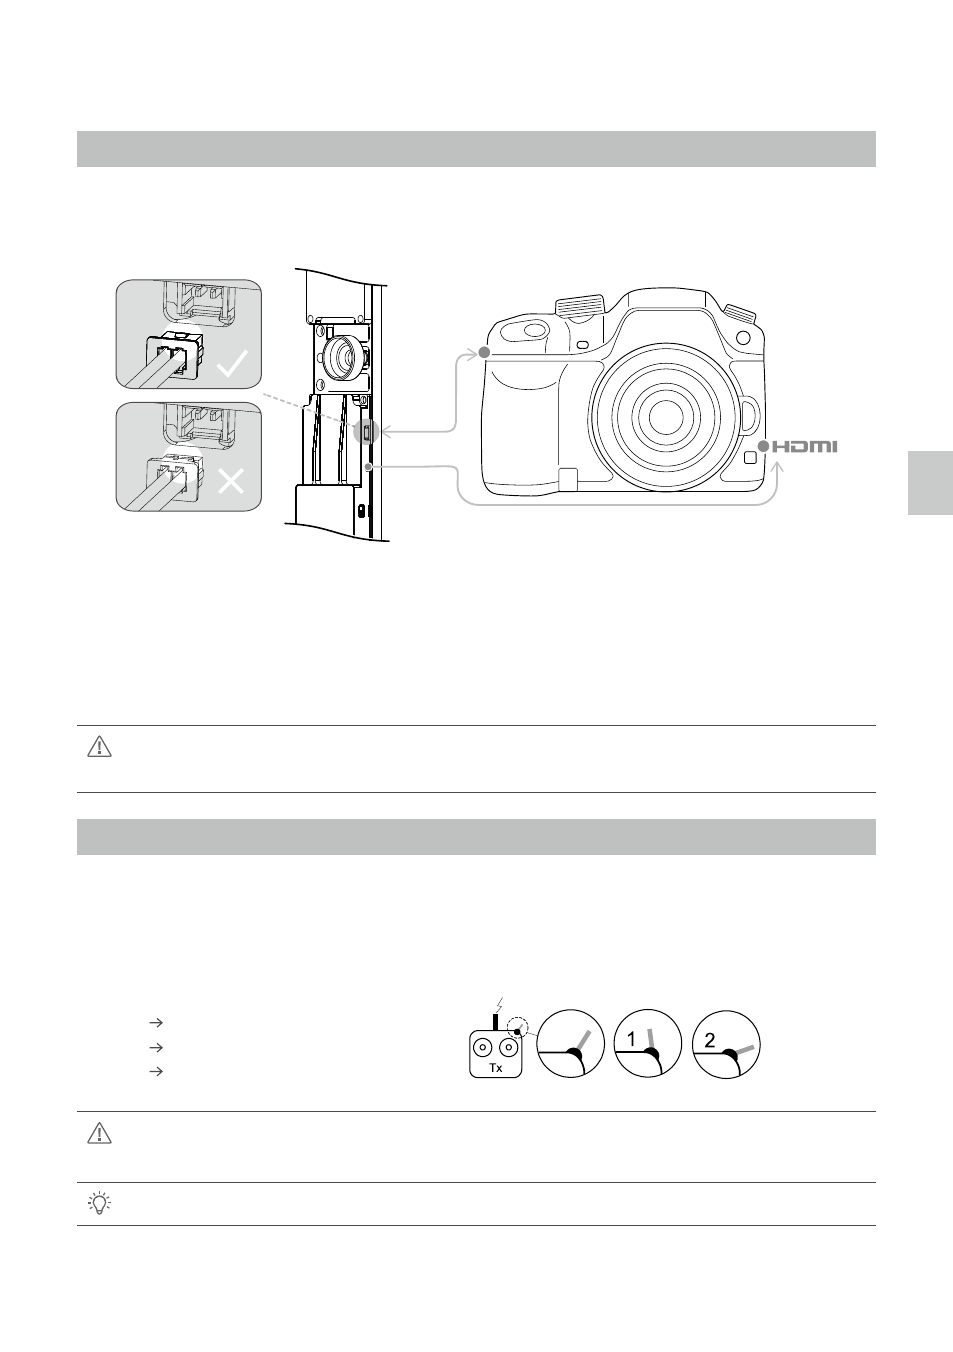
Connect the camera correctly. The gimbal works with a HDMI-HD/AV module to convert the video signal and
transform a TX signal into a shutter control signal. Ensure the camera is setup first, and then complete the
following steps to connect the camera and the gimbal.
1. Connect the gimbal HDMI-HD/AV module to the camera HDMI port with a HDMI-HD/AV connection cable.
2. Connect the camera shutter control cable to the camera.
3. Toggle the HD/AV Switch to the AV position if using a normal wireless video TX module. Toggle the HD/AV
Switch to the HD position if using a DJI HD wireless video TX module. (See Page 7 for the location of the
HD/AV Switch)
When disconnecting the cable between the HDMI-HD/AV module and the camera, first dismount the
camera, then unplug the HDMI-HD/AV interface.
Shutter Control
The Z15-GH4 gimbal can transform a TX command into a shutter control signal. Select a 2-position switch/
channel to use for remote shutter control.
First, make sure the shutter control cable is correctly connected.
Then, for whichever 2-position switch you select, connect the correct receiver channel to the SHUT port.
Toggling the 2-position works as follows:
Position-1 Position-2: Start recording
Position-2 Position-1: Stop recording
Position-1 Position-2: Resume recording
Set the camera to “Creative video” so the shutter can be used to record video. One toggle switch is
used for starting and stopping recording.
If the shutter control does not work correctly, please check each step.
$BNFSB4IVUUFS
$POUSPM$BCMF
)%.*)%"7$BCMF
Camera Wiring and Shutter Control
2-Positon
Switch
3-Positon
Switch
3-Positon
Switch