Installation instructions – Brandmotion 9002-8532 User Manual
Page 2
INSTALLATION INSTRUCTIONS
8532 Instructions 5-19-14.docx
Page 2 of 5
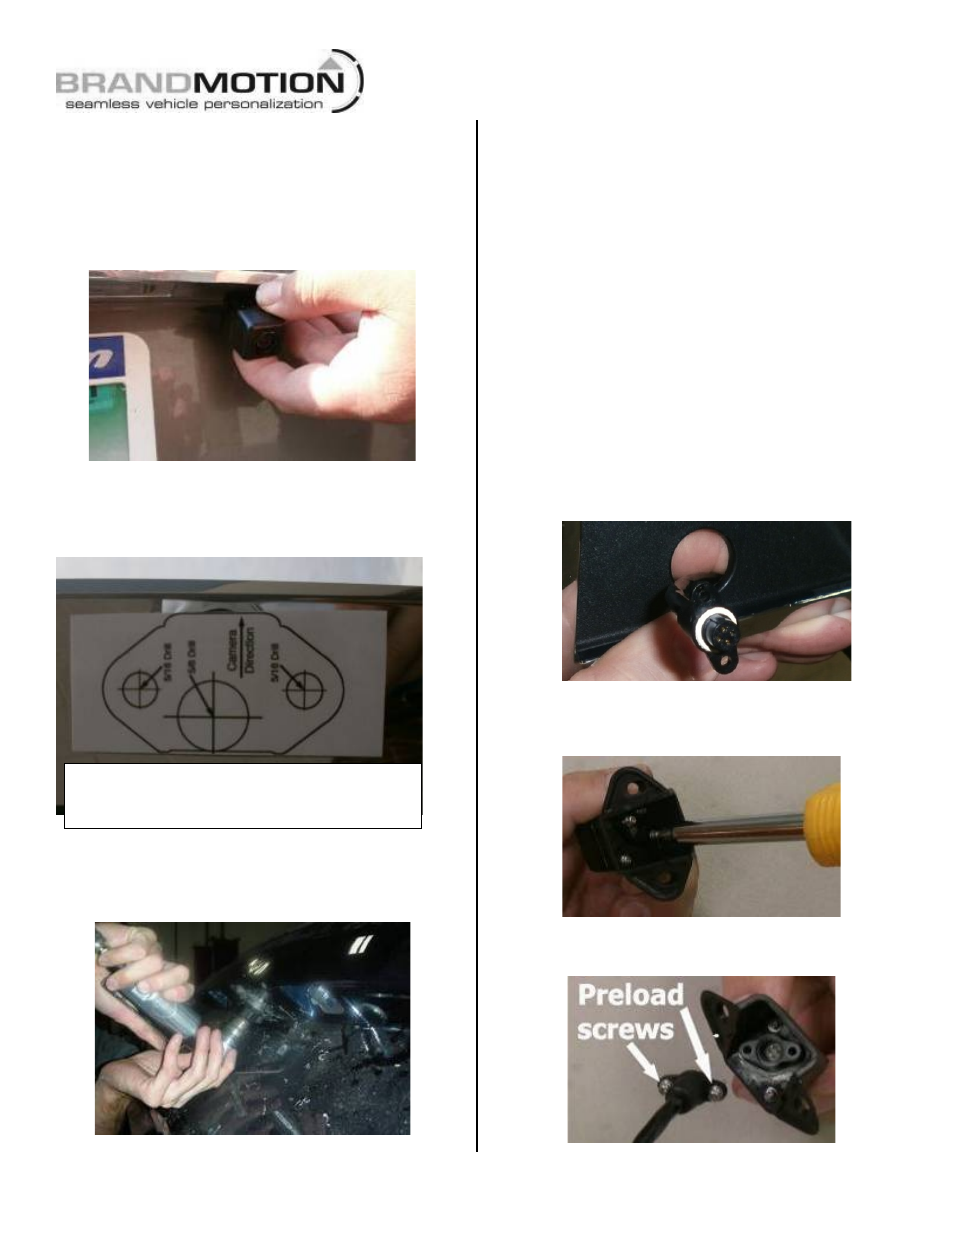
Step 1: Install Camera Mount. Place Camera
Mount in desired position. Check fit and verify that
there is no interference (latch, wiring, etc.) behind
the Camera Mount. (IMPORTANT: Some states
prohibit items blocking the vehicle license plate;
check local authorities to confirm legal status for
your specific application).
Step 2: Peel adhesive backing from supplied
Camera Mount Template and apply to the desired
location making sure that the camera direction is
correct.
Step 3: Use a Center Punch to mark the centers of
the required three holes and drill three pilot holes
using a 1/8” drill bit. NOTE: If your vehicle has a
liftgate panel/trunk trim cover, it must be removed.
Step 4: Drill two 5/16” holes for the camera
mounting bolts and one 5/8” hole for the camera
harness.
Step 5 (if necessary): Using a 5/8” drill bit, drill an
opening in the trunk or liftgate for the head of the
Camera Harness to pass through.
Step 6: Use a Cotton Swab to apply supplied Z-tec
Corrosion Inhibitor to any holes you drilled and
allow to dry.
Step 7: Insert Camera Harness head through the
backside of the hole so that the gray connector end
of the Camera Harness is inside the trunk or
liftgate. (RECOMMENDED: Protect Camera
Harness with a rubber grommet or by applying a
small amount of silicone caulk to any area that
comes into contact with metal edges.)
Step 8: Route head of Camera Harness through the
pass-through you made with the Template.
Step 9: Use a Phillips Screwdriver to remove the
two screws provided in the Camera to secure the
head of the Camera Harness onto the Camera.
Step 10: Preload the screws into the Camera
Harness connector.
NOTE: If self-adhesive Template is missing or
damaged, cut out the image above and affix with
Masking Tape.