Installation instructions – Brandmotion 9002-8836 User Manual
Page 2
INSTALLATION INSTRUCTIONS
8836 Instructions 10-7-14.docx
Page 2 of 7
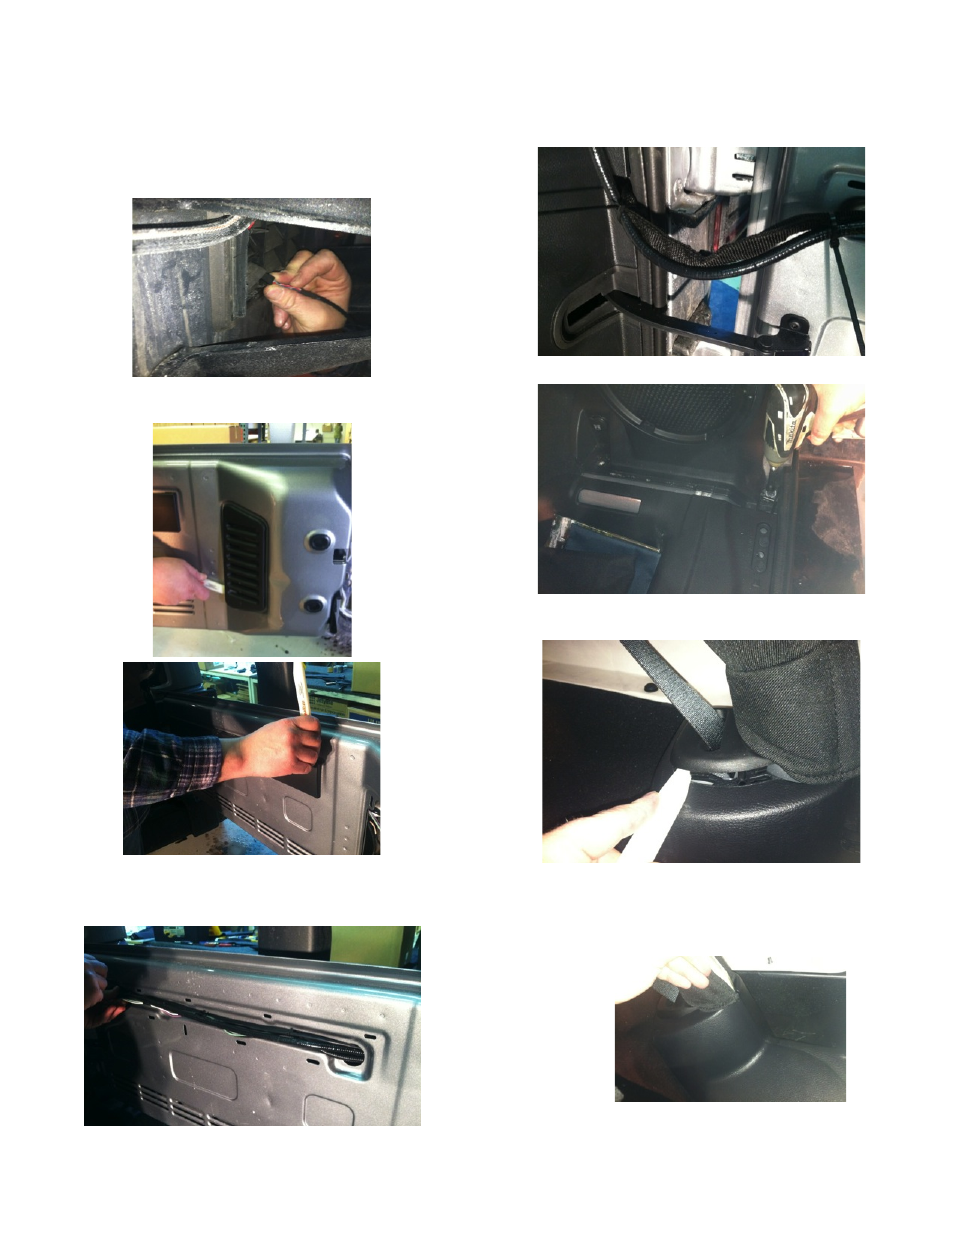
Install Chassis Harness
Step 5: Plug Camera connector into gray connector end
of Chassis Harness and insert black 6-pin connector end
of supplied Chassis Harness through the rear gate vent
behind tire carrier.
Step 6: Using a plastic trim removal tool, remove
interior panels on inside of rear gate.
Step 7: Pull harness through the rear gate openings.
Step 8: Use supplied Wire Ties to secure Chassis
Harness to existing harness.
Step 9: Use supplied Wire Ties to secure Chassis
Harness to fabric factory wire cover. CAUTION: Leave
enough slack to allow gate to open fully.
Step 10: Use a T20 Torx bit to remove subwoofer box.
Step 11: Using a plastic trim removal tool, pry off rear
seat belt closeout.
Step 12: Using a plastic trim removal tool, remove rear
access panel to expose 10mm bolt, and remove bolt.
- 1008-9527-V1 (18 pages)
- 1008-9527-V2 (38 pages)
- 9002-1010 (8 pages)
- 9002-9503-V1 (2 pages)
- 9002-9503-V2 (12 pages)
- 1008-9520-V1 (2 pages)
- 1008-9520-V2 (34 pages)
- 1013-9530-V1 (2 pages)
- 1013-9530-V2 (16 pages)
- 1009-9518 (7 pages)
- 1009-9517 (18 pages)
- 9002-1015 (6 pages)
- 9002-8522 (6 pages)
- 9002-8525 (5 pages)
- 9002-8523 (7 pages)
- 9002-8524 (5 pages)
- 9002-8521 (5 pages)
- 9002-8520 (4 pages)
- 9002-9651 (2 pages)
- 9002-9650 (2 pages)
- 9002-9511 (4 pages)
- 9002-9516 (3 pages)
- 9002-6014 (1 page)
- 9002-9510-V1 (3 pages)
- 9002-9510-V2 (3 pages)
- 9002-9618 (2 pages)
- 9002-9515 Installation Instructions (2 pages)
- 9002-9515 Wiring Instructions (2 pages)
- 9002-9608 (2 pages)
- 9002-9613 (2 pages)
- 1110-2519 (2 pages)
- 9002-9702 (1 page)
- 9002-9703 (2 pages)
- 1110-2518 (2 pages)
- 9002-9704 (1 page)
- 9002-9701 (1 page)
- FLTW-7604 (2 pages)
- 9002-7607 (2 pages)
- 9002-7609 (2 pages)
- 9002-7608 (2 pages)
- 9002-7605 (3 pages)
- 9002-7606 (2 pages)
- FLTW-7603 (3 pages)
- 9002-8501 (4 pages)