Position hood, Prepare camera mount – Autocue SSP10 Quick Start User Manual
Page 6
Getting started
- Prepare and connect the prompting hardware
SSP-QStartUserManual.docx 2011-06-15
6
© 2003-2011 Autocue Group Ltd.
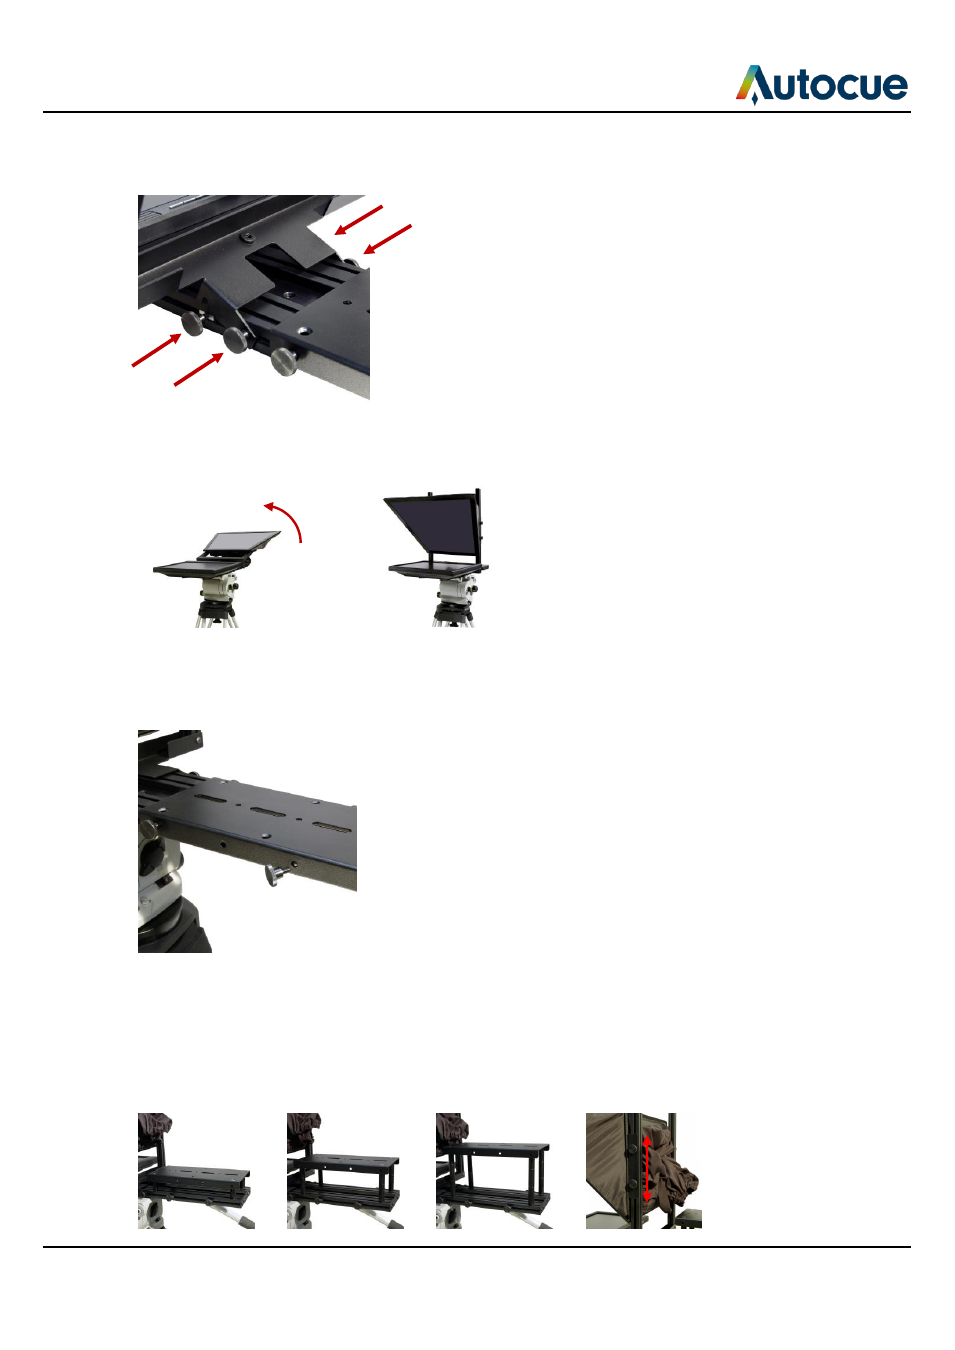
Position hood
6. Loosen the four thumbscrews of the hood assembly.
7. Raise the hood to the vertical position.
8. Secure in place by tightening the four thumbscrews.
Prepare camera mount
9. Remove the camera mounting plate.
Adjust camera mount height
Depending on the size of your camera you may need to use the supplied pillars to raise the camera
mounting plate. The smallest cameras will most likely need the longest pillars. Larger cameras require either
no pillars or the shortest ones.
Combine raising the camera with adjusting the position of the hood so that the camera lens is centred in the
mirrored glass.