Set the node address, Install the adapter – Rockwell Automation 1734-ACNR POINT I/O ControlNet Adapter User Manual User Manual
Page 14
Publication 1734-UM008B-EN-P - August 2005
2-2 Install Your Adapter
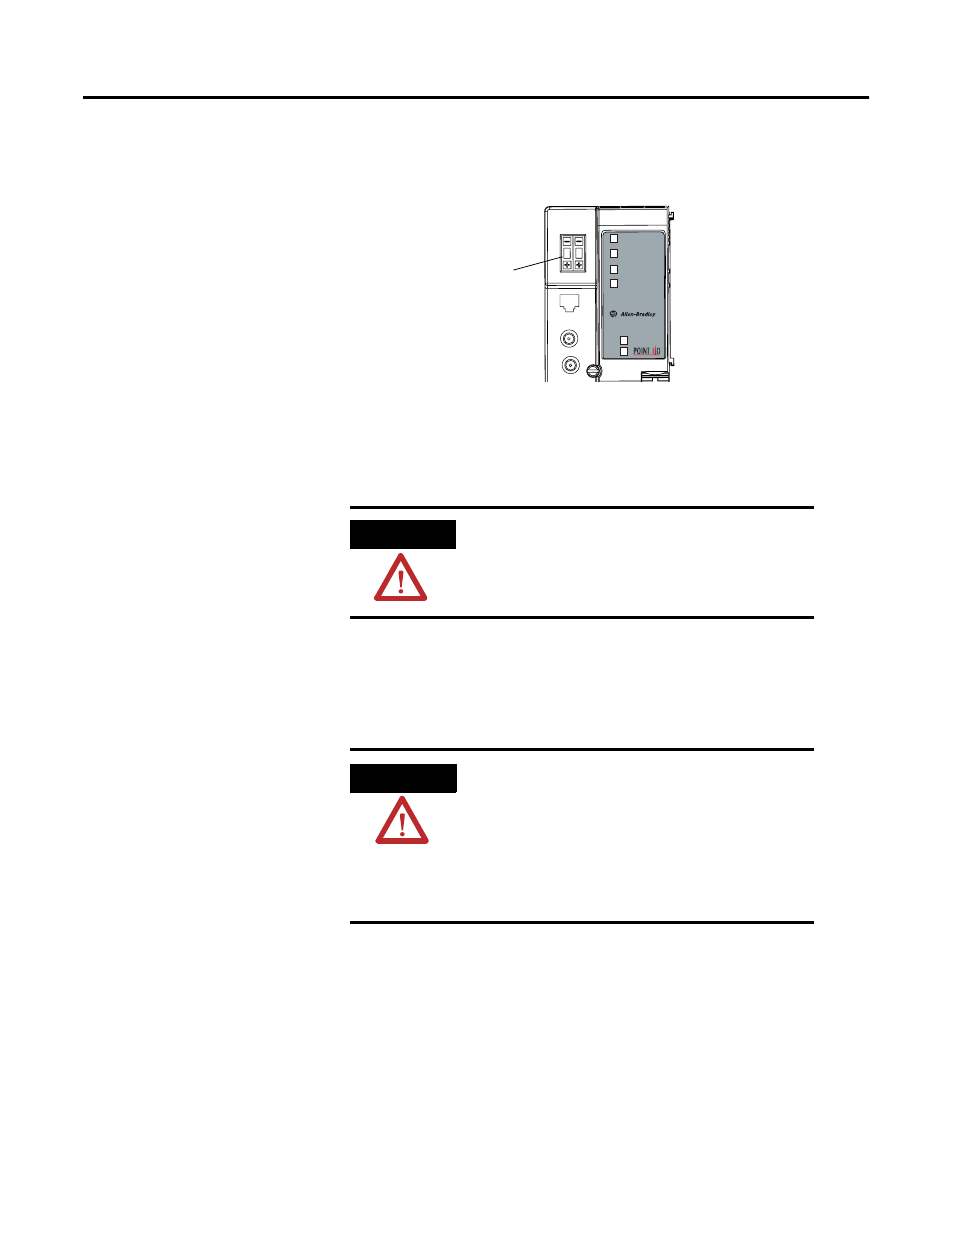
Set the Node Address
Set the node address using the 2-position thumbwheel switch. Valid
settings range from 01 to 99. Press either the + or - buttons to change
the number.
Install the Adapter
To install the adapter on the DIN rail prior to installing other base
units, proceed as follows
:
1. Position the adapter vertically above the DIN rail.
2. Press down firmly to install the adapter on the DIN rail.
The locking mechanism will lock the adapter to the DIN rail.
3. Set the node address on the node address thumbwheel.
4. Remove the safety end cap by sliding it up.
This exposes the backplane and power interconnections.
Module
Status
PointBus
Status
ControlNet A
Status
1734-ACNR
ControlNet B
Status
Field
Power
System
Power
0
A
B
2
43248
Network Node
Address
thumbwheel -
press either the +
or - buttons to
change the
number.
ATTENTION
You must use Series C POINT I/O modules
with the 1734-ACNR adapter. Series A and B
POINT I/O modules will not work with the
1734-ACNR adapter.
WARNING
If you connect or disconnect the ControlNet
cable with power applied to this module or
any device on the network, an electrical arc
can occur. This could cause an explosion in
hazardous location installations.
Be sure that power is removed or the area is
nonhazardous before proceeding.