Orbit Baby Toddler Car Seat G2 User Manual
Page 43
Forwar
d-facing Installation
84
84
Forwar
d-facing Installation
85
85
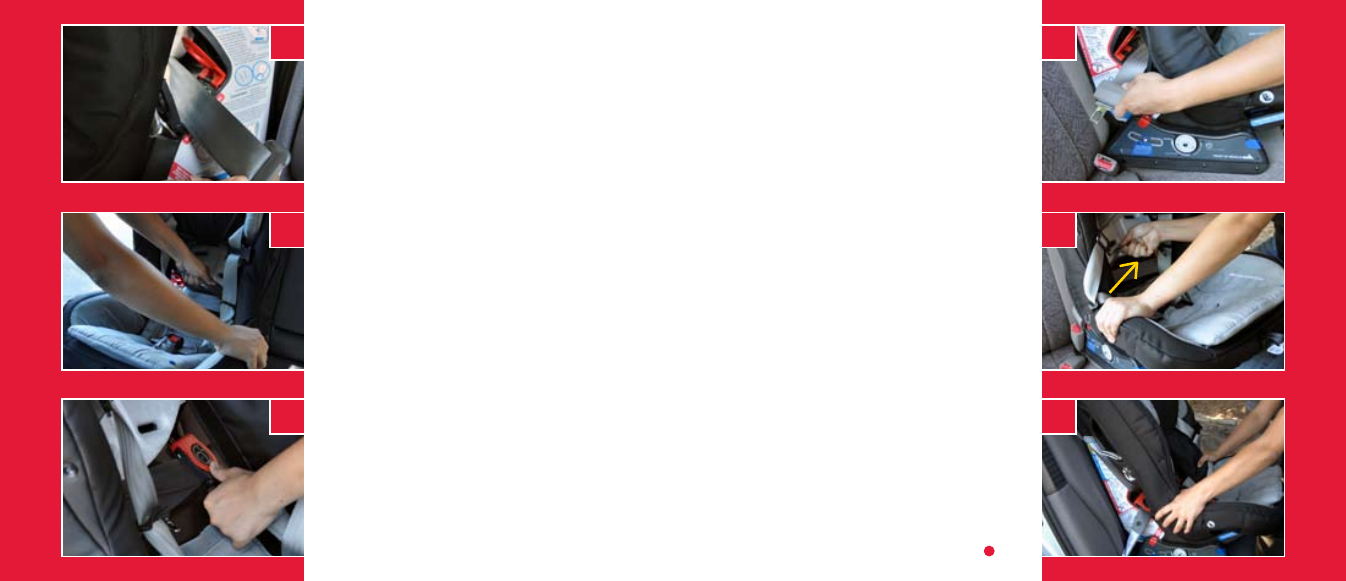
If using a lap vehicle belt:
12. Position the lap belt through the
forward-facing belt path openings in the
shell and fully open both arms of the red
belt lock-off clamp that will be closest
to the center of the vehicle in the final
installation (Photo M).
NOTE: If installing the seat in the
center position, open both arms of
either lock-off clamp. Only one clamp
is needed for a secure installation.
13. Tighten the vehicle belt around the car
seat by pushing down on alternating
sides of the car seat rim while pulling
on the loose end of the lap belt to
remove all of the slack (Photo N).
14. Ensure that the belt is centered in the
clamp. Push down both arms of the
open red clamp firmly until it locks
(Listen for a
CLICK). Pushing down on
the clamp arm with the Orbit logo will
make it easier to lock the red arm of the
clamp in place.
Installing the Car Seat: With Vehicle Seat
Belt
cont’d
15. Check the seat for a tight installation.
You know that you have reached the
optimal tightness when you tug on the
car seat at the belt path (Photo O) and
the car seat does not move more than 1
in (2.5 cm) in any direction.
If the car seat is loose, remove and re-
install the car seat beginning at Step 4.
16. Lap-shoulder vehicle belt systems in
some vehicles have an Automatic Locking
Mode, which locks the shoulder portion
of the belt and keeps it from becoming
a strangulation hazard to older children
or siblings. Orbit Baby recommends
engaging this mode by pulling the shoulder
portion of the belt out completely from the
vehicle, then letting go. You should hear a
soft clicking sound as you allow the belt to
retract back into the vehicle. Check that
you are in the locking mode by tugging
on the shoulder portion of the belt and
verifying that it doesn’t extend.
17. Close the upper upholstery panel and
install the top tether: See pages 87-88.
second clamp
J
M
K
N
L
O