Orbit Baby Toddler Car Seat G2 User Manual
Page 42
Forwar
d-facing Installation
82
82
Forwar
d-facing Installation
83
83
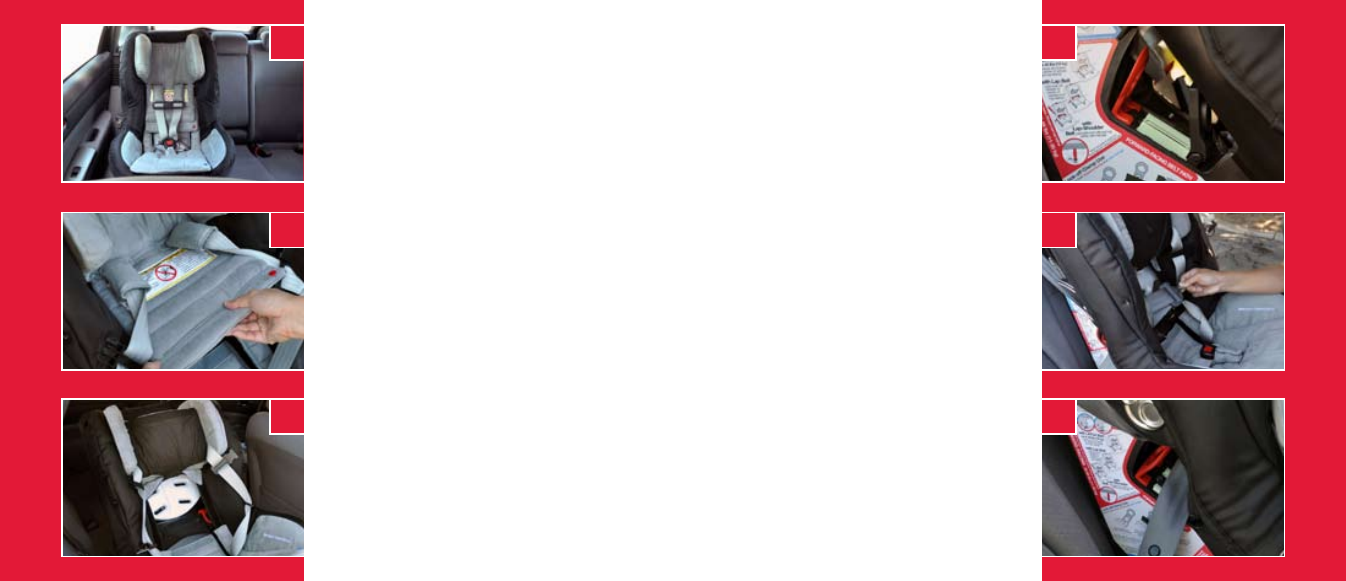
6. Center the car seat on the vehicle seat
(Photo D), making sure the areas under
and behind the car seat are clear of
obstructions.
7. Unbuckle the restraint harness on the seat.
Lift the upper upholstery panel marked
by the red dot (Photo E). It will stay out of
the way by wedging it into the sides of the
upholstery (Photo F).
If using a lap-shoulder vehicle belt to
secure the car seat, continue to Step 8. If
using a vehicle lap belt, skip to Step 12.
If using a lap-shoulder vehicle belt:
8. Open both arms of both red belt lock-
off clamps (Photo G). Pull the seat belt
through the forward-facing belt path in the
seat shell (Photo H).
9. Position only the lap portion of the seat
belt in the first clamp you pass (Photo I),
then position both the shoulder and lap
belts through second clamp (Photo J).
Buckle the belt.
Installing the Car Seat: With Vehicle Seat
Belt
cont’d
10. Tighten the vehicle belt around the car
seat by pushing down on alternating
sides of the car seat rim while pulling on
the shoulder portion of the vehicle belt to
remove all of the slack (Photo K).
NOTE: Ensure there is no slack in the
lap portion of the belt before tightening
the shoulder portion of the belt. This
will result in a tighter installation.
11. Ensure that the belts are centered in
the clamp. While continuing to hold the
shoulder portion of the vehicle belt, push
down both arms of the open red second
clamp firmly until it locks on the lap and
shoulder portions of the belt (Listen for a
CLICK) (Photo L). Next, push down both
arms of the red first clamp on only the
lap portion of the belt. Pushing down on
the clamp arms with the Orbit logo will
make it easier to lock the red arms of the
clamps in place. Continue on to Step
15.
first clamp
D
G
E
H
F
I