Mn o – Orbit Baby Toddler Car Seat G2 User Manual
Page 32
Rear
-facing Installation
62
62
Rear
-facing Installation
63
63
If using a lap vehicle belt:
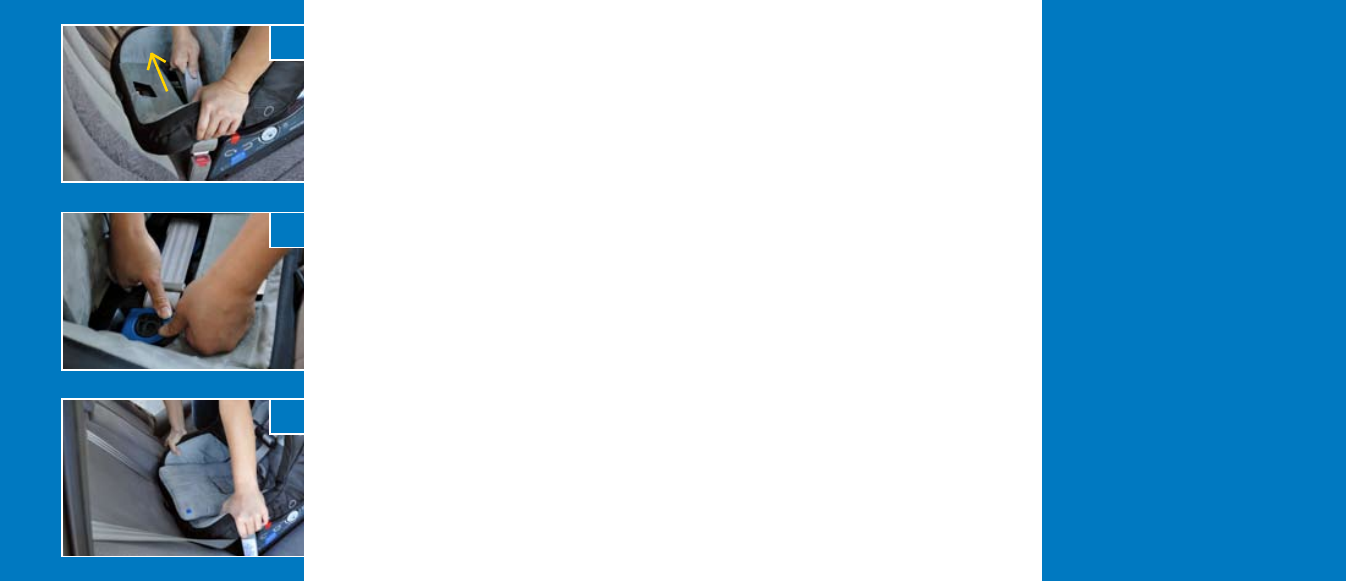
11. Feed the lap belt through the rear-facing
belt path openings in the shell (Photo
L) and the open arms of the blue lock-
off clamp. Buckle the seat belt buckle.
NOTE: If the crotch belt is in one of the
two shell slots closest to the seat back,
the vehicle belt should run in front of
the crotch belt. With the crotch belt in
the most forward shell slot, the vehicle
belt should be positioned behind the
crotch belt.
12. Tighten the vehicle belt around the car
seat by pushing down on alternating
sides of the car seat rim while pulling
on the loose end of the lap belt to
remove all of the slack (Photo M).
13. Push down both arms of the open blue
clamp firmly until they lock (Listen for a
CLICK) (Photo N). Ensure that the belt is
centered over the clamp cams. Pushing
down on the clamp arm with the Orbit
logo will make it easier to lock the blue
Installating the Car Seat: With Vehicle Seat
Belt
cont’d
arm of the clamp in place. Continue on
to Step 14. NOTE: The blue lock-off
clamp is recessed in the car seat shell
and will do the final tightening when you
push down the arms of the blue clamp. It
may be difficult to close the clamp if you
have pulled the belt overly tight.
14. Check the seat for a tight installation.
You know that you have reached
the optimal tightness when you
tug on the car seat at the belt path
(Photo O) and the car seat does not
move more than 1 in (2.5 cm) in any
direction.
15.
RE-CHECK the following to make sure
that the car seat installation is secure:
CHECK
a.
that the car seat installation
is not loose. It should not move
by more than 2.5 cm (1 in) in any
direction when checked at the belt
path.
CHECK
b.
that the car seat is level by
making sure that the white indicator
M
N
O