COATS Kit 85607471 Leverless Bead Lifter User Manual
Page 3
Important: Always read and follow the operating instructions.
• 3
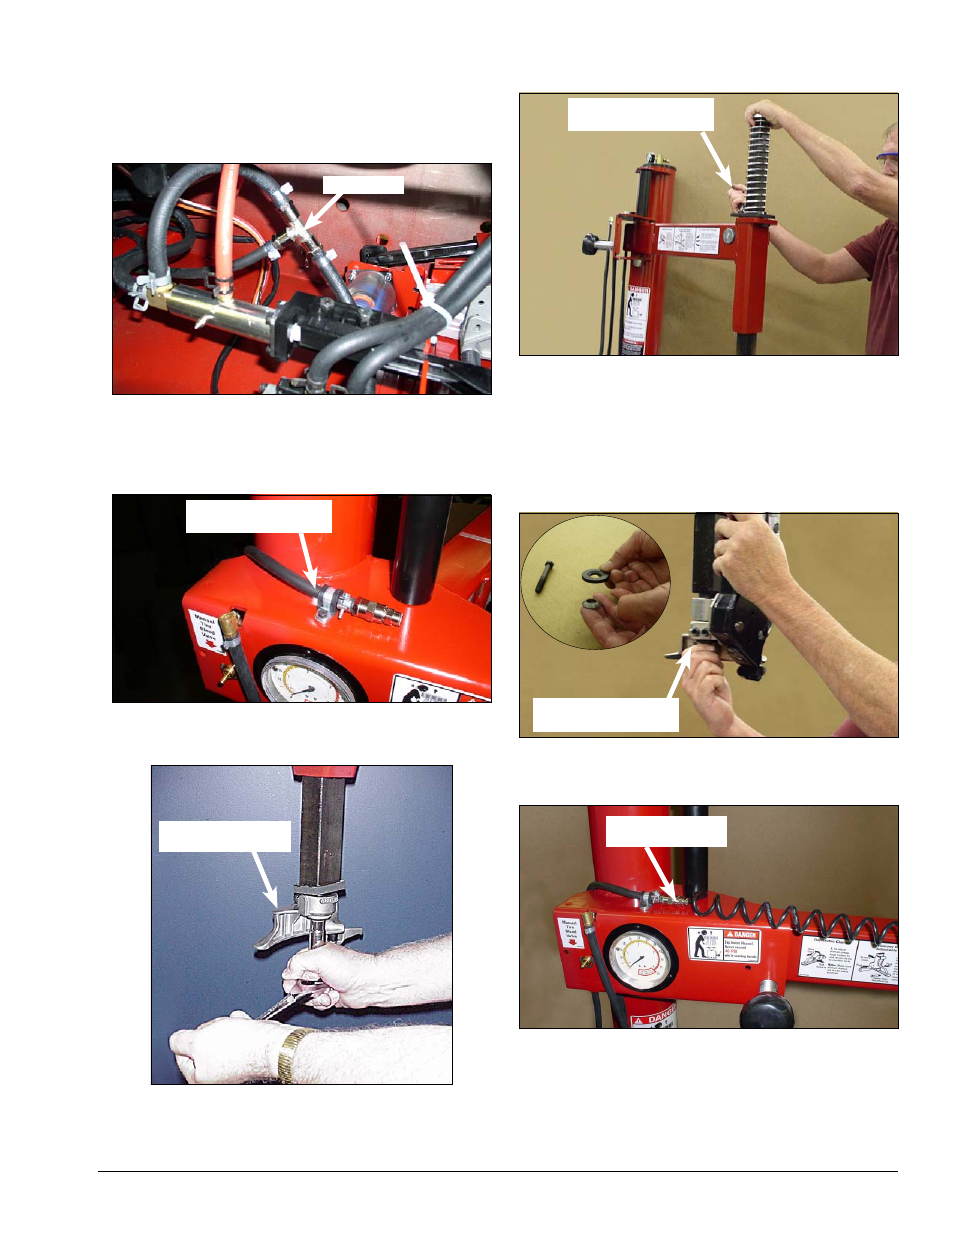
4.
Route hose through 1-inch hole in rear of chassis.
Build up tee assembly using parts 64, 65, and 60. Place
hose clamps on hoses; then connect to tee. Place hose
clamp on opposite end of hose and connect quick con-
nector assembly using parts 85 thru 89. (See Parts
Identification)
5.
Route kit hose up the back of the tower. Install
cushion hose clamp around air hose near the fitting.
Then, fasten clamp/hose assembly to top of swing arm
using supplied bolt (or use a self-supplied 1/4-inch self-
tapping screw).
6.
Lock the vertical slide shaft and then remove the
mount/demount tool, Duckhead® roller mount and rub-
ber cushion.
7.
Hold vertical slide shaft down, release lock handle
and remove shaft assembly out the top. Note orienta-
tion of flat on the end of shaft.
Note: On units equipped with shoulder screw, use
shim for plastic mount/demount head vertical bar lock.
8.
Remove spring, install spring from kit and place
shaft assembly back into swing arm. Reassemble with
shaft flat in same orientation.
9.
Lock shaft.
10.
Assemble washer set on screw, small washer
first with mating bevels together. Attach leverless bead
lifter assembly to vertical shaft; hand-tight only.
11.
Connect coil air hose from leverless bead lifter to
the fitting installed on top of swing arm bracket (from
step 5).
12.
Re-connect air supply to machine. Inspect and
correct leaks if found.
13.
Be sure to perform the steps for the Leverless
Bead Lifter Adjustment Procedure.
Tee Fitting
Fasten Hose To Top
Of Swing Arm
Remove Mount/
Demount Tool
Hold Shaft Down
And Release Lock
Connect Coil
Hose To Fitting
Attach Leverless
Bead Lifter To Shaft