COATS 875 Series Balancer User Manual
Page 15
Important: Always read and follow the instructions.
• 9
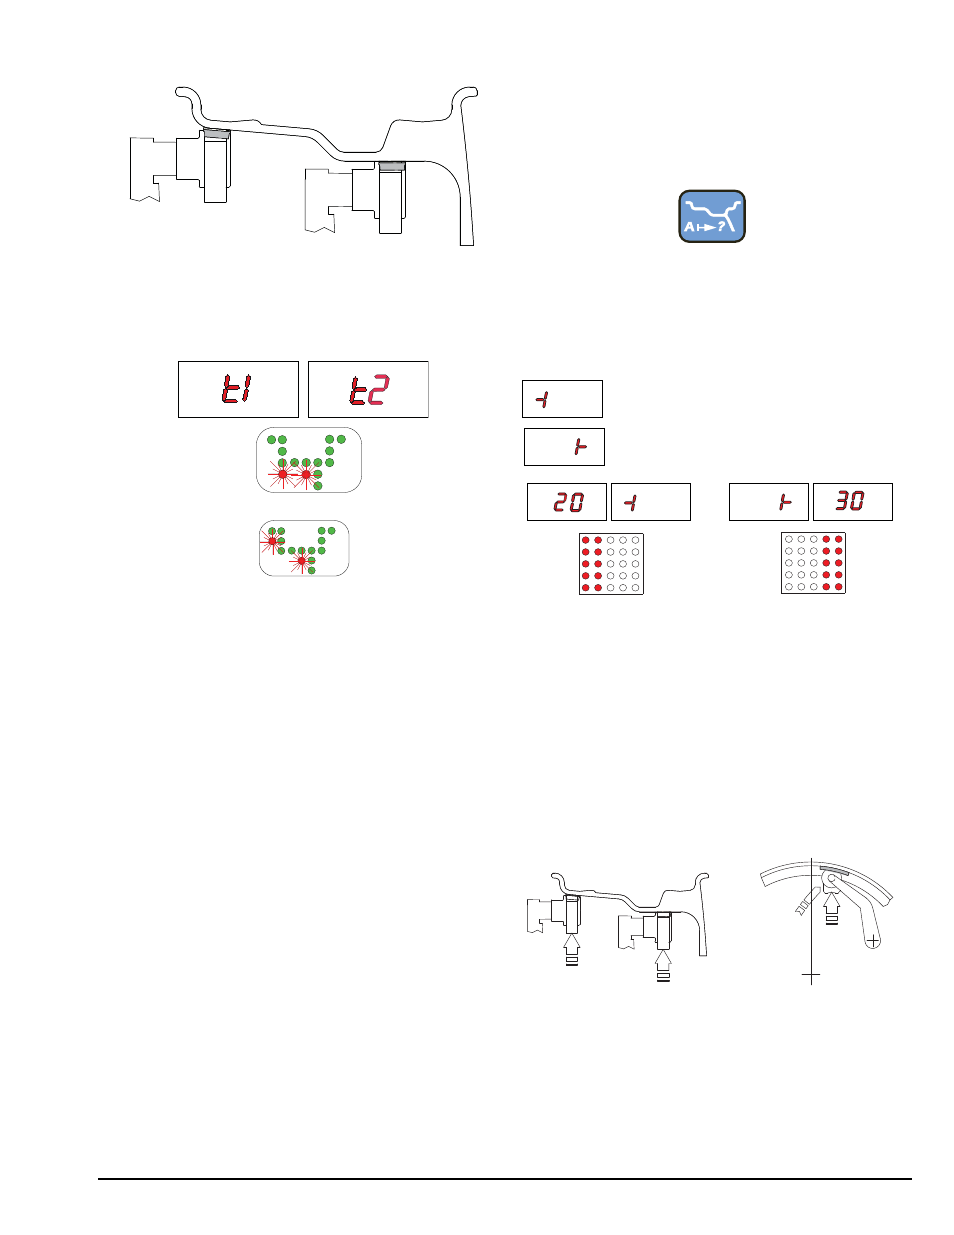
875 - t1-t2 and c1-t2 Rims
Slide out the gauge on the LH side, at the point
where a weight is to be fitted. Wait for the “beep”.
Slide it out further towards the RH side and wait for a
second “beep”. The wheel balancer automatically iden-
tifies t1-t2 or c1-t2 mode.
Counterweight position automatically suggested.
With the button 10, you can switch the correction
modes t1-t2 and c1-t2 (see CORRECTION MODE).
875 - Exact Positioning Of The Adhesive
Weight By Means Of The Gauge With Clips
In normal STATIC/t1-t2 and c1-t2 correction mode and
with an inside clip-on weight, approximations in the
application of the counterweights can be cancelled by
operating as follows:
• Press the button
• Always and only extract the gauge in position A
(Figure 5).
Note: If the correction type is different from any of
those indicated in this paragraph, there is no effect.
The following indications appear on the display:
to indicate that the gauge should be
pulled out further
to indicate that the gauge should be
returned to rest position
The left display gives the indications to reach the posi-
tion for the inside, while the right display that for the
outside.
• Move the wheel into the correct angular position
indicated by the instrument for each side.
• Apply the counterweight turning the gauge prod
outward to the position where the clip touches
the wheel in position
A. The fact that the weight application position is no
longer vertical (Fig. 9) is automatically compensated
(where appropriate use the weight pusher).
Note: The position repeater works only in Pos. A as
shown in Fig. 5.
FE
FI
FI
FE