Caution, Operating the balancer – COATS 875 Series Balancer User Manual
Page 10
4 •
Important: Always read and follow the instructions.
Operating the Balancer
Wheel Mounting
Select the most appropriate mounting method for the
wheel you are balancing. Using the proper method
ensures secure mounting and safe balancer operation,
and prevents damage to the wheel.
On most wheels, the inner side of the wheel hub
usually has the most uniform surface for wheel bal-
ancing. Always center the wheel by the most uniform
shaped side of the hub to achieve the most accurate
balance.
Regardless of mounting type, always make sure that
the wheel is forced firmly against the shaft faceplate
and that the hub nut engages the threaded shaft for at
least four complete turns. To assist in centering the
wheel properly, rotate the wheel and the shaft while
tightening the hub nut.
Failure to tighten the hub nut properly may
result in the wheel dismounting, causing
personal injury and property damage.
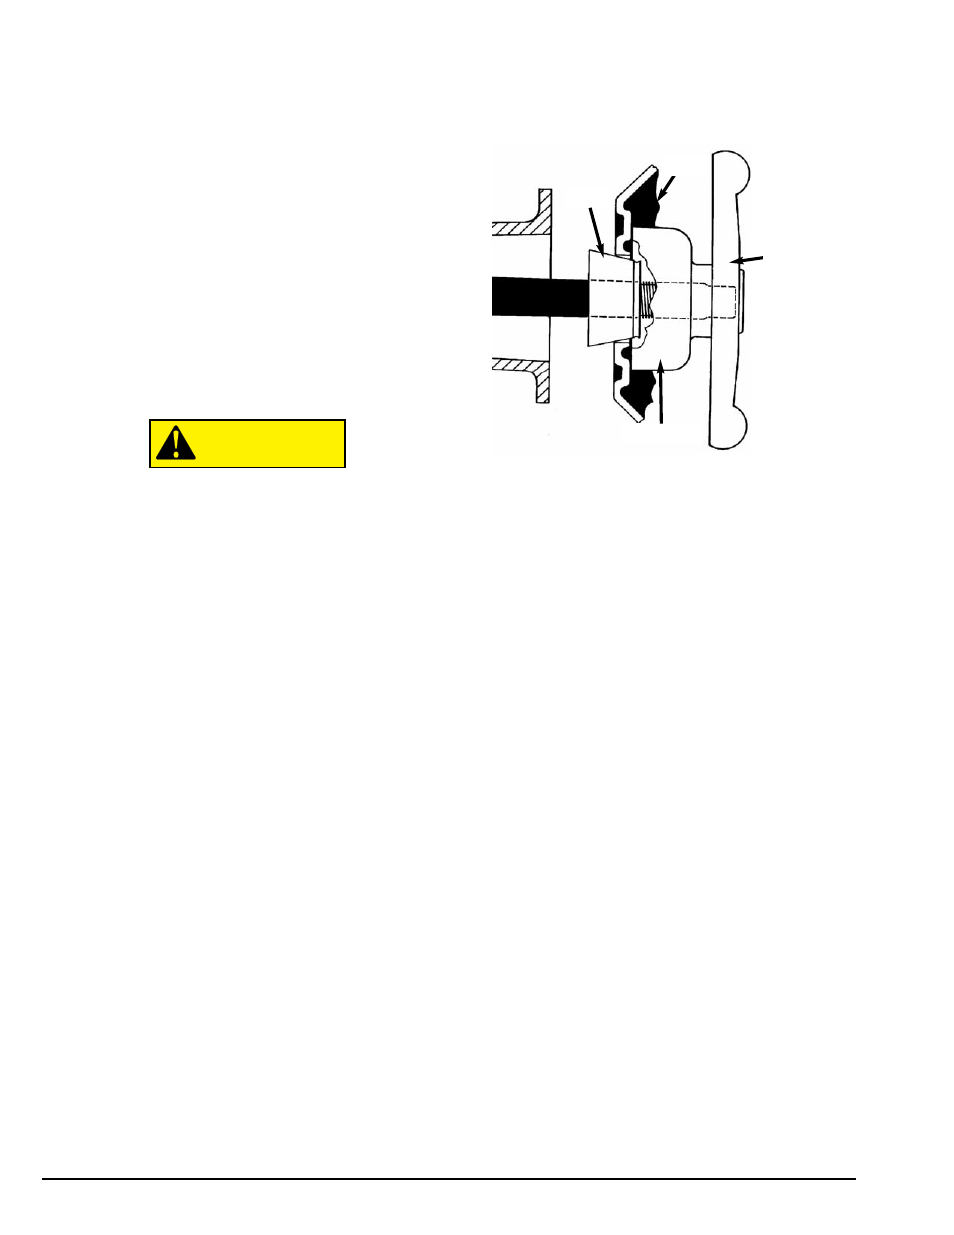
Standard Back Cone Mounting
Most original equipment and steel wheels can be
mounted properly using this method. The wheel is cen-
tered on a cone from the inner side of the hub.
Back Cone Mounting
1. Select the cone that best fits the center hole in the
wheel. Slide the cone onto the shaft with the large end
towards the faceplate.
2. Lift wheel onto the shaft and center it on the cone.
3. Attach the pressure cup to the hub nut and install
the assembly onto the shaft. Tighten securely.
Note: Use a nylon spacer (no mar ring) to protect cus-
tom wheel finishes.
4. Thread the hub nut onto the shaft, and tighten it
against the wheel. The wheel must be forced firmly
against the faceplate. The hub nut must engage the
threads for at least three full turns.
Note: If the hub nut will not tighten completely, use
the front cone mounting method.
CAUTION
Cone
Pressure Cup
Rim
Hub Nut