Ul4000 ultra-lok, Tool, Maintenance – BAND-IT UL4000 Cordless Ultra-Lok Tool User Manual
Page 13
BAND-IT IDEX, Inc.
A Unit of IDEX Corporation
4799 Dahlia Street
Denver, CO 80216-0307 USA
P: 1-800-525-0758
F: 1-800-624-3925
Document # P07886 Rev. N
© Copyright
BAND-IT IDEX, Inc. 2013
All rights reserved
www.BAND-IT-IDEX.com
Page 13 of 14
UL4000
Ultra-Lok
Tool
Maintenance
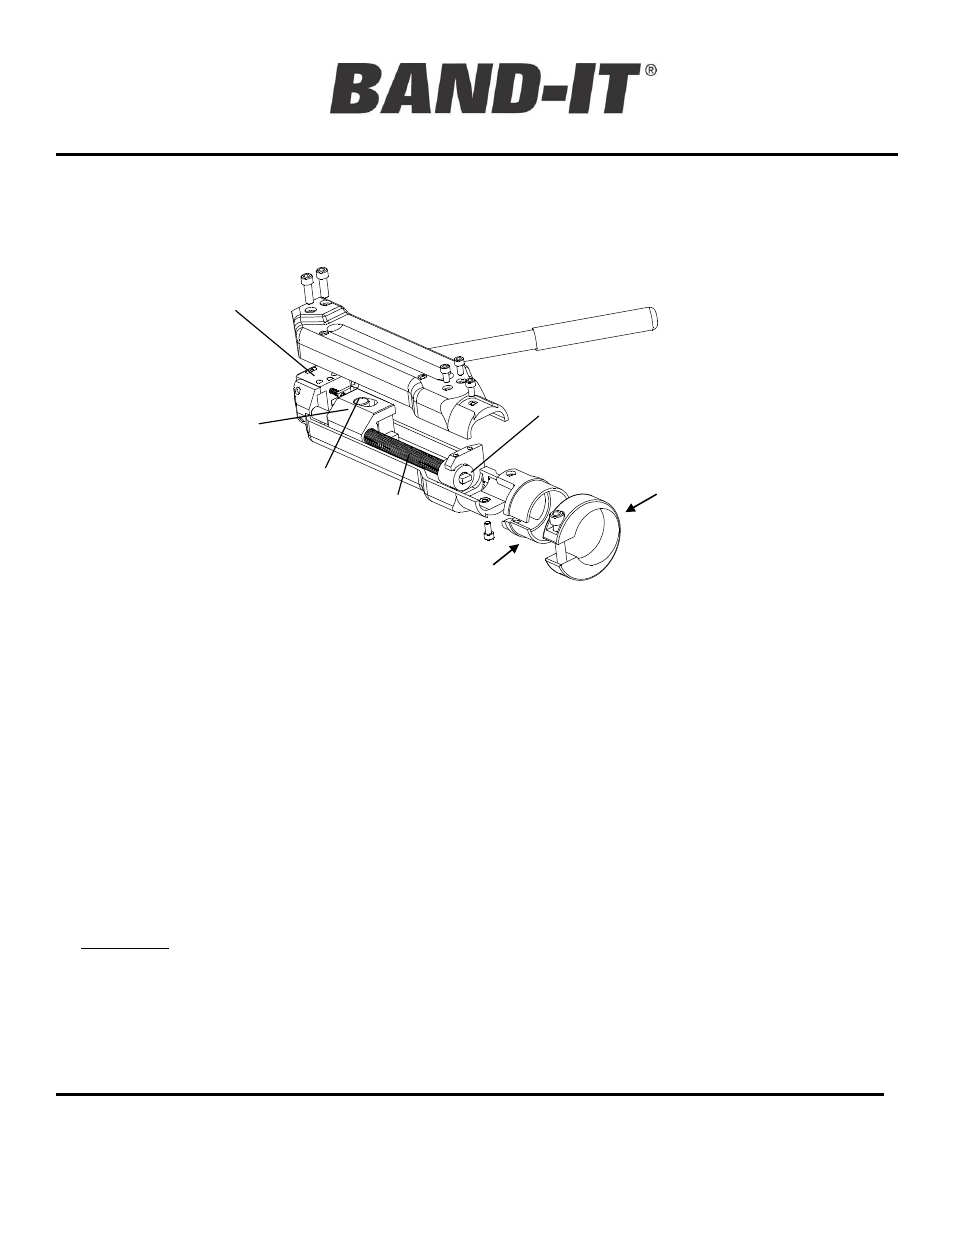
5. To replace gripper: Make sure tension block is all the way forward against the tool head.
Remove drill. Remove tool adapter body. Remove one side of the tool body or the other, not both.
Slide gripper out sideways and replace with a new one. Re-attach tool body side. Caution: Do
not push or move tension block while gripper is out of tool.
6. To replace tension screw: Move tension block all the way back (away from tool head) using drill
in tensioning mode (clock-wise). Remove Ultra-Lok
tool from drill. Remove the tool adapter body from
the Ultra-Lok
tool. Remove blade and load bearing tip from tensioning screw (see bearing detail).
Remove one side of the tool body or the other, not both. Grasp the smooth barrel on tension screw and
pull all the way forward until tension block is against the tool head. If tension screw is stuck, use a
punch and tap the center of the screw from the back end of the tool. Turn tension screw out of tension
block. Lubricate new tension screw with Molybdenum Disulfide lubricant, or equivalent. Install new
tension screw in reverse order, making sure that back end of tension screw extends well beyond the
back end of the tension block. Push the assembly all the way back and extend the round portion of the
tension screw through holes on the tripper bracket and back guide plate. Reinstall tool body side.
Reinstall blade and tighten the blade mounting screws approximately 120 in-lbs. Reattach tool adapter
body to Ultra-Lok
tool. Reattach tool to drill and drive tension block all the way forward.
Note: Drills needing repair must be forwarded to an authorized ‘DeWalt’ repair center in your area. Be
sure to remove BAND-IT safety clutch (M21790) from drill.
Tension
Screw
Item 7
Move tension
block all the way
forward against
the tool head.
Tool Head
Item 1
Gripper
Item 8
This tip must align with
the safety clutch
(M21790) on the DeWalt
drill. See page 4.
DeWalt Drill is covered solely by the DeWalt warranty as described in the DeWalt literature. BAND-IT
does not extend any warranty of any kind to the drill.
Tool body
adapter,
Item 35
Collar, Adapter,
Item 36