Brake lathes – AMMCO 700 Vehicle Brake Lathe User Manual
Page 10
Lathe Mounting Procedures
The lathe was designed to be mounted to the caliper mount-
ing bracket on the vehicle.
1. Loosen the bolts holding the adjustable mounting brackets
on the lathe and slide the brackets in or out to align with the
holes in the caliper mounting bracket on the vehicle.
This may be accomplished by removing the bolts holding them
to the lathe and repositioning them, being certain that they are
squarely seated in the track, and are mated with the pins in the
gear rack.
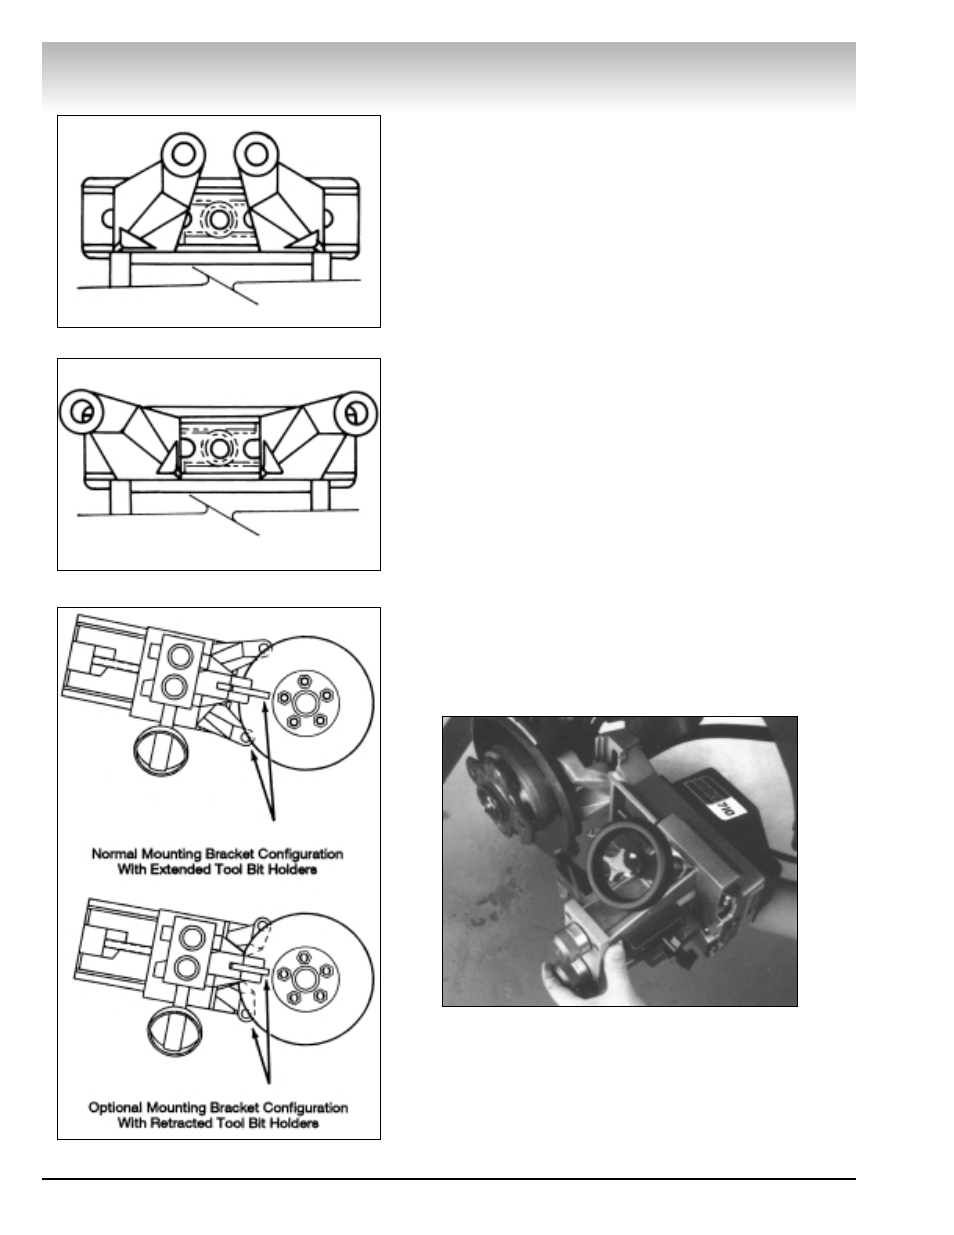
Some applications require the tool bit holders to be extended
in order to refinish the entire braking surface. This could induce
vibration during the cut. The use of the configuration shown in
Fig. 3 will prevent the vibration by eliminating the need to
extend the cutting bits, Fig. 4.
Note: When repositioning the mounting brackets, care should
be taken not to allow the gearing mechanisms to disengage. If
the gearing becomes disengaged, it needs to be recentered by
sliding both racks toward the pinion gear. Engage the end tooth
of each rack with the pinion at the same time. Locate the pins
midway between the end of the track and the pinion to allow
room for re-attaching the mounting brackets.
2. Turn the depth-of-cut knob counterclockwise until the
inboard (red) cutter rests against the carriage. Turn the carriage
handwheel clockwise until the carriage reaches the end of its
travel.
Position the lathe against the inboard side of the caliper
mounting bracket and check to see if both cutting bits will clear
the rotor, Fig. 5.
If the outboard (blue) cutter does not appear to clear the rotor,
adjust the outboard depth-of-cut knob until clearance is gained.
If the inboard (red) cutter does not appear to clear the rotor, pay
special attention to step 4 in the following section.
3. Attach the lathe to vehicle according to the guidelines in
the following three sections.
Brake Lathes
4 • AMMCO 700/705/710 Brake Lathes
Figure 2
Figure 3
Figure 4
Figure 5