Brake lathes, Caution, Installation of the hardware storage rack – AMMCO 700 Vehicle Brake Lathe User Manual
Page 17
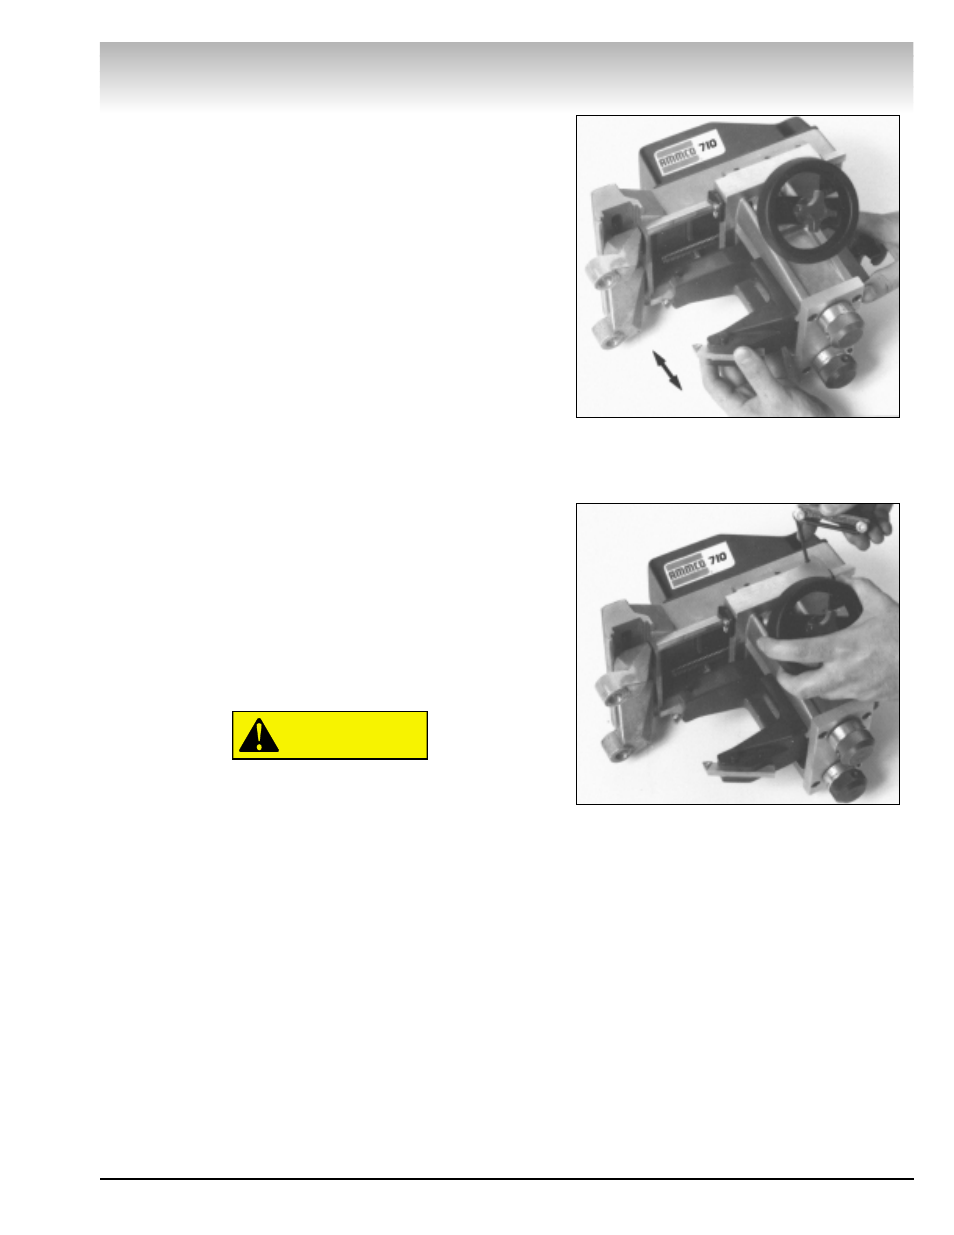
Figure 20
Figure 21
4. Move the cutter thru its entire travel. Check to see that no
tight spots (or loose spots) exist.
5. Push the far end of the cutter back and forth. Check to see that
no rocking motion exists, Fig. 20. Re-adjust set screws if required.
6. Repeat for the other cutter.
To adjust the carriage gib:
1. Loosen the engagement knob in the center of the handwheel.
2. Tighten each of the three (3) set screws separately, while turn-
ing the handwheel to move the carriage back and forth on the
ways, Fig. 21.
3. Tighten only until slight resistance is felt as the handwheel is
turned.
4. Move the carriage through its entire travel. Check to see that
no tight spots or rocking motion exists. Re-adjust the set screws if
required.
Storage
Use the storage case provided to store the lathe and accessories
when not in use. This will protect the lathe from any damage, and
keep it clean.
If all adapters, spacers, and accessories are kept inside the box,
they will be easy to locate when needed again.
Care Of Mounting Hardware
The mounting hardware is designed for mounting the lathe to the
vehicle ONLY. DO NOT misuse this hardware.
DO NOT throw the bolts, spacers, and nut plates into the storage
box. Use the supplied storage rack.
Great care should be taken in the use, handling, and
storage of the mounting hardware. Even the smallest
nick, scratch, or loose chip can cause problems when
installing the lathe onto the vehicle.
Installation of the Hardware
Storage Rack
Note: Use MOUNTING HARDWARE illustration and the Parts
Identification Manual to accomplish steps 1 thru 4.
1. Hang the storage rack inside the lathe storage chest by hook-
ing the lip of the rack over the lip of the chest.
2. Fully Insert the screw, into the storage rack, to secure the rack
to the storage chest.
3. Place the mounting bolts in the two circular holes on the left
end of the storage rack.
4. From left to right, the following parts should be loaded on the
storage rack by pushing the parts over the tongues on the rack: flat
washers, nut plates, 1/8" spacers, 1/4" spacers, 1/2" spacers, 1"
spacers, end 2" spacers.
CAUTION
Brake Lathes
AMMCO 700/705/710 Brake Lathes • 11