2 select the camera to view and control – AirLive WL-1200CAM User Manual
Page 75
AirLive WL-1200CAM
User’s Manual
72
3.4.2 Select the Camera to View and Control
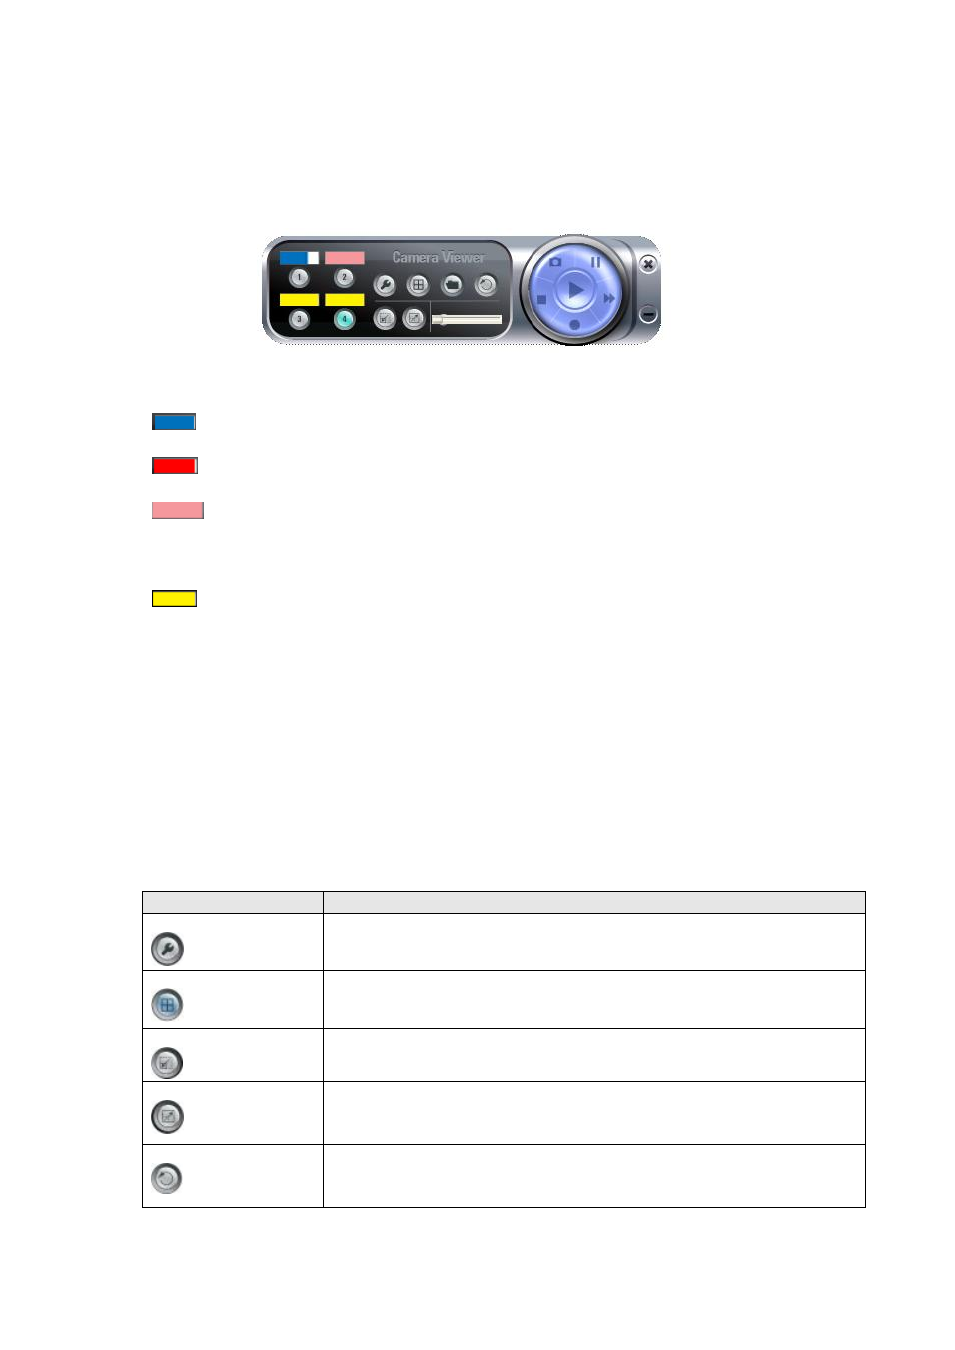
The status of every camera will be shown in the dashboard (the color bar above the camera
’s number):
Where:
Blue indicates the video camera is connected,
Red indicates the camera is recording now.
Pink indicates the video camera
’s information has been set
already, but unable to connect to selected camera, or the camera is
being stopped or paused, and
Yellow indicates the camera
’s information is empty.
The length of color bar shows the frame rate of connected camera; when the color bar is longer, the
frame rate is higher. A low frame rate may be caused by slow network connection or simple because
there
’s too little motion in the environment that IP camera points to.
If a camera is connected, clicking its number will bring the viewer to single-camera mode
The description of other camera controls on dashboard in single-camera mode will be given below:
Item
Description
Camera Setup
Click this button to setup selected camera. Detailed instructions will be
given in next section.
Quad View
Back to 4-camera view mode.
Reduce View Window
Reduce the size of camera view window (resolution 320 x 240)
Enlarge View Window
Enlarge the size of camera view window (resolution 620 x 480)
Rotate View
Flip the captured image upside down (turn 180 degrees), click this button
again to return. This function is very useful when camera is installed in a
upside-down position.