Pressure limiter valve adjustment -37, Pressure limiter settings -37 – JLG 24RS Service Manual User Manual
Page 161
SECTION 5 - HYDRAULICS
3121287
– JLG Lift –
5-37
2.
Start the prime mover and operate at normal speed.
3.
Use a 17mm wrench to loosen the locking nut (L024).
4.
Activate the control input until pressure in the high side
of the system loop stops rising. This pressure is the PL
setting.
NOTE:
The model code on the serial plate gives the factory setting
of the PL (Pressure Limiter). The PL setting is referenced to
charge pressure. Subtract charge pressure from system
pressure gauge readings to compute the effective PL set-
ting.
5.
Return the pump to neutral and adjust the PL setting
using an internal hex wrench. Wrench size is in the dia-
gram on the previous page. Turn the adjusting screw
clockwise to increase the PL setting, counter clockwise
to decrease it. The adjustment is very sensitive. Change
per turn is approximately 150 bar [2176 psi].
NOTE:
Change per turn is 150 bar/rev [2176 psi/rev].
6.
Repeat steps four and five until you reach the desired PL
setting. After adjustment, torque the locknut (L024) to
12 N•m [9 lbf•ft]. Do not over torque.
7.
Shut down the prime mover. Remove gauges and
replace plugs.
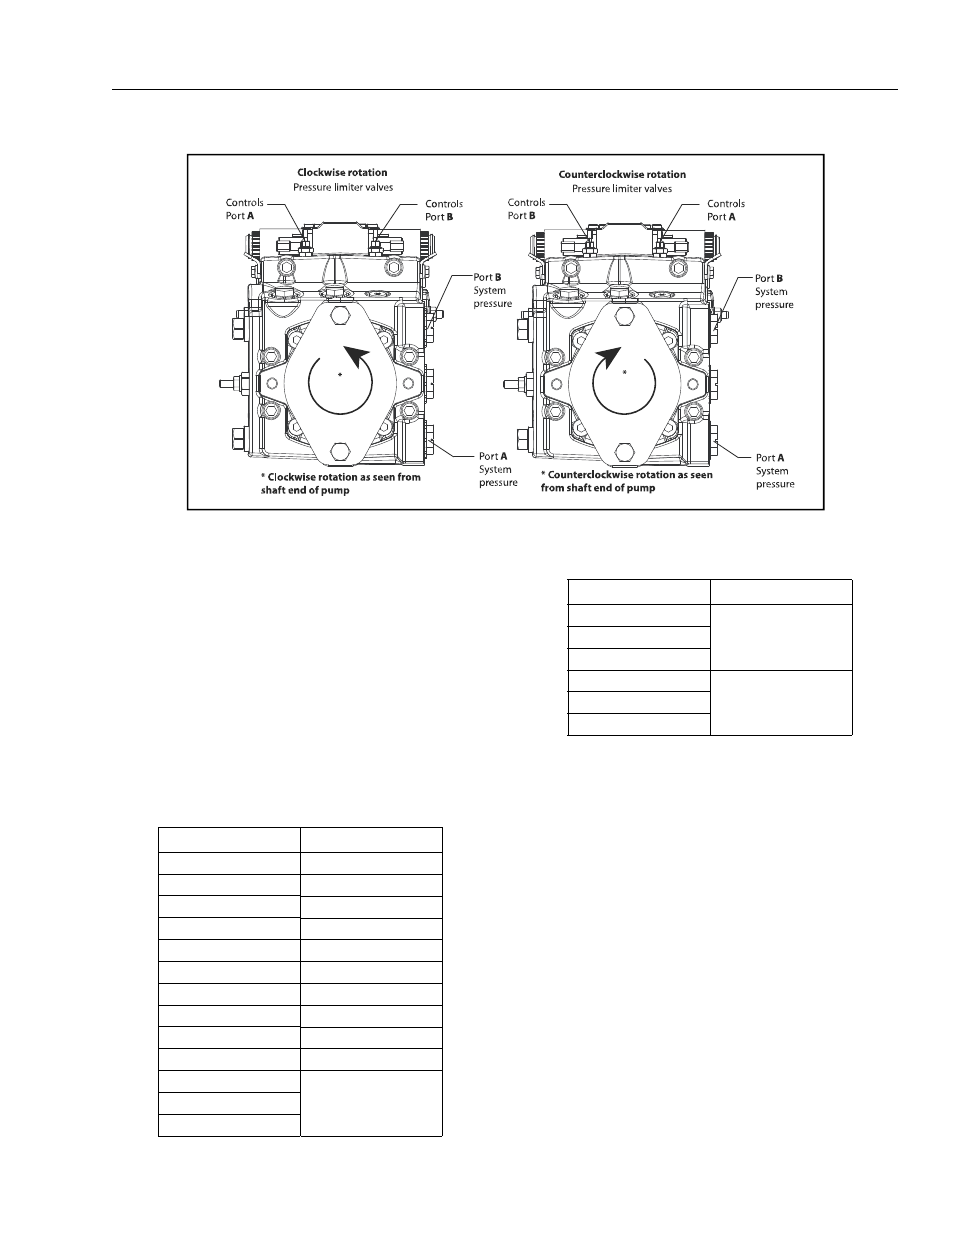
Figure 5-34. Pressure Limiter Valve Adjustment
Table 5-9. Pressure Limiter Settings
Pressure Limiter Setting
HPRV setting
150
200
180
230
200
250
230
280
250
300
280
330
300
350
330
380
350
400
380
420
400
450
410
420
430
480
440
450
460
510
470
480
Table 5-9. Pressure Limiter Settings
Pressure Limiter Setting
HPRV setting