IKA RV 10 control FLEX User Manual
Page 35
36
032010
Feed the steam pipe in until it stops.
Then lock the locking device by turning it clockwise by 60°
(fig. 10).
Check the axial locking device on the steam pipe.
Push-off mechanism
The plastic screw nut (H) helps loosen tight-fitting piston ground-in
connections (Fig. 9).
Hold the locking device and loosen the plastic screw nut (H).
To do so, hold the tight-fitting evaporator piston and turn the pla-
stic screw nut (H) until the evaporator piston neck.
Before using the device, hand-tighten the plastic screw nut (H)
against the left-hand stop. This will hold the steam pipe locking de-
vice (G) firmly in place.
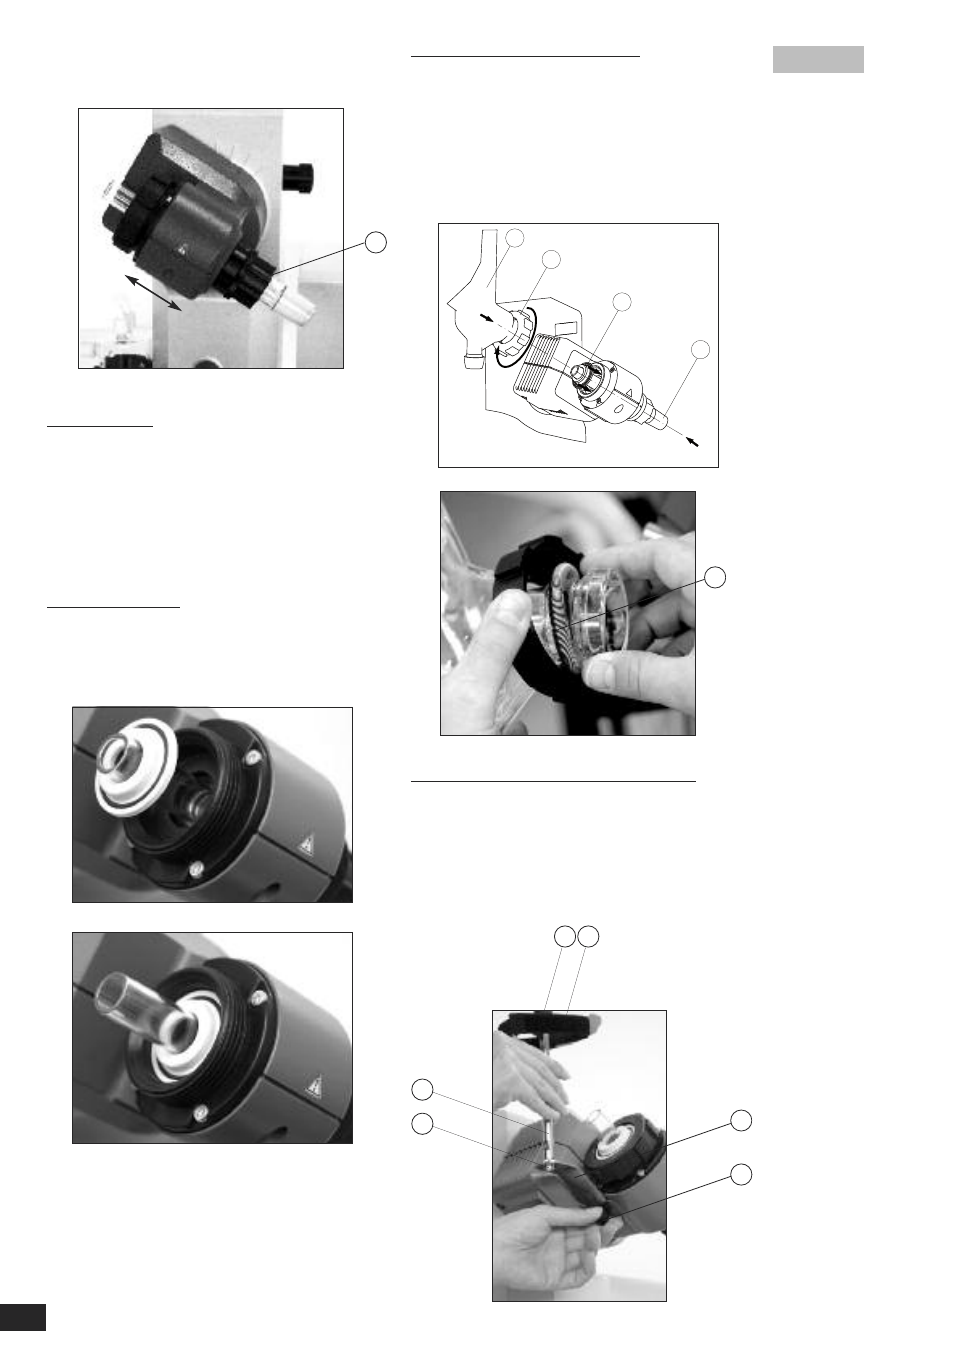
Fitting the condenser seal
Place the RV 06.15 or RV 06.13 condenser seal in the condenser
receptacle and fit the glassware to the device according to the as-
sembly instructions (Fig. 11 a,b, c and d).
Fig. 10
Fig. 11b
Fig. 11a
First use - Fitting the seal RV 06.15/RV 06.13
Insert vapour tube (1).
Insert seal RV 06.15 (2).
Slide the union nut (3b) over the flange on the condenser (3a).
Also slide the annular spring (3c) over the flange on the condenser (3a).
Position the condenser (3a) on top of the seal (2).
Tighten the union nut (3b) by hand onto the threaded flange. Run the
device for 20 minutes at 120 rpm. Finally, retighten the union nut (3b) by
hand.
Note: Follow the mounting instructions for the glassware
Assembling the vertical glassware cooler locking device
Assemble the condenser locking device according to the diagram
(fig. 12).
Mount the plate (I) using the thumb screw (J).
Put the support rod (L) on the plate (I) and attach it with the screw
nut (K).
Attach the rubber protector (M).
Fasten the Velcro band (N) to the support rod (L).
Secure the vertical glassware with the Velcro band (N).
1
2
3a
3b
Fig. 11c
Fig. 12
J
I
L
K
N
M
H
Fig. 11d
3c