Pre - assembly of the wheel carrier – ARB 5650010 User Manual
Page 9
PRE - ASSEMBLY OF THE WHEEL CARRIER
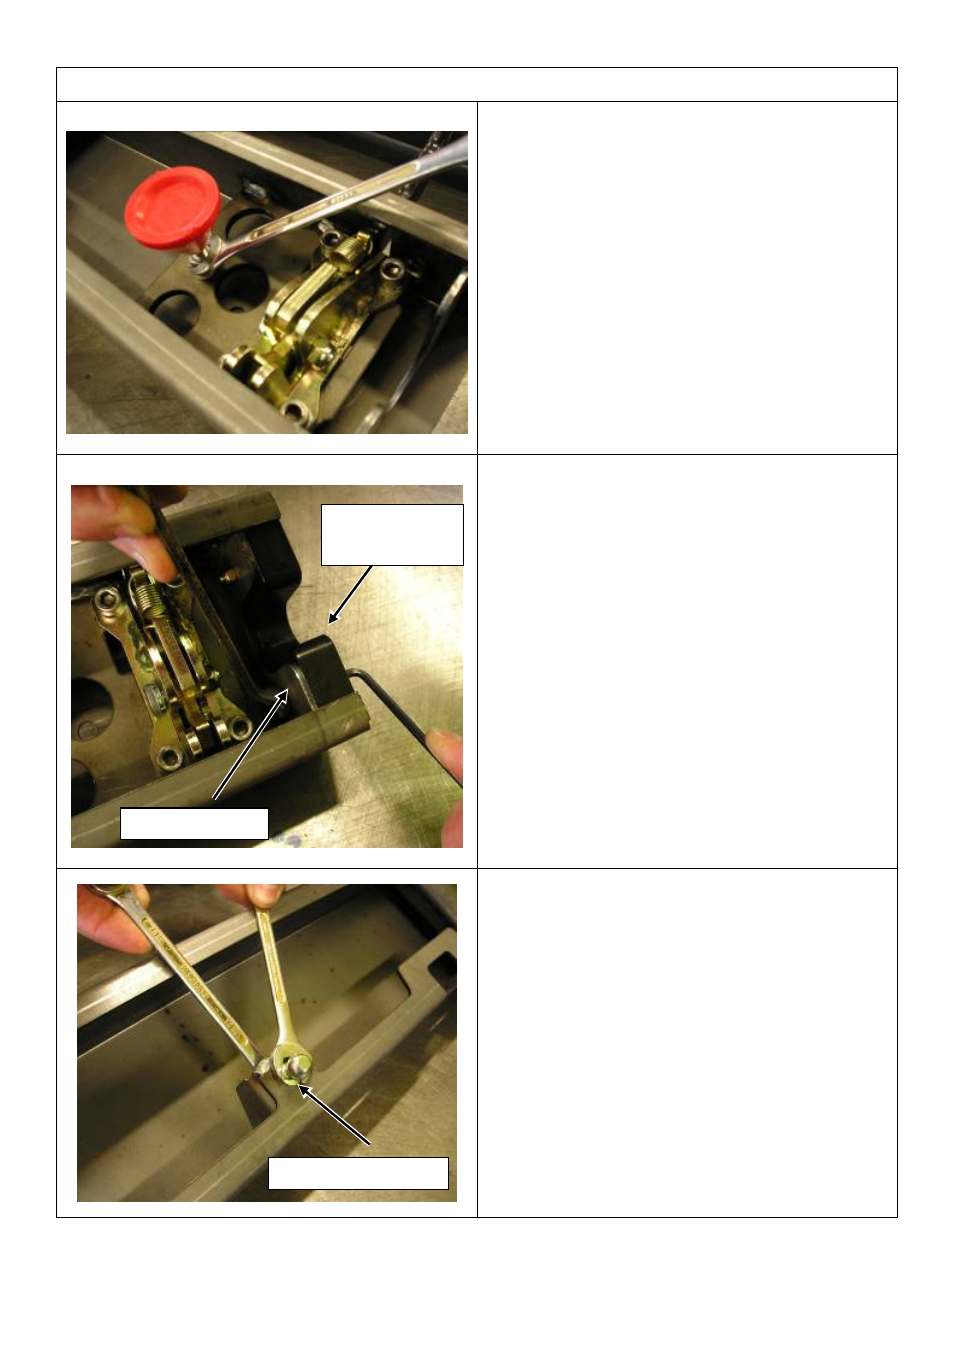
2. INSTALLATION OF THE STOPPER
Install one M8 nut, spring washer and flat
washer onto the threaded section of the
stopper.
Fit the stopper to the wheel carrier plate as
shown (the plate is pre – tapped). The
spring and flat washers should be placed
between the M8 nut and the treaded plate.
Do not tighten the nut at this stage. The
stopper will be adjusted after the wheel
carrier is fitted to the rear bar.
3. INSTALLATION OF GRABBER BUFFER
Install the grabber using the two M6
countersunk cap screws and lock nuts
provided. The grabber buffer should be
installed on the outer face of the mounting
plate as shown.
When tightening the bolts, start at the top
first. Pull the centre of the grabber towards
the top (stretching out the buffer) and
tighten the top bolt, repeat this for the
bottom of the arm as shown.
This will increase the grabber opening.
Ensure the buffer cut out is central to the
cut out in the mounting plate.
4. INSTALL STRUT PIVOT BALL
Install the gas strut pivot ball into the wheel
carrier as shown using the M8 flange nut
and flat washer provided.
Insert Screws
From This Side
Mounting Plate
Gas Strut Pivot Ball
Last Rev Date: 16/10/2006
Page 9 of 25
3783210 - rev 3
Copyright © 2005 by ARB Corporation Limited. All rights reserved, this document must not be reproduced without the express authority of ARB Corporation Ltd