Fitting the rear bar to the vehicle, Marking the rear bar position to the vehicle – ARB 5650010 User Manual
Page 13
FITTING THE REAR BAR TO THE VEHICLE
10. MARKING THE REAR BAR POSITION
TO THE VEHICLE.
With the rear bar in position on the back of the
vehicle, mark the two holes in the centre of the
rear bar onto the rear cross member of the
vehicle. Use a metal scribe or felt tip marker to
do this.
Remove the bolts described in step 9 and
remove the rear bar to enable the holes to be
drilled (refer to step 11.)
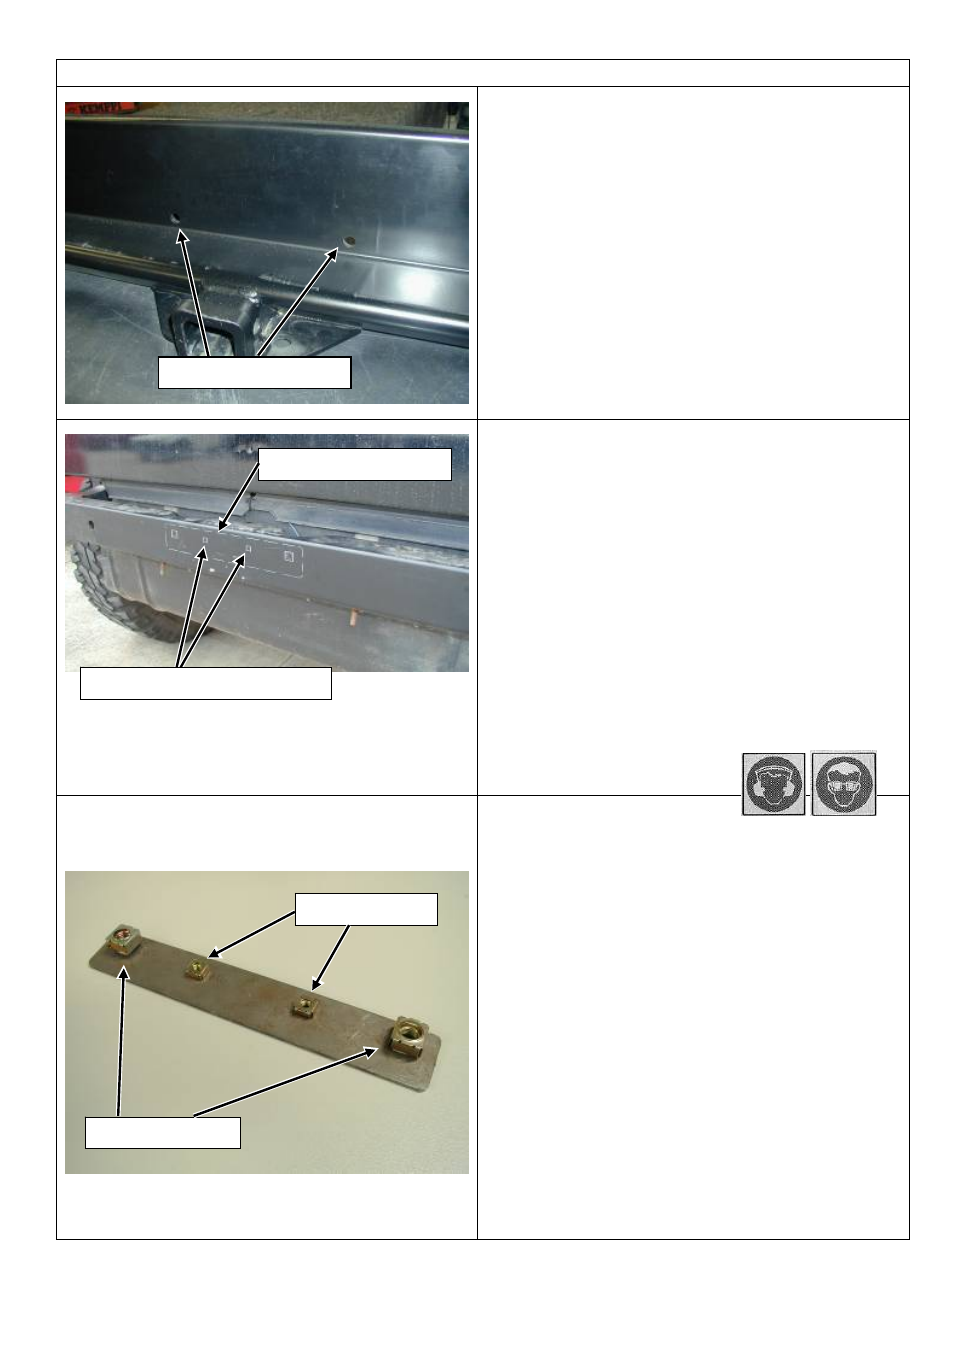
11. POSITIONING THE BACKING PLATE
TO THE REAR CHASSIS BEAM.
Align the outer holes in the chassis beam plate
(supplied in the fitting kit) with the newly
marked holes on the cross member. Mark the
position of the two smaller holes.
NOTE: The smaller edge of the bracket is to
the top.
Centre punch the position of the four holes.
Drill the smaller holes using an 8 mm drill bit
and the two larger holes with a 13 mm drill bit.
WARNING: Wear eye and ear protection
when using drill.
12. INSTALLATION OF THE BACKING
PLATE TO THE CHASSIS BEAM
Insert an M12 (short leg) cage nut into the two
outer holes as shown. Insert an M6 cage nut
into the two inner holes as shown.
Place the assembled chassis beam plate in
behind the chassis cross member and align the
smaller inboard cage nuts with the drilled
holes. The position of the bracket is shown
dotted in the above photo.
Bolt the backing plate to the chassis beam
using the M6 bolts, flat washers and spring
washers. Tighten both bolts.
Reinstall the rear bar and hardware by
repeating steps 7 – 9.
Mark these two holes
Narrow edge to top.
Mark & drill these two holes
M12 Caged Nuts
M6 Caged Nuts
WARNING: PLACE A BOARD BETWEEN THE
CHASSIS CROSS MEMBER AND THE FUEL TANK
WHEN DRILLING. THIS IS TO PREVENT DAMAGE
TO THE FUEL TANK.
Last Rev Date: 16/10/2006
Page 13 of 25
3783210 - rev 3
Copyright © 2005 by ARB Corporation Limited. All rights reserved, this document must not be reproduced without the express authority of ARB Corporation Ltd