Fitting the wheel mounting bracket to the carrier – ARB 5650010 User Manual
Page 21
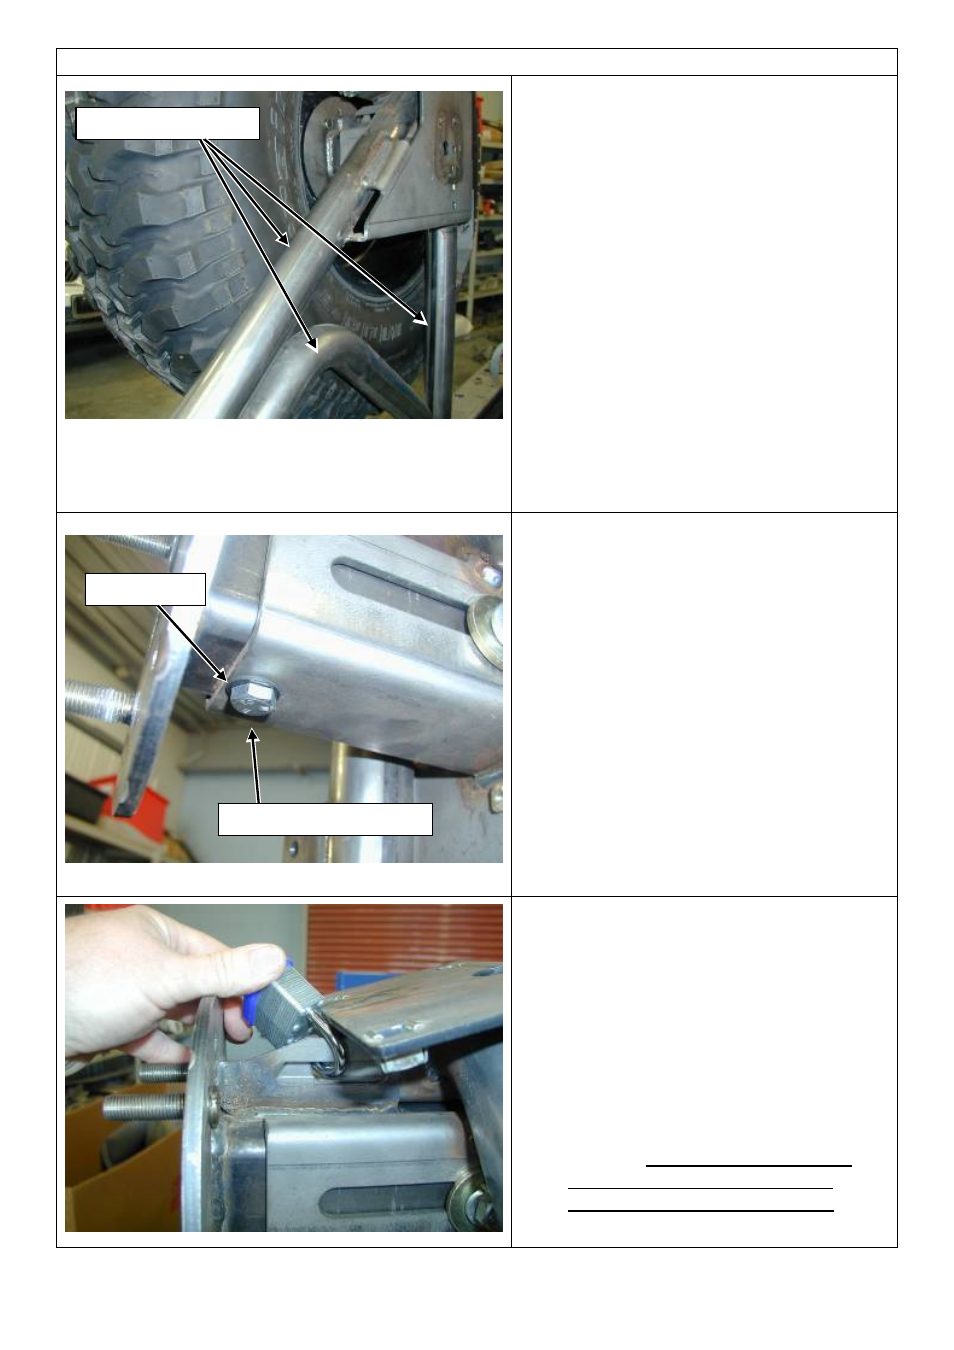
FITTING THE WHEEL MOUNTING BRACKET TO THE CARRIER
5.
INSTALLATION OF THE SPARE
WHEEL TO THE BRACKET
Fit the spare wheel to the carrier and
ensure all three wheel nuts are fully
engaged. Slide the spare wheel and
carrier back towards the frames.
The tyre must have full contact with
the frames. Using a marker or scribe
mark the position of the bracket in
relation to the housing (in case it
moves when removing the spare
wheel). Remove the spare wheel.
To enable the tyre to be Pre -loaded on
the frame, push the bracket a further
5 mm inward. Tighten the two M12
side bolts.
6.
WHEEL MOUNTING BRACKET
DRILL AND PINNING
From the underside of the wheel
carrier channel, there is a predrilled
pilot hole for the locking bolt.
Using a 10 mm drill bit in an electric
drill, drill through the lower wall of
the wheel mounting bracket . Ensure
eye protection is used.
Place the
M10 bolt up through the
drilled hole and fasten on the inside
with the M10 flange nut .
Tighten the nut and bolt .
7.
WHEEL MOUNTING BRACKET TO
WHEEL CARRIER
The wheel mounting bracket has been
designed to attach to the wheel carrier
and can slide forward and reward to
accommodate different size tyres
and
wheel offsets .
The two components although bolted
together can be removed with the tyre
in place . It is recommended that a
padlock (not supplied) is used to
secure these items to the vehicle.
Full contact required
Locking bolt
Drill up from underside
Last Rev Date: 16/10/2006
Page 21 of 25
3783210 - rev 3
Copyright © 2005 by ARB Corporation Limited. All rights reserved, this document must not be reproduced without the express authority of ARB Corporation Ltd