After completing installation – OR-Fab 84204 ROCKER PANEL (PAIR) TJL (UNLIMITED) User Manual
Page 8
8
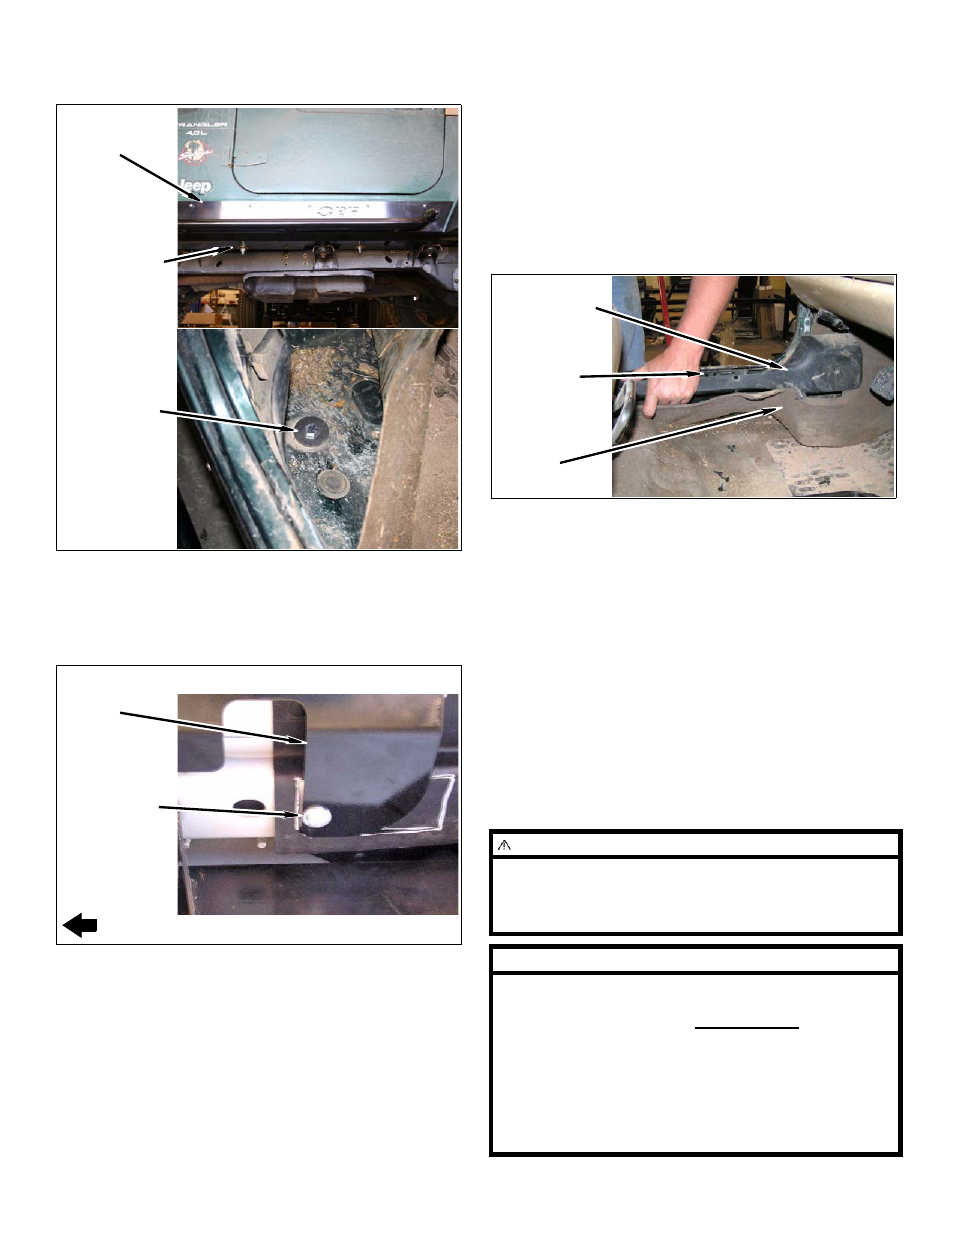
Jeep TJ, TJL Rocker Panels
g. Install kit rocker panel (driver) onto body chan-
nel with kit bolt (1/2” x 2-1/2”), two kit washers
(1/2” x 2”), and kit nut (1/2” Nylock).
h. TJL Models: Install kit rocker panel (driver)
onto rear 3/8” drilled body channel hole with kit
bolt (3/8” x 1-1/2”), kit washer (3/8” USS), and
kit nut (3/8” flange). Use cutout rear plastic
fender for access.
i.
Repeat above substeps for passenger rocker
panel.
Kit Washer
(1/2” x 2”),
Kit Nut
(1/2” Nylock)
Kit Bolt
(1/2” x 2-1/2”),
Kit Washer
(1/2” x 2”)
Kit Rocker
Panel
Kit Bolt
(3/8” x 1-1/2”),
Kit Washer
(3/8” USS),
Kit Nut
(3/8” Flange)
FRONT
Kit Rocker
Panel
Inside of Vehicle
1. Interior trim panels
a. Lay down driver and passenger carpet onto
floor.
b. Install carpet beneath driver and passenger door
sills if equipped.
c. Install driver and passenger kick panels onto
vehicle with hardware if equipped.
After Completing Installation
Engine Compartment
1. Connect both battery cables. Connect positive cable
first, then negative cable.
Miscellaneous
1. Check all fasteners to ensure they are tight.
2. Ensure all wires, hoses, cables, etc. are properly
connected and there is ample slack.
WARNING
Retorque all fasteners after 500 miles and after off road
use. All body lift components should be visually
inspected and fasteners retorqued during routine vehi-
cle servicing.
NOTE
All warranty information, instruction sheets, and other
documents regarding the installation of this product
must be retained by the vehicle owner. Information
contained in the instructions and on the warranty card
will be required for any warranty claims. The vehicle
owner needs to understand the modifications made to
the vehicle and how they affect vehicle handling and
performance. Failure to provide the customer with this
information can result in damage to the vehicle and
severe personal injury.
Kick Panels
Door Sills
Carpet