4 subnet-mask set up, Subnet-mask set up, Projector control – Barco CLM R10+ User Manual
Page 147
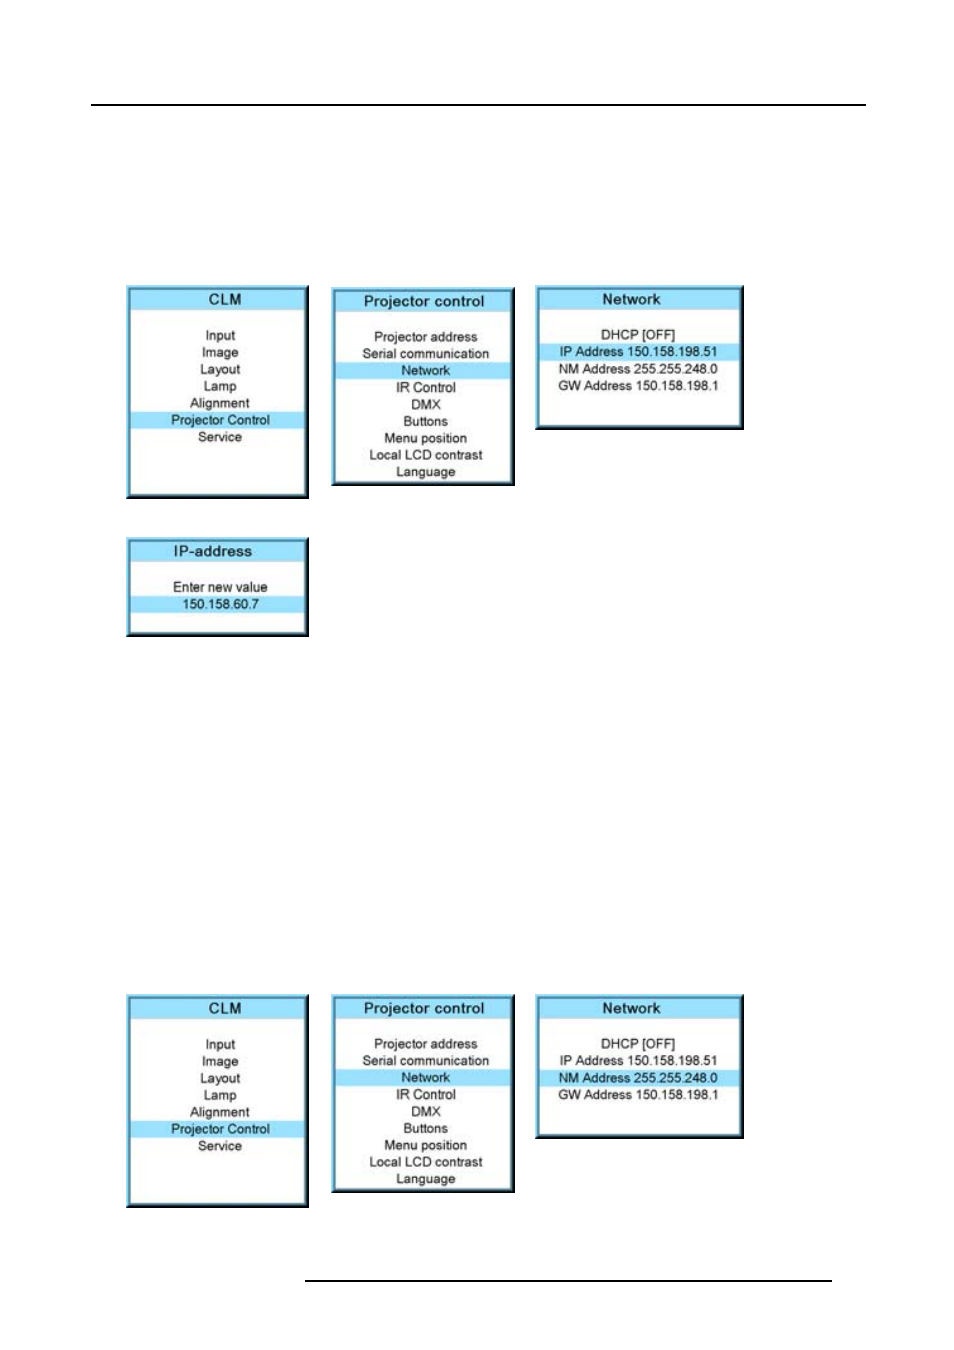
13. Projector control
4. Use the ▲ or ▼ key to select IP-address and press ENTER to select.
Note: An address contains 4 octets with a maximum value of 255.
This must NOT be 0.0.0.0 for static IP-Address assignment.
5. Use the ▲ or ▼ key to select the desired digit and press ◄ or ► key to select the next digit in the address.
Or,
enter the value with the digit keys on the remote control or local keypad. The next digit in the address will be selected automati-
cally.
6. Press EXIT to return. (image 13-21, image 13-22, image 13-23, image 13-24)
Image 13-21
Image 13-22
Image 13-23
Image 13-24
13.4.4 Subnet-mask set up
How to set up?
1. Press MENU to activate the menus.
2. Use the ▲ or ▼ key to select Projector control and press ENTER.
3. Use the ▲ or ▼ key to select Network and press ENTER.
The Ethernet menu opens.
4. Use the ▲ or ▼ key to select Subnet mask and press ENTER to select.
Note: An address contains 4 octets with a maximum value of 255.
Fill out the 4 fields as appropriate for the local subnet.
5. Use the ▲ or ▼ key to select the desired digit and press ◄ or ► key to select the next digit in the address.
Or,
enter the value with the digit keys on the remote control or local keypad. The next digit in the address will be selected automati-
cally.
6. Press EXIT to return. (image 13-25, image 13-26, image 13-27, image 13-28)
Image 13-25
Image 13-26
Image 13-27
R59770021 CLM R10+ 11/10/2010
143