3 lens adjustment, Lens adjustment, Alignment menu – Barco CLM R10+ User Manual
Page 123
12. Alignment menu
For more information about the physical installation, see chapter “General”, “Projector configurations”.
12.3 Lens adjustment
Quick way to enter the lens adjustment setting; press the lens button on the local keypad or the remote control.
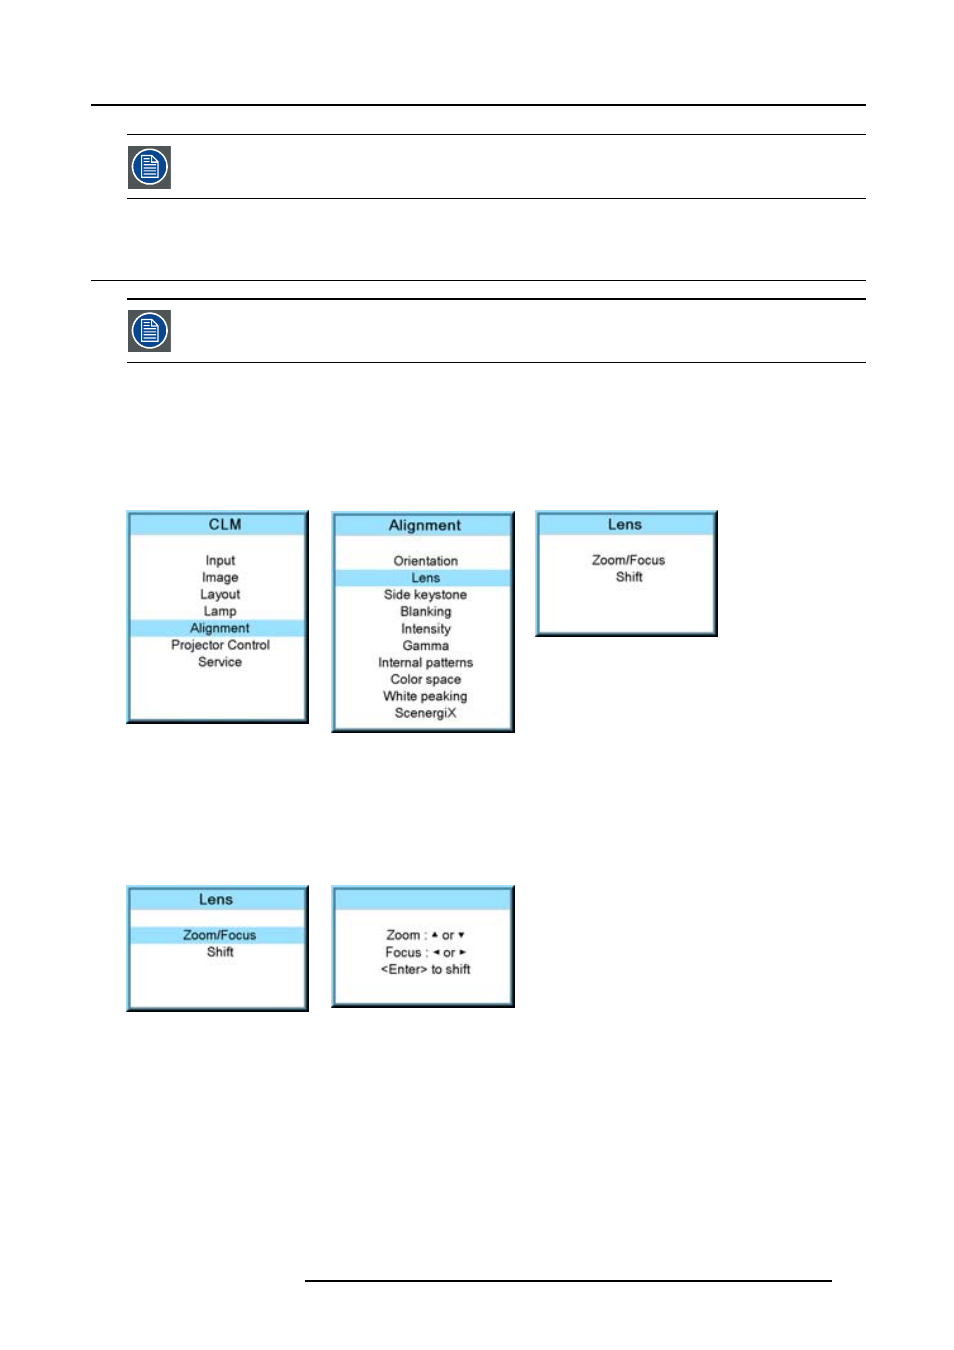
Access to the lens adjustments
1. Press MENU to activate the menus.
2. Use the ▲ or ▼ key to select Alignment and press ENTER.
3. Use the ▲ or ▼ key to select Lens and press ENTER.
The lens adjustment menu is displayed. (image 12-4, image 12-5, image 12-6)
Image 12-4
Image 12-5
Image 12-6
Zoom/focus the lens
1. Use the ▲ or ▼ key to select Zoom/Focus and press ENTER. (image 12-7, image 12-8)
2. Use the ▲ or ▼ key to zoom the lens.
Use the ◄ or ► key to focus the lens.
3. Press ENTER to go to the shift adjustments.
Image 12-7
Image 12-8
Lens shift
1. Use the ▲ or ▼ key to select Shift and press ENTER or when in the Zoom/Focus menu press ENTER to toggle to the Shift menu.
2. Use the ▲ or ▼ key to shift the lens upwards or downwards.
Use the ◄ or ► key to shift the lens to the left or to the right.
R59770021 CLM R10+ 11/10/2010
119