D. front panel and main door assemblies – American Dryer Corp. ADG-385 User Manual
Page 29
25
To Adjust Sail Switch
1. Operate the installed dryer normally to verify that the heat system is fully operational.
2. Open the main dryer door.
3. Manually depress the door switch actuator.
4. While continuing to depress the door switch actuator, and with the door open, start the dryer.
5. If the heat system is not activated in 15 seconds, the sail switch is properly adjusted.
6. If the heat system is activated, the sail switch is improperly adjusted and must be readjusted by bending
the actuator arm of the sail switch toward the front of the dryer. If the actuator arm is bent too far
toward the front of the dryer, the dryer may not have heat when needed. After any adjustments of the
sail switch, the above procedure must be repeated to verify proper operation.
CAUTION: DO NOT disable this switch by taping or screwing sail switch damper to burner.
PERSONAL INJURY or FIRE COULD RESULT.
D. Front Panel and Main Door Assemblies
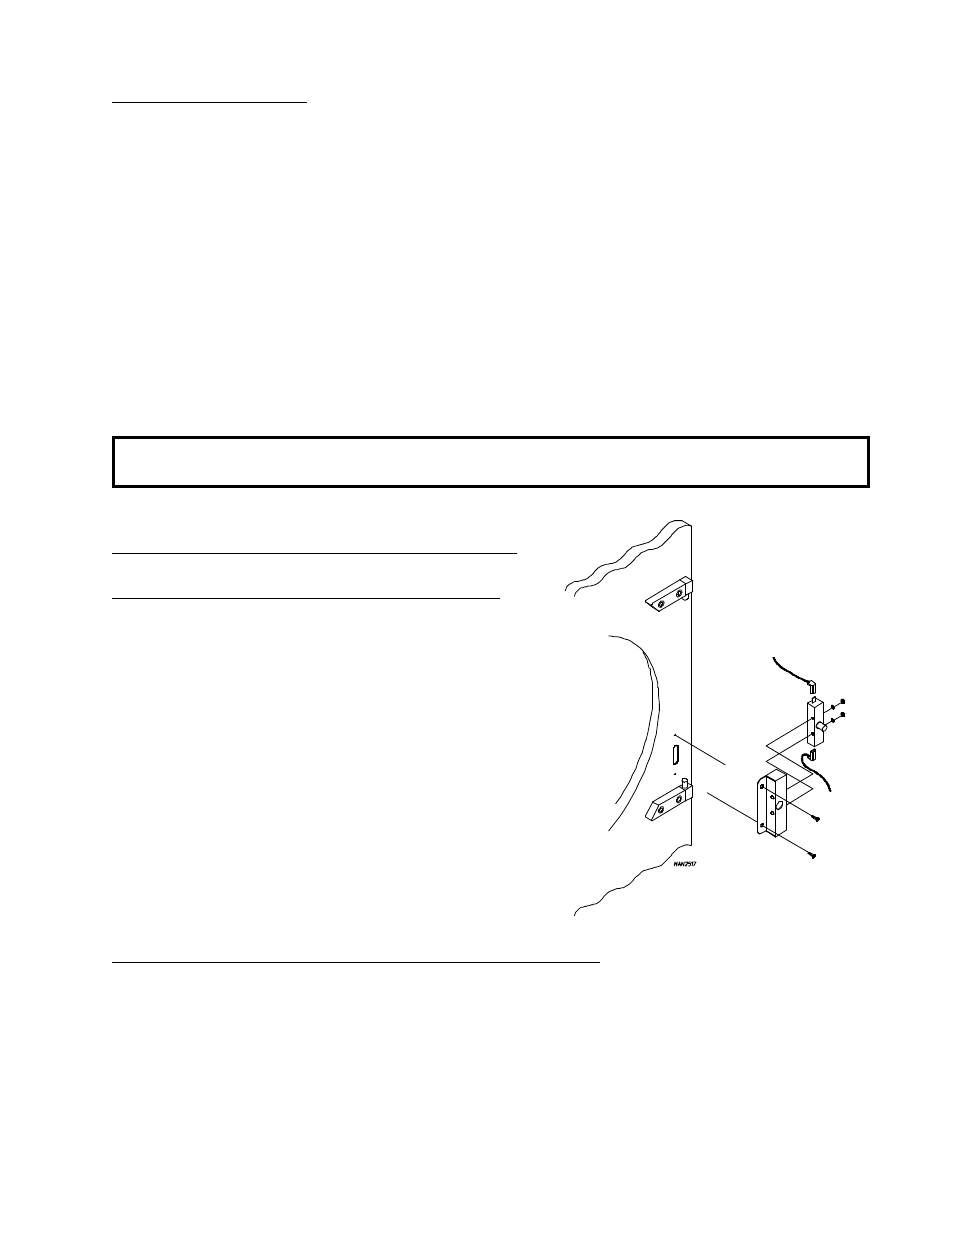
To Replace Main Door Switch (Steel Door)
1. Discontinue power to dryer.
2. Open main door.
3. Remove the two (2) Phillips head screws holding
the main door switch in place.
4. Disconnect the two (2) connectors from the door switch
5. Disassemble door switch bracket by removing the two
(2) nuts holding the door switch to the housing, and
remove the door switch.
6. Reverse this procedure for installing new door switch.
TO REPLACE MAIN DOOR ASSEMBLY (STEEL DOOR)
1. Discontinue power to the dryer,
2. Remove the two (2) top 3/16" Allen screws securing the top hinge pin to the front panel.
3. Remove the door from the dryer by lifting the door off the bottom hinge pin.
4. Remove the bottom hinge pin assembly from the front panel two (2) 3/16" Allen screws securing
the hinge pin to the front panel.