3 connecting to the vp-4x1cs via rs-232, 4 connecting to the vp-4x1cs via ethernet, Connecting to the vp-4x1cs via rs-232 – Kramer Electronics VP-4x1CS User Manual
Page 14: Connecting to the vp-4x1cs via ethernet, Figure 5: balanced stereo audio connection, Figure 6: unbalanced stereo audio connection, Section
VP-4x1CS - Connecting the VP-4x1CS 4x1 PC Graphics Clean Switcher
11
In
, the operation of Switches 1 and 4 select Inputs 1 and 4 respectively;
operation of Switch A mutes the output.
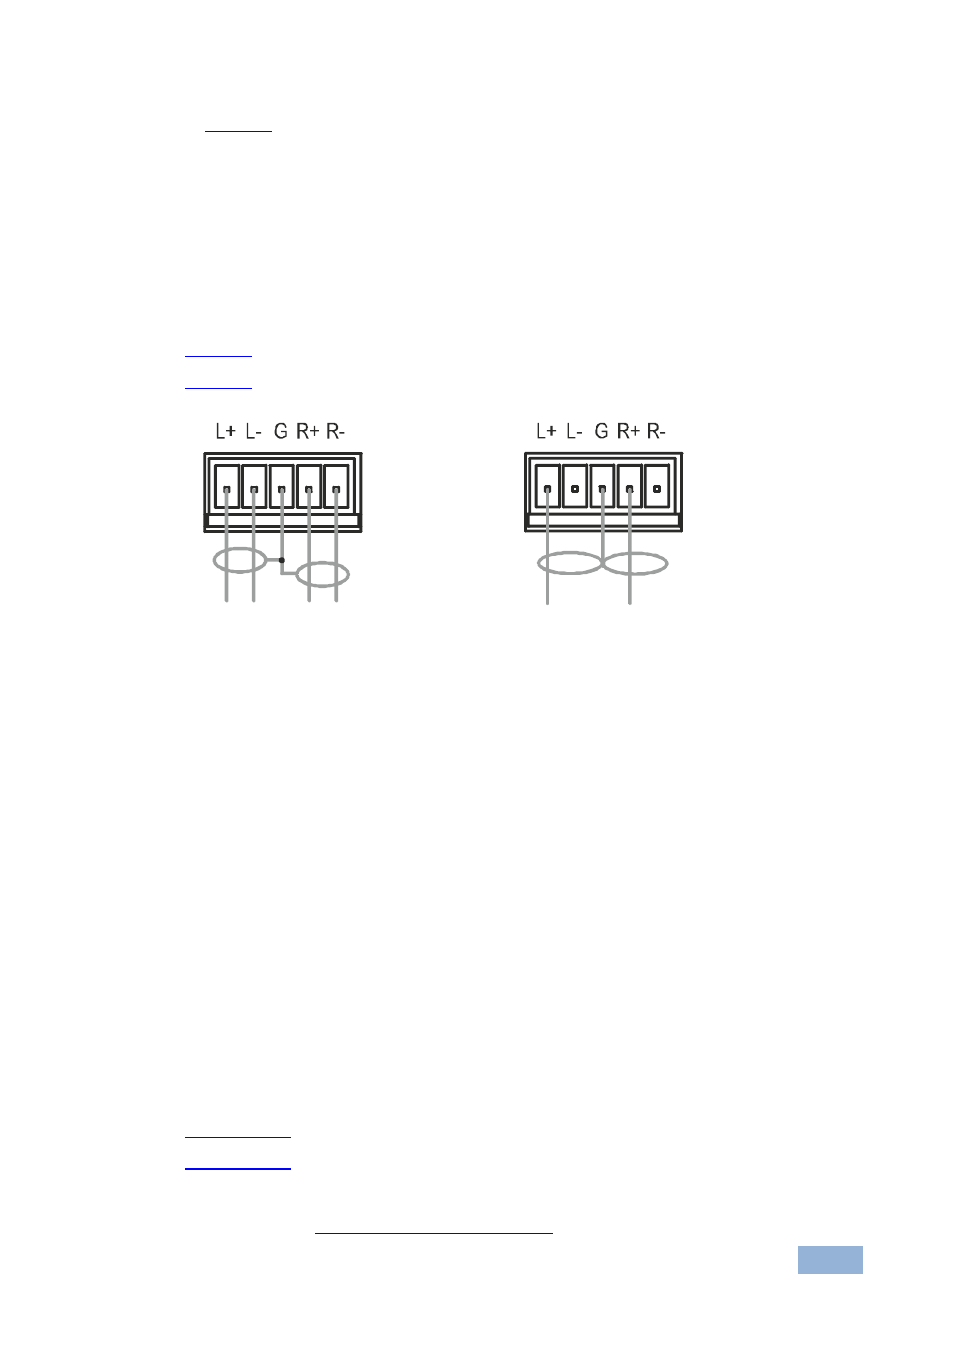
Note: Do not connect more than one terminal to ground at a time.
6.2
Connecting a Balanced/Unbalanced Stereo Audio
Output
illustrates how to wire a balanced, stereo, audio output connection.
illustrates how to wire an unbalanced, stereo, audio output connection.
Figure 5: Balanced Stereo
Audio Connection
Figure 6: Unbalanced Stereo
Audio Connection
6.3
Connecting to the VP-4x1CS via RS-232
You can connect to the VP-4x1CS via an RS-232 connection using, for example, a
PC. Note that a null-modem adapter/connection is not required.
To connect to the VP-4x1CS via RS-232:
Connect the RS-232 9-pin D-sub rear panel port on the VP-4x1CS unit via a
9-wire straight cable (only pin 2 to pin 2, pin 3 to pin 3, and pin 5 to pin 5
need to be connected) to the RS-232 9-pin D-sub port on your PC
6.4
Connecting to the VP-4x1CS via Ethernet
You can connect the VP-4x1CS via the Ethernet, using a crossover cable (see
) for direct connection to the PC or a straight through cable (see
) for connection via a network hub or network router.
After connecting the Ethernet port, you have to install and configure your Ethernet Port. For
detailed instructions, see the “Ethernet Configuration (FC-11) guide.pdf” file in the technical
support section at