1 recomendations for installation, 2 battery power supply, 1 replacing the internal battery – NOVUS RHT-Air User Manual
Page 3: 6 configuration / operation
RHT-Air
NOVUS AUTOMATION
3/8
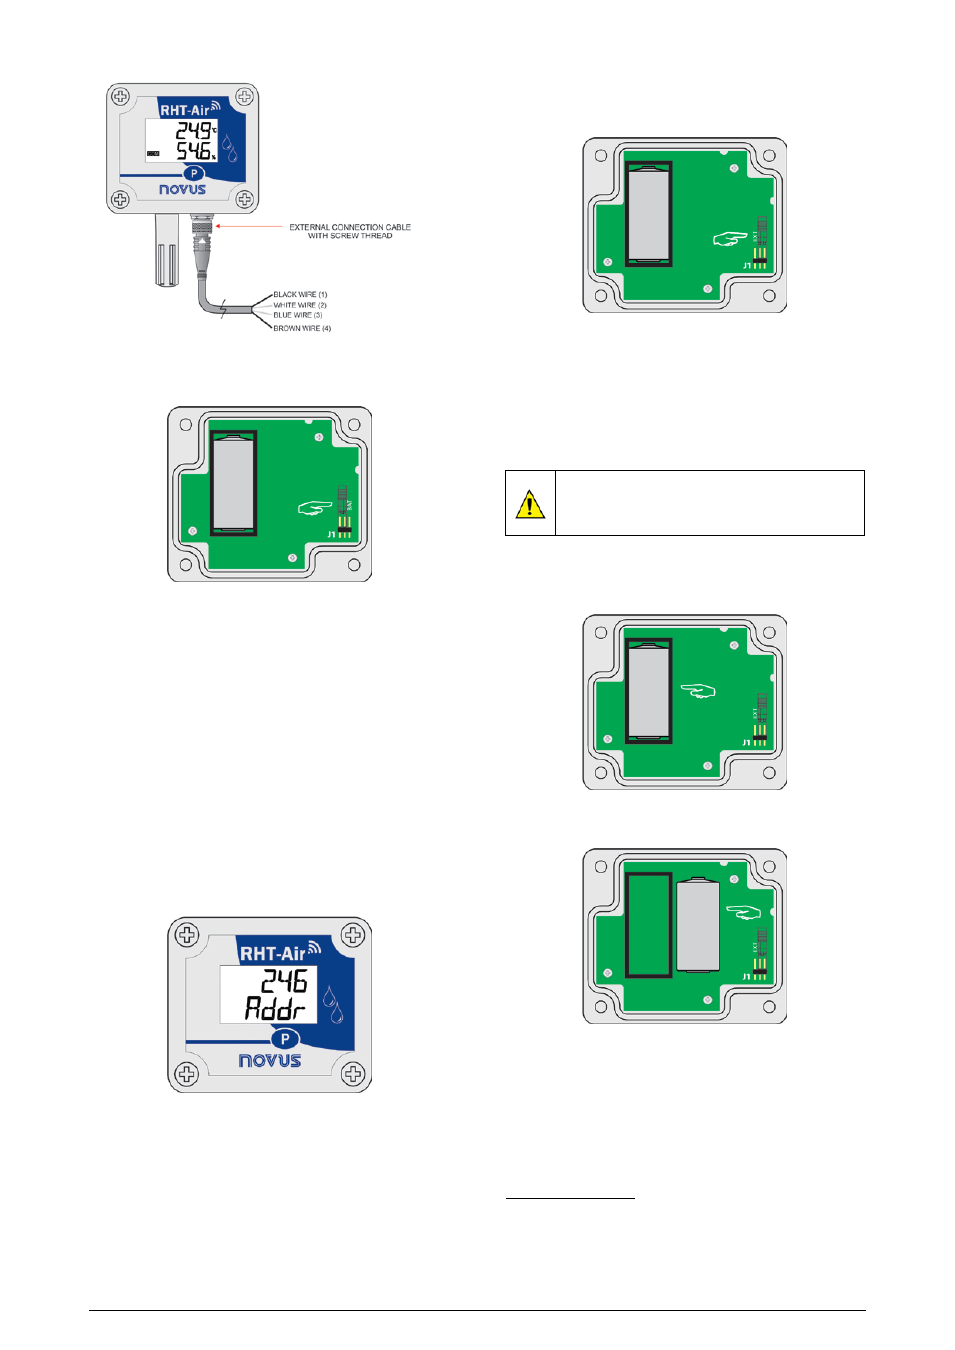
Fig. 6 - Electrical wiring
• RHT-Air is manufactured with the jumper (J1) set in the position “EXT”
for external power supply.
5.1.1 RECOMENDATIONS FOR INSTALLATION
• Conductors of small electric signals must be separated from activation
conductors or higher current or power in the system’s plan, if possible in
grounded electroducts.
• The instrument’s supply must come from a network proper for
instrumentation.
• In control and monitoring applications, it is essential to consider what
may happen when any part of the system fails.
• The use of RC FILTERS (47 Ω and 100 nF, series) in parallel with
contactor and solenoid coils, etc. is recommended.
5.2 BATTERY POWER SUPPLY
RHT-Air can be supplied by an internal battery whenever the equipment is
not energized by the electrical grid. Below are guidelines on how to proceed
for supplying power with a battery:
• Remove the four set screws of the front panel of the equipment RHT-Air,
taking the necessary precaution not to apply force on the internal connector
of the electronic circuit.
• After removing the front panel, change the position of the jumper (J1) to
“BAT” so that it can be supplied through the battery. Replace the front
panel, by placing the four set screws, taking the necessary precaution
not to apply force on the internal connector of the electronic circuit.
5.2.1 REPLACING THE INTERNAL BATTERY
It is possible to check the battery’s charge through register “29”. A fully charged
battery typically has a power above 3.6 V. As you use the RHT-Air, the power
of the battery will gradually decrease. It is recommended that you check the
value of registry “29" regularly so that when it reaches below 3.3 V, the battery
can be replaced.
Note: Even when the power is below 100 %, the equipment will operate
normally.
Only suitable replacement battery for this product is:
MANUFACTURER: OMNICELL
MODEL: ER14250HD
• Remove the four set screws of the front panel, taking the necessary
precaution not to apply force on the internal connector of the electronic
circuit. After removing the front panel, replace the battery, taking the
necessary precaution not to touch the electronic circuit.
• Insert a new battery and replace the front panel carefully, placing the
four molding screws.
6 CONFIGURATION / OPERATION
The application DigiConfig is a Windows® software used for configuring
RHT-Air. In order to install it, please run the file “DigiConfigSetup.exe” from
the CD that comes with the equipment and follow the instructions therein.
DigiConfig comes with an unabridged help tutorial, containing all the
necessary information for you to use it. If you want to use help tutorial, start
the application and select the "Help” menu or press "F1".
If you do not have the CD that comes with the equipment, go to
to get the DigiConfig installer and the additional
manual guides.
Users will receive the fully calibrated adjustment-free equipment. The original
configuration is shown below:
Addr
(Communication address) = 246
Time (Update interval) = 60