Light distribution table, Socket adjusting option (for aj flat lens) – American Electric Lighting 315 2bolt User Manual
Page 2
American Electric Lighting a division of Acuity Lighting Group, Inc. Conyers, GA
DRAWING NO. B64877 REV E
(BACK)
©2003 ACUITY LIGHTING GROUP, INC.
PART NUMBER 058-71-64877
LAMP INSTALLATION AND SERVICING:
Open the door to the lamp compartment by pulling forward on the latch
located at the front of the luminaire. Lower the door slowly and let it
hang from its hinges. It should not be allowed to drop free and swing.
Install a lamp of the proper type and wattage.
To close the door swing it up into position and press firmly upward until
latch snaps into position. NOTE: IT IS NEVER NECESSARY OR
ADVISABLE TO SLAM THE HOUSING CLOSED!
MAINTENANCE AND CLEANING:
The optical assembly should be cleaned with a mild detergent and rinsed
with clean water to maintain efficiency of the luminaire.
REFRACTOR REPLACEMENT:
Open the lower door. Rotate the refractor clip enough to allow the
release of the refractor or the lens being careful to support the refractor
at all times. The front end can easily be slipped out of the cast-in
retainers. Remove refractor and clean or replace as desired.
REFLECTOR REMOVAL:
FIXTURES WITH POWER-PAD: Disconnect the electrical connector in
the socket leads.
Remove the mounting screw in the top center of the reflector and slide
the reflector forward and down off of the socket. Reverse this procedure
to replace the reflector.
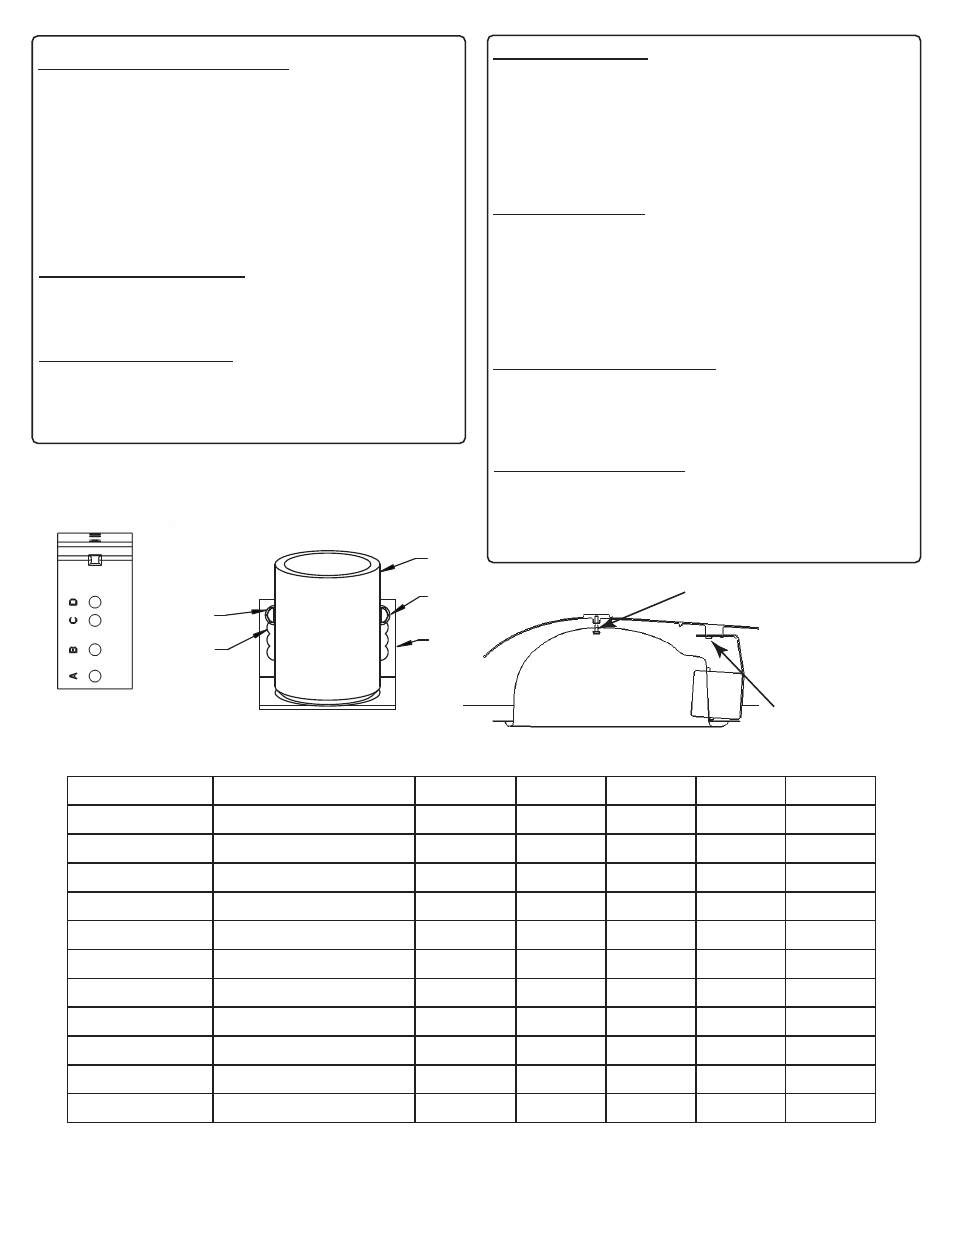
SOCKET ADJUSTMENT:
Refer to the chart in these instructions for the required socket positions.
Remove the reflector. To adjust the horizontal position, remove the
screw holding the socket bracket. Move the bracket forward or back to
line up A, B, C, or D with the mounting hole for the desired position.
Replace the screw and tighten it securely. The vertical position is factory
set and is not field adjustable.
REMOVAL OF REFRACTOR DOOR:
FIXTURES WITH POWER PAD: To remove the refractor door, the
power-pad door must be opened first. It is not necessary to remove the
power-pad door to remove the refractor door.
OPTIONAL PHOTOCONTROL:
Loosen the receptacle clamping screw. Rotate the receptacle so that
the arrow on the top points North. Tighten the clamping screw. Plug the
photocontrol into the receptacle and twist it clockwise until it locks into
position
UNLESS SPECIFIED OTHERWISE, SOCKET SETTINGS AT THE FACTORY ARE ADJUSTED FOR CLEAR LAMPS.
S = Short M = Medium SC - Semi-Cutoff C = Cutoff NC = Non-Cutoff
I = Type I II = Type II III = Type III *Vertical Socket Setting is pre-set at the factory and is not field adjustable.
**Painted Reflector Only.
LENS
LIGHT SOURCE
PATTERN*
D
C
B
A
ACRYLIC
(POLYCARBONATE)
100-250W CLEAR MERCURY
METAL HALIDE
UP (1)
DOWN (2)
----
II-M-SC
ACRYLIC
ACRYLIC
(POLYCARBONATE)
----
II-M-SC
UP (1)
DOWN (2)
UP (1)
DOWN (2)
UP (1)
DOWN (2)
UP (1)
DOWN (2)
UP (1)
DOWN (2)
UP (1)
DOWN (2)
UP (1)
DOWN (2)
UP (1)
DOWN (2)
UP (1)
DOWN (2)
UP (1)
DOWN (2)
POLYCARBONATE
GLASS (PRISMATIC)
GLASS (FLAT)
GLASS (PRISMATIC)
GLASS (PRISMATIC)
GLASS II-2-4 WAY
GLASS (FLAT)
GLASS II-2-4 WAY
100-175W DELUXE MERCURY
METAL HALIDE
100-250W CLEAR MERCURY
METAL HALIDE
50-150W HPS
100-250W CLEAR MERCURY
50-150W HPS
50-150W CLEAR HPS
50-150W CLEAR HPS
200-250W CLEAR HPS
200-250W CLEAR HPS
200-250W HPS
200-250W HPS
----
II-M-SC
----
II-M-C
----
II-M-SC
II-S-C
II-S-SC
----
----
----
----
----
----
----
----
----
----
----
----
----
----
----
----
----
----
----
----
----
----
----
----
----
----
----
----
----
----
----
----
----
----
----
II-M-SC
----
II-M-SC
----
II-M-C
----
----
----
----
----
----
----
II-4 WAY SC
----
III-M-SC
II-S-C
III-M-C
----
II-S-C
----
----
----
III-M-C **
----
III-S-SC
----
----
II-S-SC
III-M-SC
----
----
----
----
III-S-C
III-M-SC
----
III-M-SC
II-S-SC
III-M-SC
----
III-S-SC
SOCKET
BRACKET
REFLECTOR
MOUNTING
SCREW
SOCKET
BRACKET
SCREW
LIGHT DISTRIBUTION TABLE
A. LOOSEN SCREWS ON SOCKET BRACKET.
B. MOVE BRACKET TO DESIRED POSITION.
C. TIGHTEN SCREWS.
SOCKET
SCREW
SOCKET
BRACKET
TYPE II
MEDIUM CUTOFF
TYPE III
MEDIUM CUTOFF
SOCKET ADJUSTING OPTION
(FOR AJ FLAT LENS)
*NOTE: VERTICAL SOCKET SETTING IS SET AT
THE FACTORY AND IS NOT FIELD ADJUSTABLE.