American Electric Lighting ASA User Manual
Warning, Caution
INSTALLATION & MAINTENANCE INSTRUCTIONS
AREA LIGHT ASA SERIES
American Electric Lighting a division of Acuity Lighting Group, Inc. Conyers, GA
DRAWING NO. A67853 REV -
(FRONT)
©2005 ACUITY LIGHTING GROUP, INC.
PART NUMBER 057-70-67853
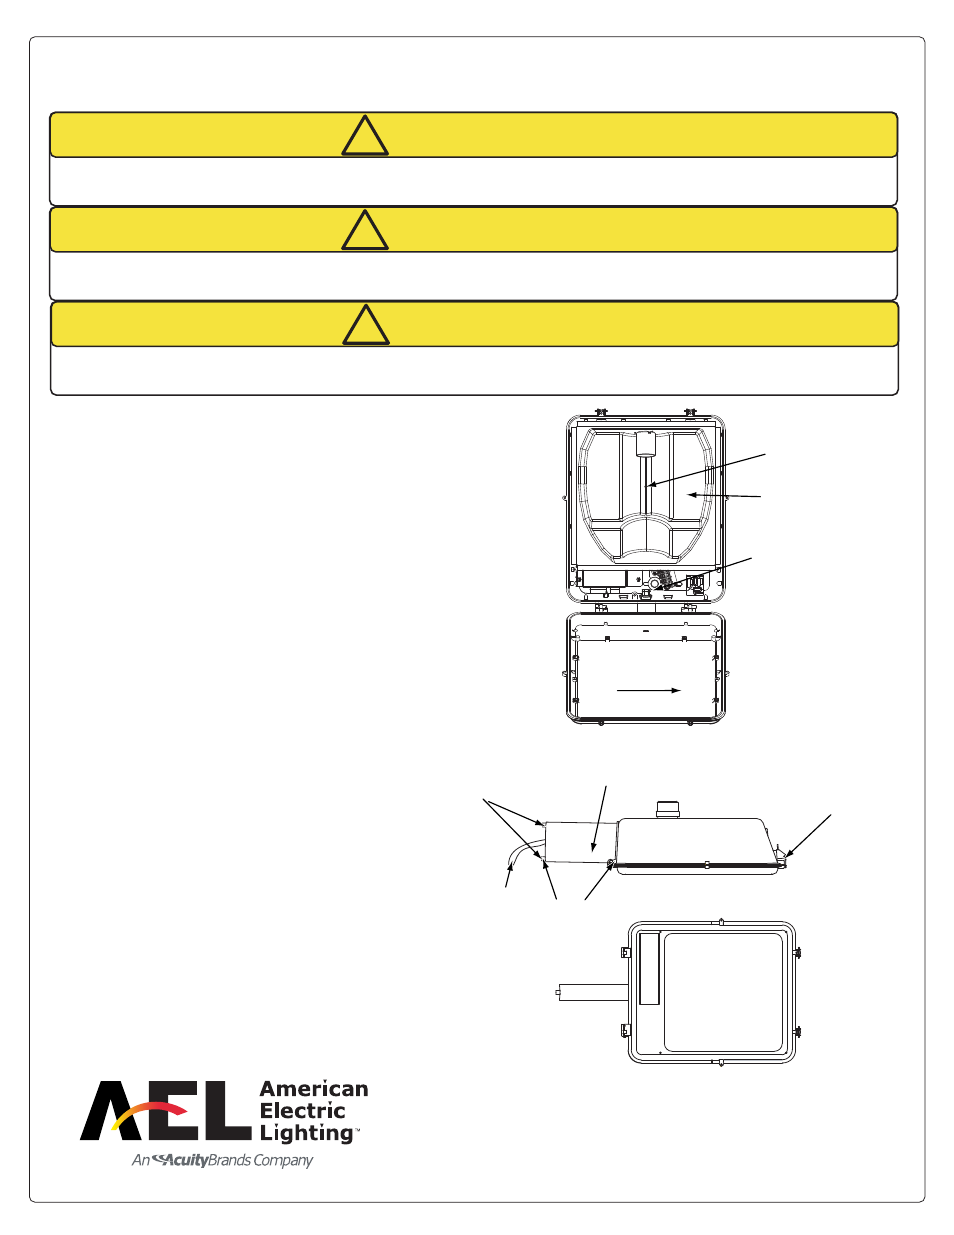
1.Loosen the four captive screws or optional latches in the door assembly
allowing it to open and hang from the hinge pins. The door assembly can be
removed by rotating it back and sliding the door to the right, off the hinge pins.
The optional hingekeeper will have to be removed if installed. See Fig. 1.
2.Loosen the screws securing the reflector to the housing. Unplug
the disconnect circuit and remove the reflector/socket assembly.
The electrical components will now be exposed
3. TO POLE MOUNT- Remove top cap from the pole, if in place.
Position mounting plate inside the pole or tenon adaptor. Insert
the two threaded rods through the drilled hole in pole and turn
rods to thread securely into mounting plate.
FOR WALL MOUNT- Place mounting plate on mounting surface.
Mark top, middle and bottom holes of the plate (see diagram) .
Remove mounting plate and drill 5/8" hole at marked locations
(minimum of 3/4" to accept fixture mounting rods). Secure
mounting plate to mounting surface (fasteners not provided) using
second and fourth holes. Insert the two threaded fixture mounting
rods into mounting plate and turn to secure.
4. Slide gasket over rods and position against pole. Slide arm
over rods and place second gasket at end of arm. Position housing
at end of arm and align holes with threaded rods. Insert into holes.
Install split washer and nut to each rod and tighten securely. Be
sure fixture is mounted straight and gaskets are in place. Feed wires
from electrical components through arm and make wire connections
in outlet box or pole. Replace pole top cap or coverplate. Reinstall
the reflector assembly. Be sure to securely reconnect the plug at this time.
5. To install lamp (not included) , check to make sure the lamp is
the corrrect source and wattage. Screw the lamp securely into the
socket, back it out one or two turns , then screw the lamp back in,
making sure the lamp is secure. This procedure properly seats the
lamp into the socket.
6. Reinstall door, if removed, and close. Secure with the four closing screws or latches.
Assembly, Mounting and Wiring
WARNING
DISCONNECT POWER BEFORE RELAMPING OR WIRING THE FIXTURE.
READ ALL INSTRUCTIONS COMPLETELY BEFORE STARTING INSTALLATION.
!
CAUTION
TO AVOID THE RISK OF FIRE OR SHOCK, FIXTURE MUST BE INSTALLED IN COMPLIANCE WITH ALL APPLICABLE NATIONAL
AND LOCAL ELECTRICAL/BUILDING CODES. FOR CODE INTERPRETATION, CONSULT LOCAL CODE AUTHORITY.
!
WARNING
RISK OF FIRE. PRODUCT FOR OUTDOOR INSTALLATION AND USE ONLY.
!
THREADED RODS
ARM
OPTIONAL LATCHES
NUTS AND WASHERS
REFLECTOR ASSY
REFLECTOR SCREW
GASKETS
Slide Bezel this
way to remove
Fig. 1
WIRES