Caution, Remove lower door assembly, Refractor/gasket replacement – American Electric Lighting 20 new User Manual
Page 2: Cleaning & maintenance, Socket adjustment, Photometric type, Access to lamp compartment
American Electric Lighting a division of Acuity Lighting Group, Inc. Conyers, GA
DRAWING NO. B62046 REV F
(BACK)
©2003 ACUITY LIGHTING GROUP, INC.
PART NUMBER 057-70-62046
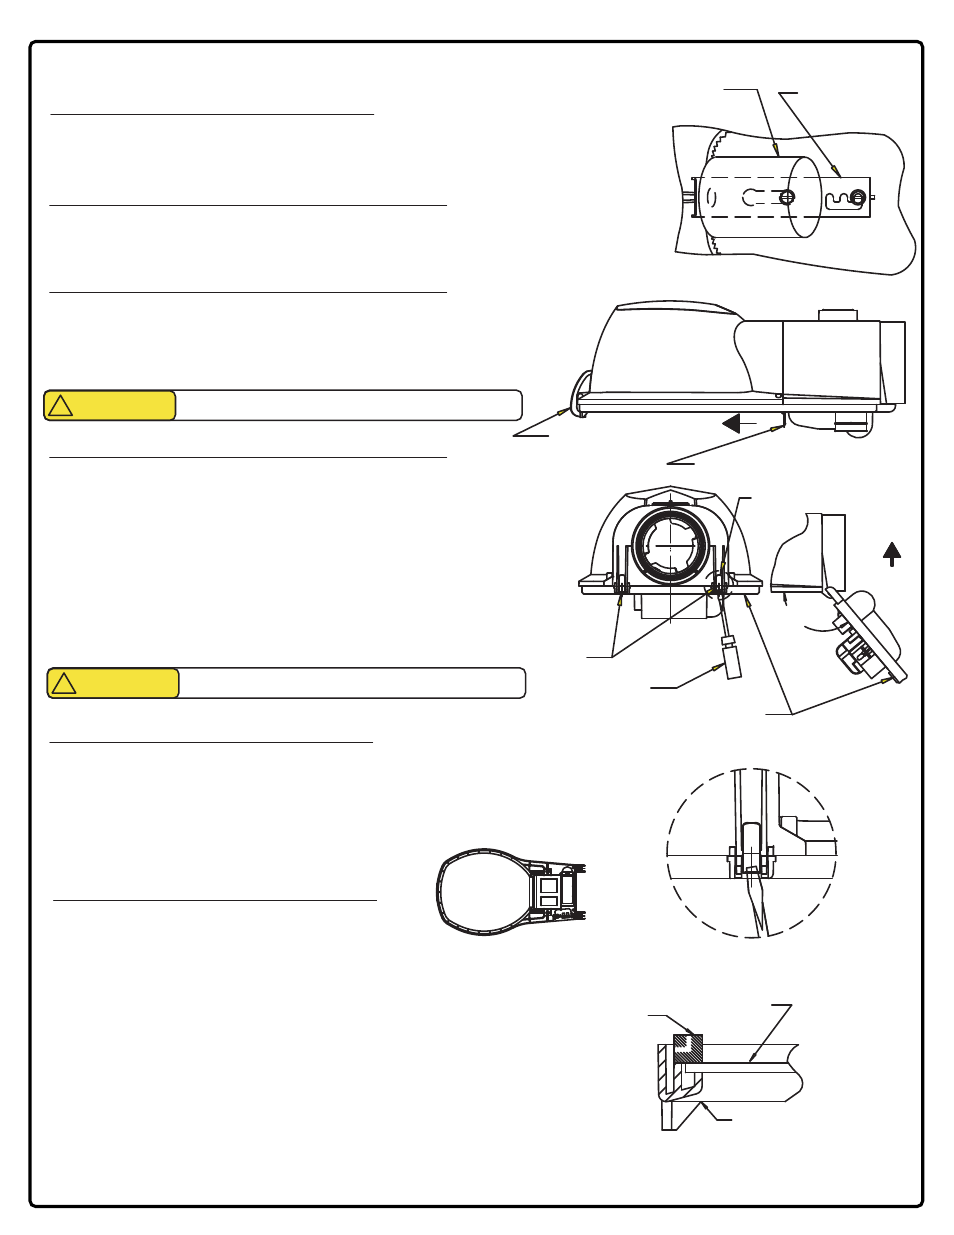
CAUTION
ENSURE THAT THE BALLAST COMPARTMENT
LATCH IS ENGAGED WHEN THE DOOR IS CLOSED
!
Screwdriver
Hingekeeper
Lower Door Assembly
Optical
Assembly
Lower Door Assembly
Remove optional hingekeepers using screwdriver. Place end
of screwdriver between hingekeeper and luminaire housing.
With a slight prying action hingekeeper will disengage.
Hingekeeper should be retained for replacement on a new
door assembly. Open Lower door assembly by releasing front
toggle latch and pulling forward on ballast compartment
latch. Ballast compartment latch should be in place and
engaged on all units with ballasts weighing 7lbs or more.
This is to make the installer/servicer aware of the
additional weight of the door assembly. Disconnect
wiring harness. Rotate lower door assembly about 130°
and lift from upper housing.
Remove Lower Door Assembly:
Ballast Compartment Latch
Toggle Latch
Open lower door assembly by releasing front toggle latch and
pulling forward on ballast compartment latch. Ballast compartment
latch should be in place and engaged on all units with ballast
weighing 7 lbs. or more. This is to make the installer/servicer
aware of the additional weight of the door.
C
B
A
Gasket
Lower Door
Refractor
Refractor/Gasket Replacement:
The replacement lens and gasket are sold as an
assembly. Open the fixture door and lower
carefully. Remove the old lens and gasket.
Remove the gasket backing from the new refractor/gasket
assembly. Place assembly in the door and apply pressure
with your thumb to the gasket around the
refractor to seal. Close the door and secure
the latch. Note, the gasket is attached to the
lens at the factory.
Cleaning & Maintenance:
The optical assembly can be cleaned with a soft, clean,
dry cotton cloth. Starter and photo control may be
maintained from the outside of luminaire without
tools. Lower door assembly may be removed and replaced
in the field with a replacement door assembly ordered
from Thomas and Betts.
Socket Adjustment:
Refer to Photometric Type and Distribution Chart for settings.
Loosen socket bracket screw, rotate bracket counter clockwise,
slide to new position, rotate back into slot, tighten to 12-14 in. lbs.
Photometric Type:
7
8 9
NOTE: Socket settings are for clear lamps only.
Socket
Socket Bracket
Type II Medium Cutoff Socket position is "C"
Type III Medium Cutoff Socket position is "B"
Access To Lamp Compartment:
See Hingekeeper Detail
Hingekeeper Detail
130í REF
CAUTION
ENSURE THAT THE BALLAST COMPARTMENT
LATCH IS ENGAGED WHEN THE DOOR IS CLOSED
!