Atbs series, Luminaires – American Electric Lighting Autobahn ATBS User Manual
Page 3
ATBS
SERIES
Installation and
LUMINAIRES
Maintenance
Manual
IM-367-A
INTRODUCTION
Product Description
The ATBS Series luminaires have been listed to
applicable U.S. & Canadian safety standards CSA. They
are suitable for use in wet locations and ambient
temperatures up to 40°C.
This device complies with Part 15 of the FCC Rules.
Operation is subject to the following two conditions: (1)
this device may not cause harmful interference, and (2)
this device must accept any interference received,
including interference that may cause undesired
operation.
INSTALLATION
Tools and Materials Required
Description
Use
9/16” Hex Wrench
Fitter bolts
Flat Head Screwdriver
Terminal Block
Torque Wrench (ft.-lbs.)
Fitter Bolts
#2 Philips Head Screwdriver
Photocontrol Receptacle
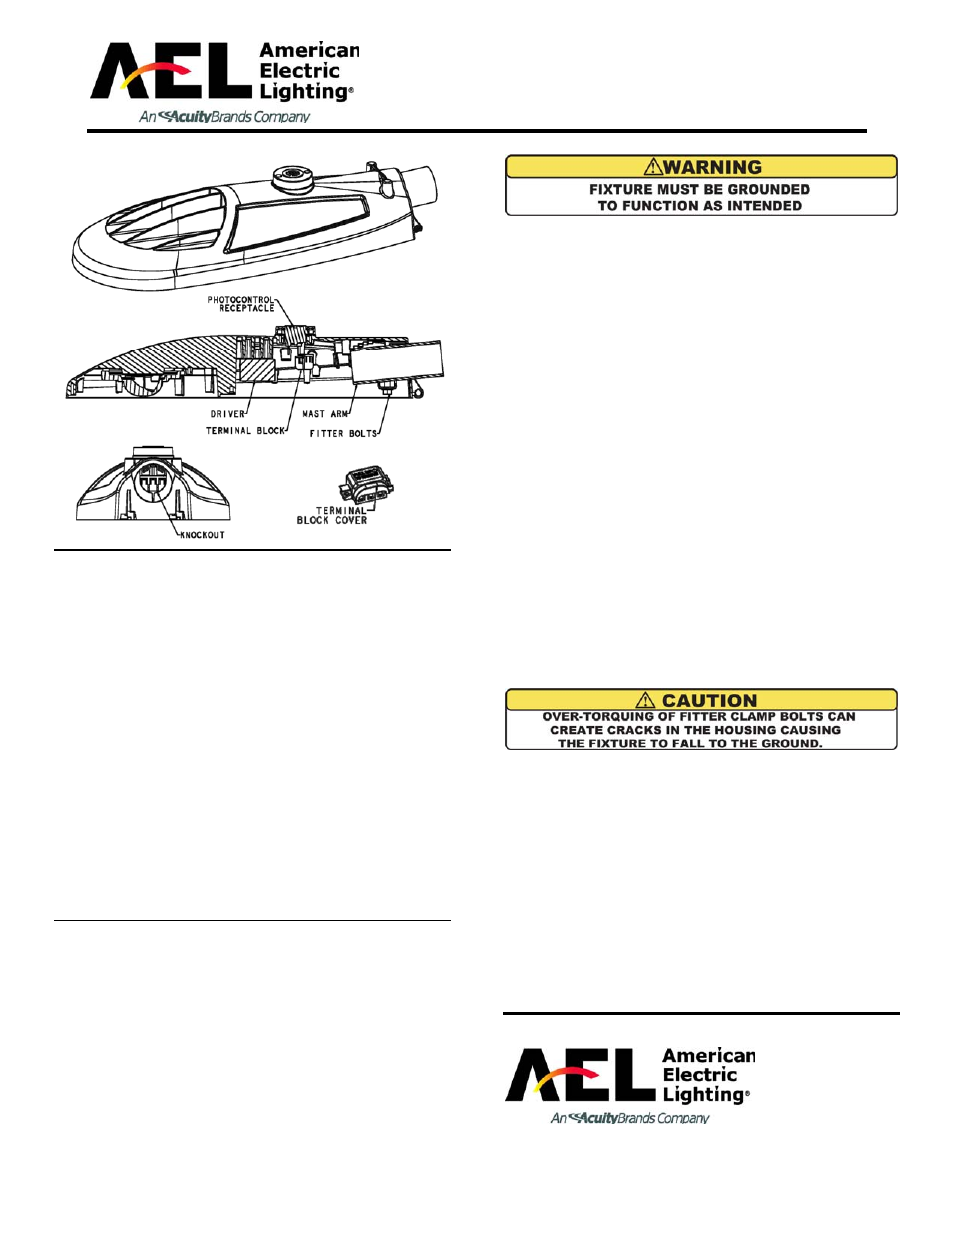
WIRING:
Pull up the terminal block cover (optional). Feed the
supply wires through the mast arm, dress them so they
do not interfere with any components and so they will not
be pinched in the door, and connect them to the proper
terminals on the terminal block. Verify the supply voltage
is correct as noted on the nameplate label. Push down
the terminal block cover to keep terminals covered.
Terminal Block:
Recommended terminal block screw torque: 35 IN-LBS
Mounting / Leveling:
Determine the size of the mast arm. This luminaire is
designed to accommodate a mast arm from 1-1/4” to 2”
diameter. The luminaire is factory set to mount to the 1-
1/4” arm. To mount to a 2” arm, a modification is
required.
The rear opening must be enlarged. Knockouts are cast-
in around the rear opening for this purpose. To remove
this excess material, strike with a hammer or grasp with
pliers and break off.
Standard Mounting:
Loosen (DO NOT REMOVE) the fitter bolts. Lift the
luminaire into position in front of the mast arm such that
the mast arm enters through the opening at the rear of
the luminaire housing. Level luminaire using internal
bubble level and tighten fitter bolts.
Recommended fitter bolt torque: 10-12 FT-LBS
Optional Photocontrol:
Plug the photocontrol into the receptacle ensuring
gasket is firmly seated. Twist clockwise until it locks into
position.
If Photocontrol Receptacle rotation is required, loosen
the two Philips head receptacle screws completely.
Rotate receptacle 90°, 180° or 270°, then re-tighten
screws until snug, using 20-25 IN-LBS of torque.
Warranty:
Five-year limited warranty. Full warranty terms located at
http://www.acuitybrands.com/customerresources/terms_
and_conditions.aspx
©2014 Acuity Lighting Group, Inc.