Swiftech H20 120 PREMIUM User Manual
Page 7
Copyright Swiftech 2005 – All rights reserved – Last revision date: 09-22-06 - Information subject to change without notice – URL:
http://www.swiftnets.com
Rouchon Industries, Inc., dba Swiftech – 1703 E. 28
th
Street, Signal Hill, CA 90755 – Tel. 562-595-8009 – Fax 562-595-8769 - E Mail: [email protected]
PAGE 7 of 26
External radiator installation using the “Radbox”
PCI pass-thru Installation
Make sure to insert your fan electrical connector through the slotted hole of the PCI bracket before you install the tubing. Only 3-pin connectors (the
type that connect to the motherboard) are small enough to pass through the slotted hole. 4-pin Molex connectors (the type that connect to your
power supply) will require that the terminals be removed from the Molex housing first.
Radbox
Installation
Place the radiator assembly on the back of the computer to roughly estimate where it will fit best. You need to consider the following clearance
issues:
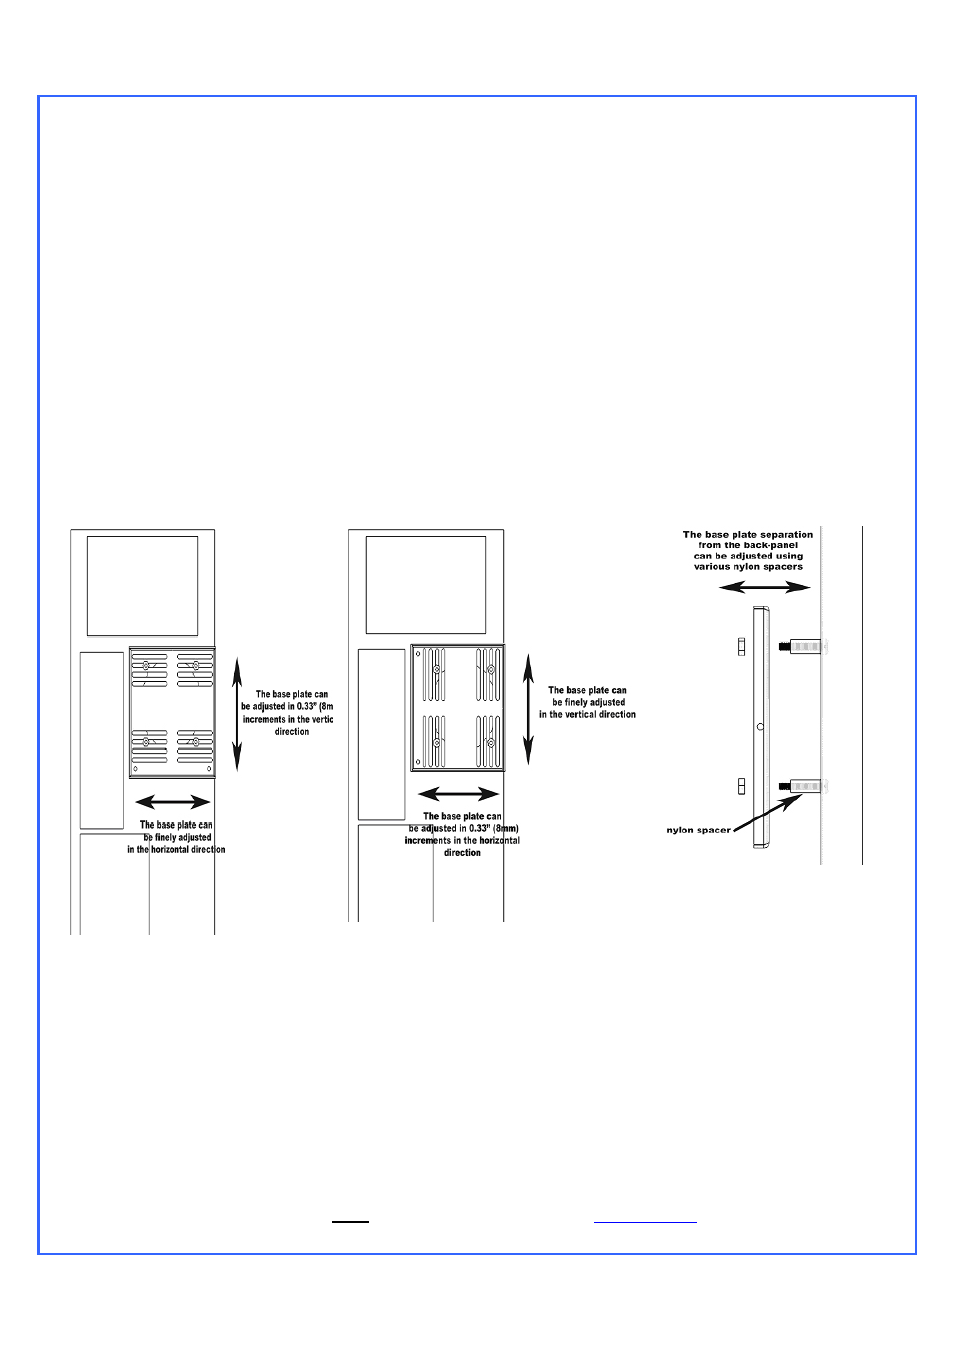
1. Exit cables and connectors from various PCI devices: the Radbox base plate can be moved in both vertical and horizontal directions to allow
clearance for the cables.
2. Opening the side panel once the Radbox is installed: the Radbox is supplied with various nylon spacers to separate the base plate from the
surface of the back-panel and to provide clearance for opening of the side-panel (see Fig.3)
Note that a chassis with 80mm fan opening(s) is likely to provide a very good range of adjustments. Conversely, a chassis featuring a single 120mm
fan opening the base-plate is a direct bolt on, but offers no adjustments, which may or may not suit your installation for the purpose of positioning the
radiator. In that case, it will be become necessary to drill (4) mounting holes of 0.150” (~3.5mm) in diameter to install the base plate at the desired
location.
A.
Securing the base plate at the desired location: