Installing the switch in a rack – Allied Telesis AT-8288XL/SC User Manual
Page 36
Installation
36
Installing the Switch in a Rack
To install the Ethernet switch in a standard 19-inch rack, perform the
following steps:
1. Remove all components from the shipping package and store the
packaging material in a safe location.
2. To prepare the switch, place it on a level, secure surface.
3. If you purchased an expansion module for the switch, install the
module by following the instructions in the section ‘Installing an
Expansion Module’ on page 38.
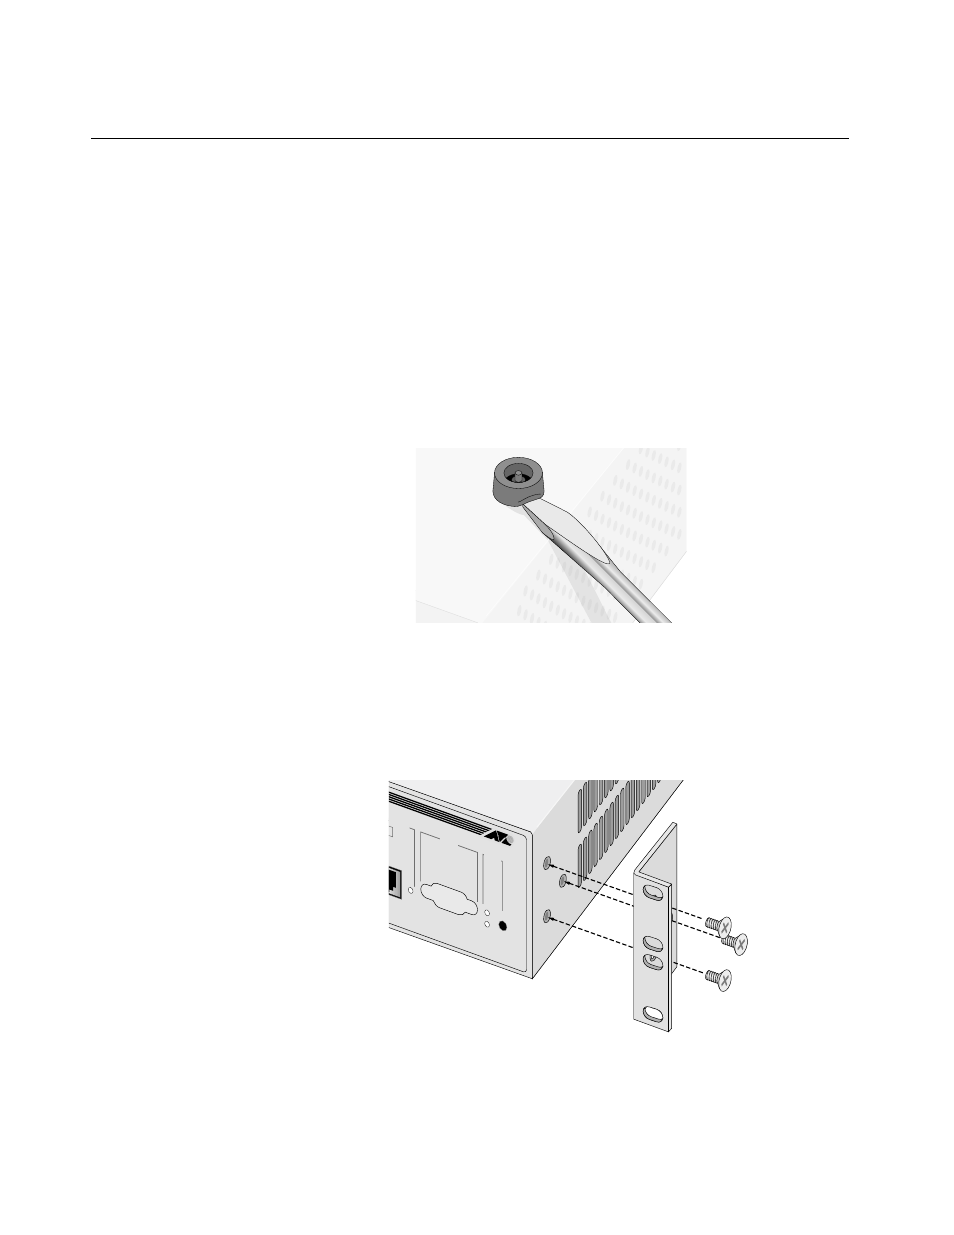
4. Remove the snap-on plastic feet from the bottom of the switch, as
shown in Figure 13.
Figure 13 Removing the Feet
5. Attach the rackmounting brackets to each side of the switch, using
the six flathead screws that came in the switch package as shown in
Figure 14.
Figure 14 Attaching Rackmounting Brackets
R POR
T
RS-232
TERMINAL POR
T
STATUS
RESET
FAUL
T
POWER