Installing the switch on a concrete wall – Allied Telesis x310 Series User Manual
Page 82
Chapter 4: Installing the Switch on a Wall
82
Installing the
Switch on a
Concrete Wall
To install the AT-x310-26FP, AT-x310-50FT, or AT-x310-50FP Switch on
a concrete wall, perform the following procedure:
1. Perform steps 1 to 3 in “Installing the Switch in an Equipment Rack” on
page 60 to remove the rubber feet from the bottom of the switch.
2. Install the two brackets diagonally across from each other on the sides
of the switch, with the eight bracket screws included with the device.
Refer to Figure 36 on page 80.
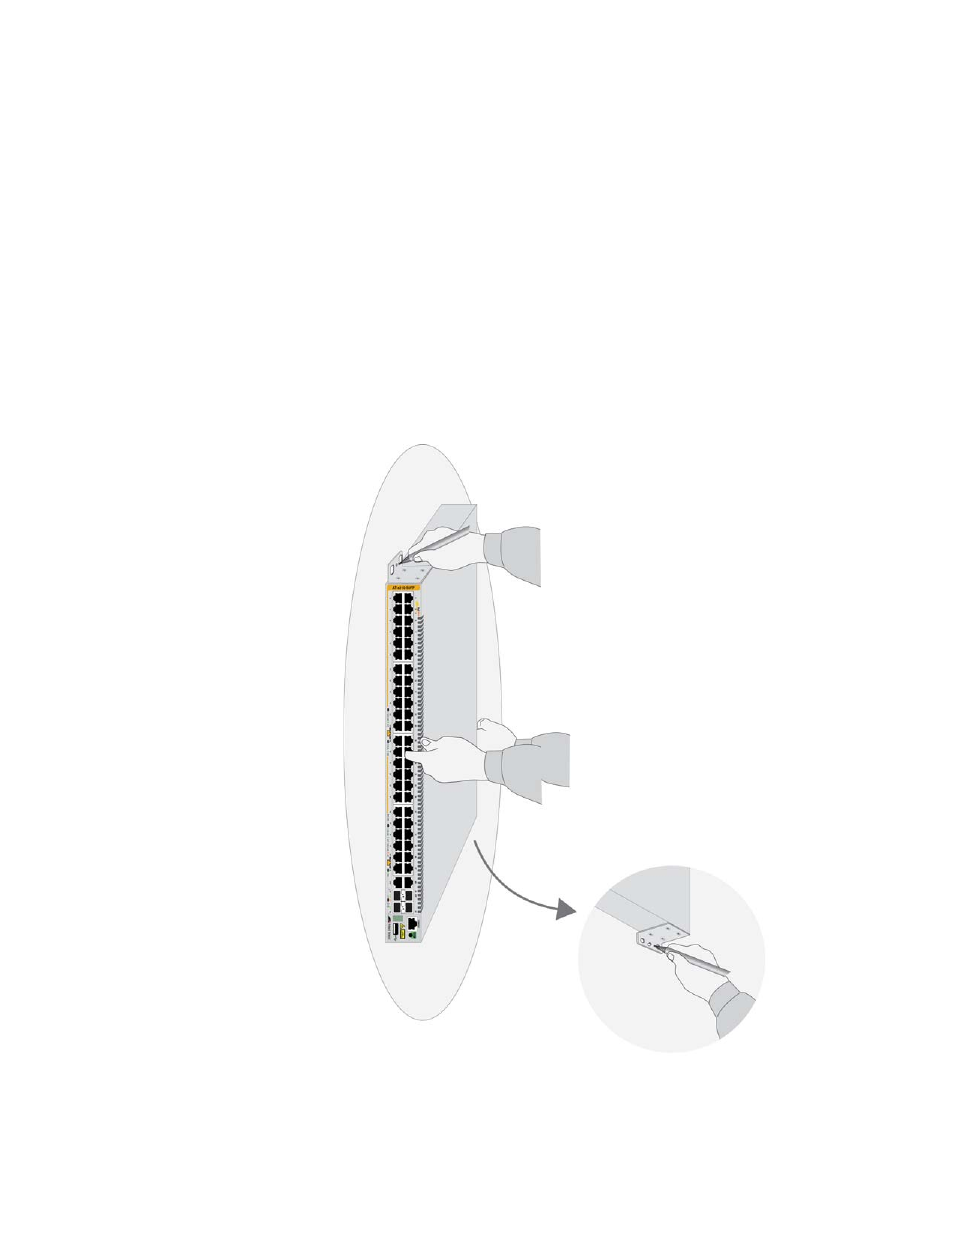
3. Have another person hold the switch on the concrete wall at the
selected location for the device while you use a pencil or pen to mark
the wall with the locations of the two screw holes in the brackets. Refer
to Figure 38. The selected wall location should adhere to the
recommendations in “Choosing a Site for the Switch” on page 52 and
“Recommended Minimum Wall Area Dimensions” on page 73.
Figure 38. Marking the Locations of the Bracket Holes on a Concrete Wall