Figure 18-3. cc5mpx mounted to crossarm -2 – Campbell Scientific CC5MPX and CC5MPXWD Digital Network Cameras User Manual
Page 106
Section 18. Installation
18-2
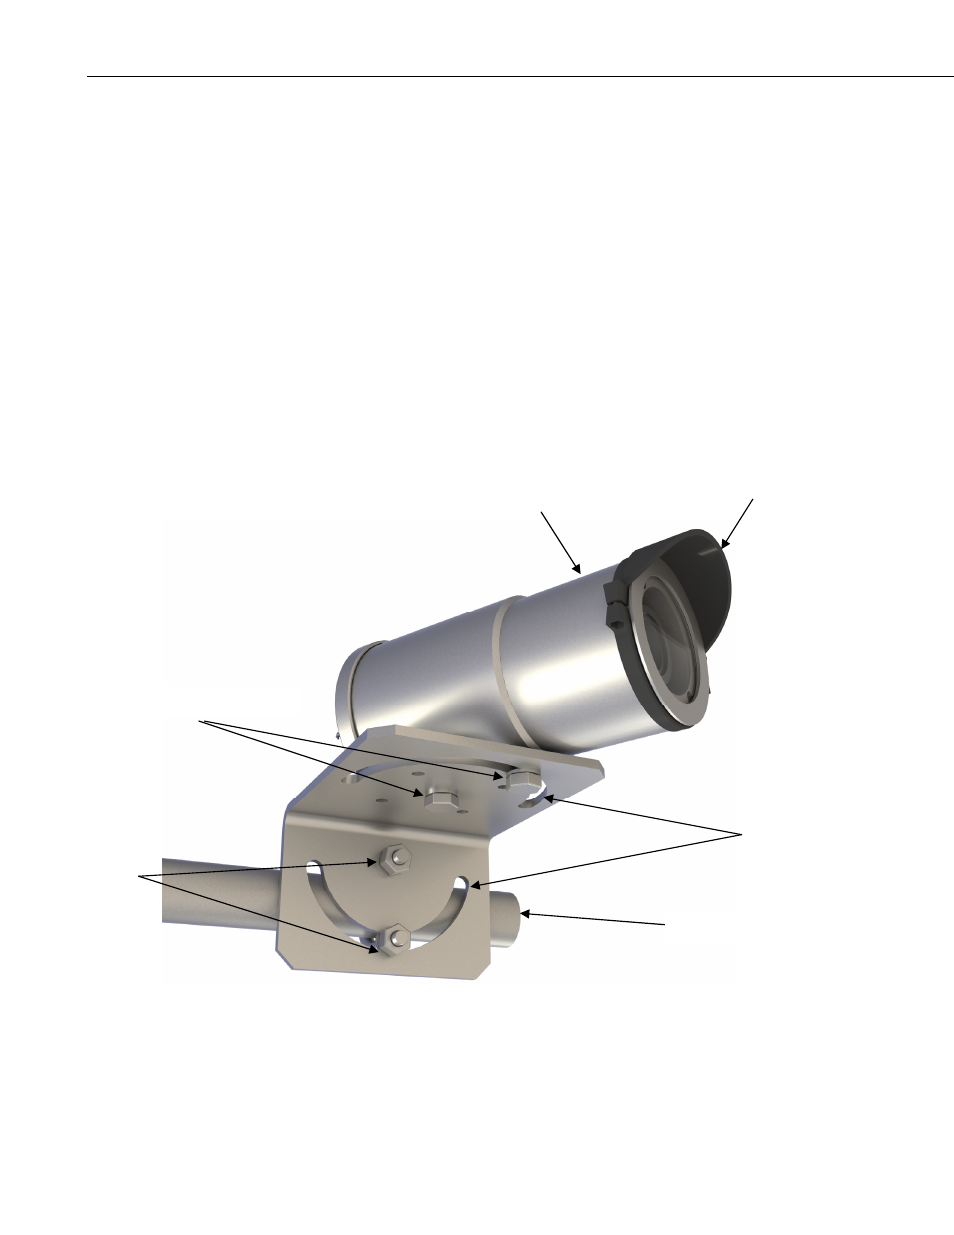
The 18549 Mounting Kit is available for mounting the camera to a crossarm,
tripod, or pole. When using this mounting kit, align the outer holes of the
CC5MPX with the center hole and the 180° slot of the mount. Loosely secure
the two together with the two ¼-20 x 0.5 in. Hex bolts included with the kit. It
is now possible to mount the CC5MPX to either a crossarm or other mounting
surface with the included u-bolt.
With the hardware loose, the camera and the 18549 mount can be pivoted to
allow a full range of motion when aiming the camera. The hardware should be
secured once the camera is properly aimed at the intended target.
The focus of the camera should be checked and adjusted as required. Refer to
Section 14.2, Focus and Zoom Adjustment for details. Be sure that the lens
tube is fully seated, the sun shroud is properly orientated after the camera is
aimed, and any protective caps are properly secured.
The sun shroud can be adjusted by loosening the Philips screws and turning the
shroud. When tightening the screws back up do not over tighten the screws as
the shroud may crack.
FIGURE 18-3. CC5MPX Mounted to Crossarm
¼-20 x 0.5” Hex bolts
Sun Shroud
Lens Tube
U-bolt
Curved
Slots
Crossarm