2 choose the power supply line, 3 open the box, 4 connection of the board – Videotec WASPT User Manual
Page 6: 1 installing the fuse
EN - English - I
nstruc
tions manual
4
6.1.2 Choose the power supply line
Depending on the version, the device can be
provided with different power supply voltages. Their
value is shown on the product identification label.
Electrical connections must be performed
with the power supply disconnected and
the circuit-breaker open.
When commencing installation make sure
that the specifications for the power supply
for the installation correspond with those
required by the device.
Make sure that the power source and
connecting cables are suitable for the
power consumption of the system.
6.1.3 Open the box
Open the cover of the water-proof box and connect
as described below.
Fig. 4
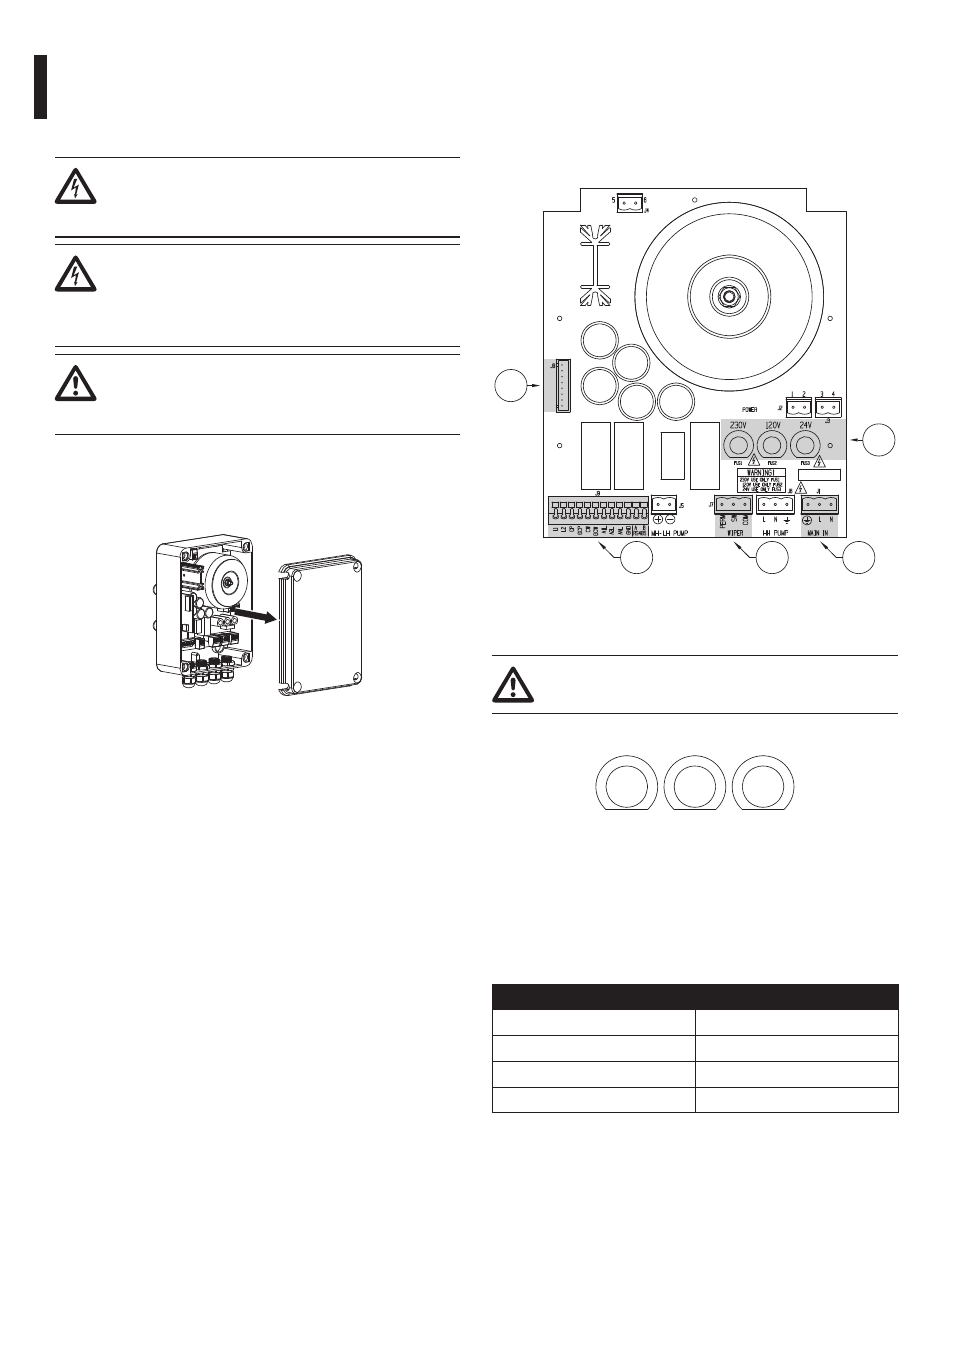
6.1.4 Connection of the board
Find the position of the following on the pump
control board: fuses (01), power supply terminal
J1 (02), wiper connector J7 (03), control terminal
J9 (04) and DTWRX optional board connector J8 (05).
01
05
04
02
03
Fig. 5
6.1.4.1 Installing the fuse
Move the fuse into the correct fuse holder
according to the input voltage.
230V
FUS1
120V
FUS2
24V
FUS3
Fig. 6
The pump is supplied with the fuse in position FUS1
(for a 230Vac power supply).
If the power supply is different position the fuse
correctly referring to the following table.
INSTALLING THE FUSE
Voltage
Fuse holder
230Vac
Fuse in FUS1
120Vac
Fuse in FUS2
24Vac
Fuse in FUS3
Tab. 1