Installing driveright, Procedure 1. install the speed sensor, Install the magnet - rear wheel drive – DAVIS DriveRight 600E GD/HD Installation Guide (8126GD, 8126HD) User Manual
Page 8: 3urfhgxuh ,qvwdoo wkh 6shhg 6hqvru
,
167$//,1*
'
5,9(
5
,*+7
&
$87,21
Always use safety stands when working under a raised vehicle. Never work under a
vehicle supported only by a jack.
3URFHGXUH ,QVWDOO WKH 6SHHG 6HQVRU
The speed sensor used by the DriveRight GD and HD consists of a magnet
mounted on the driveshaft or CV-joint hub and a reed switch.
1. Mount the magnet on the vehicle’s driveshaft or CV-joint hub.
2. Assemble the reed switch bracket.
3. Install the reed switch.
4. Route the sensor leads into the vehicle.
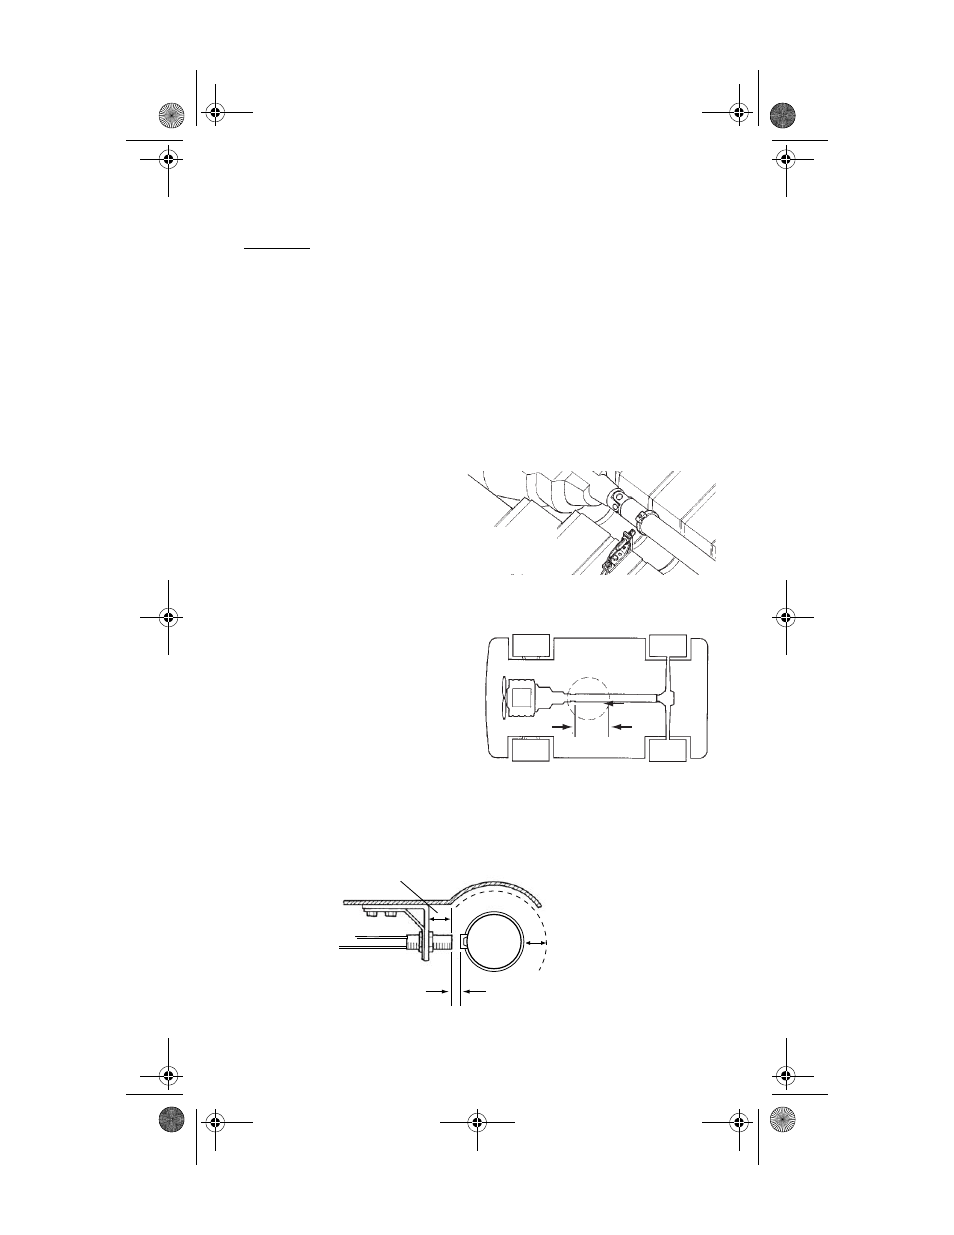
,QVWDOO WKH 0DJQHW 5HDU :KHHO 'ULYH
For a rear wheel drive vehicle,
the magnet mounts on the
driveshaft close to the
transmission. The sensor
mounts adjacent to the magnet
on the vehicle’s chassis or floor
pan.
Ir) If you are installing a DriveRight HD, see the special magnet mounting instructions in the
“Supplement for DriveRight HD” on page 20.
Select a mounting location on
the drive shaft within 12 inches
(30cm) of the universal joint to
account for vehicle suspension
movement while driving.
❏
The mounting location should provide a clearance zone around the
driveshaft of at least 3/4” (19mm) and a 3/8”-1/2” (10 - 13 mm) gap
between the magnet and reed switch.
Rear Wheel Drive
Installation
Drive Shaft
12" (30 cm)
Rear Wheel Drive Mounting Positions
3/4" (19 mm)
Minimum Clearance
3/4" (19 mm)
Minimum Extension
3/8" - 1/2" (10 - 13 mm) Gap
07395.043 DR GD Inst Rev D Body D146.fm Page 6 Monday, December 1, 2003 12:02 PM