Procedure 4: install the driveright console, Face of dashboard mounting options, 3urfhgxuh ,qvwdoo wkh 'ulyh5ljkw &rqvroh – DAVIS DriveRight 600E GD/HD Installation Guide (8126GD, 8126HD) User Manual
Page 15
"
Connect the black ground wire from the adapter cable to chassis ground.
#
Use in-line butt splices to connect the blue wires with fuses to the green and
yellow digital input cables.
$
Connect digital input 1 to the desired circuit, typically the brake light circuit.
%
Connect digital input 2 to the desired circuit, typically the headlight circuit.
&
Connect the adapter cable to the harness cable.
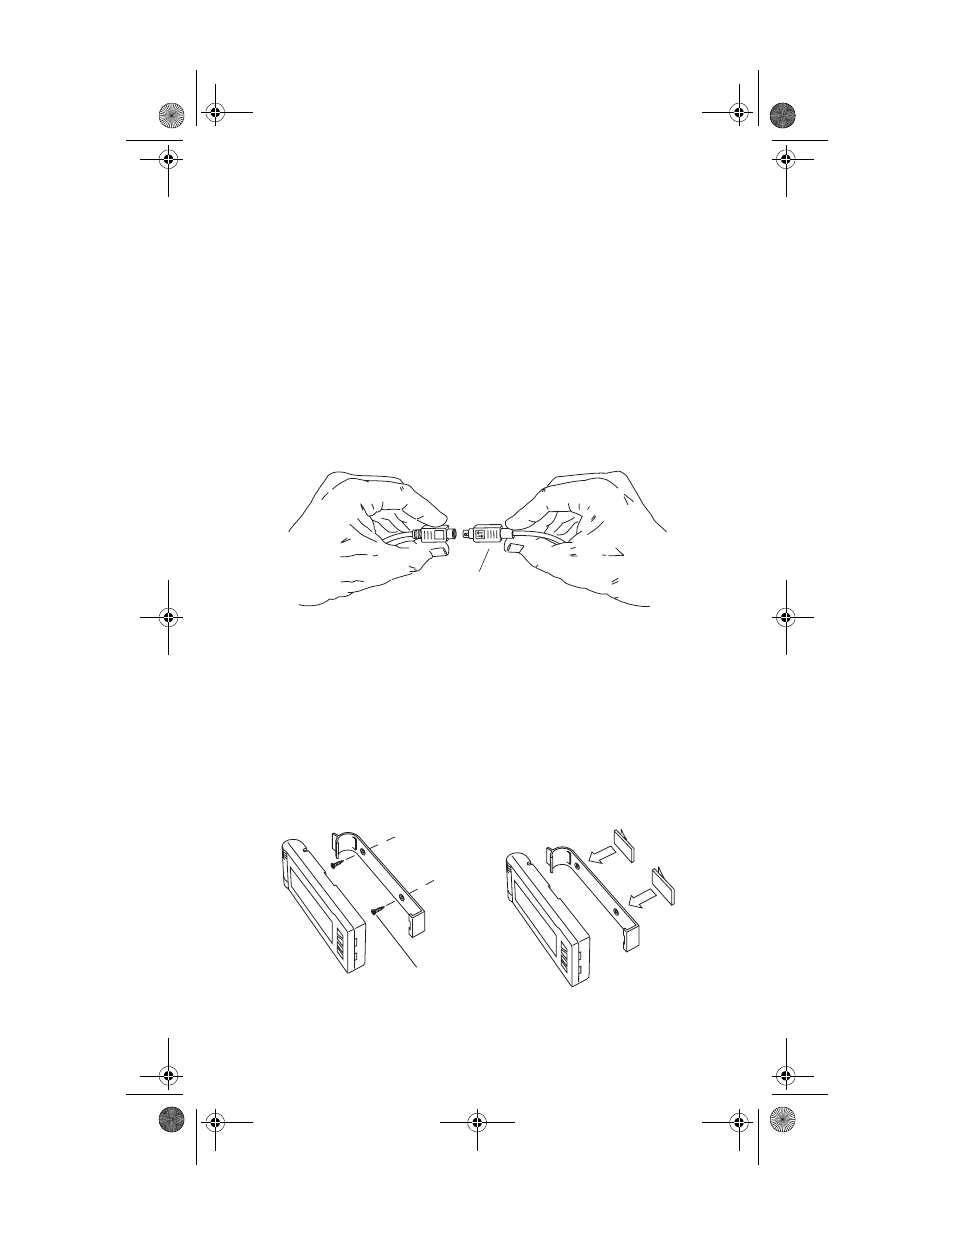
❏
It is easiest to make the connection if you hold the harness cable
connector by the connector housing and hold the adapter cable by the
cable next to the connector.
❏
Push the two connectors together. The connector housing on the
adapter cable slides back when you make the connection, allowing the
cables to lock together.
Ir) To disconnect the cables, hold the both cables by the housing and pull apart. The sliding
housing on the adapter cable connector will release the lock and allow the cables to be
separated.
3URFHGXUH ,QVWDOO WKH 'ULYH5LJKW &RQVROH
The DriveRight console can be mounted in a number of places, including the top
of the dash, on the face of the dash, or on a sun visor.
)DFH RI 'DVKERDUG 0RXQWLQJ 2SWLRQV
Sliding
Connector
Housing
Adapter Cable
Harness Cable
To Connect Cables,
Hold as Shown Here
Mounting
Bracket
Double-Sided
Foam Tape
OR
Flat Head Self-Tapping Screw (2x)
Mounting
Bracket
07395.043 DR GD Inst Rev D Body D146.fm Page 13 Monday, December 1, 2003 12:02 PM