Test the speed sensor – DAVIS DriveRight 600E GD/HD Installation Guide (8126GD, 8126HD) User Manual
Page 18
"
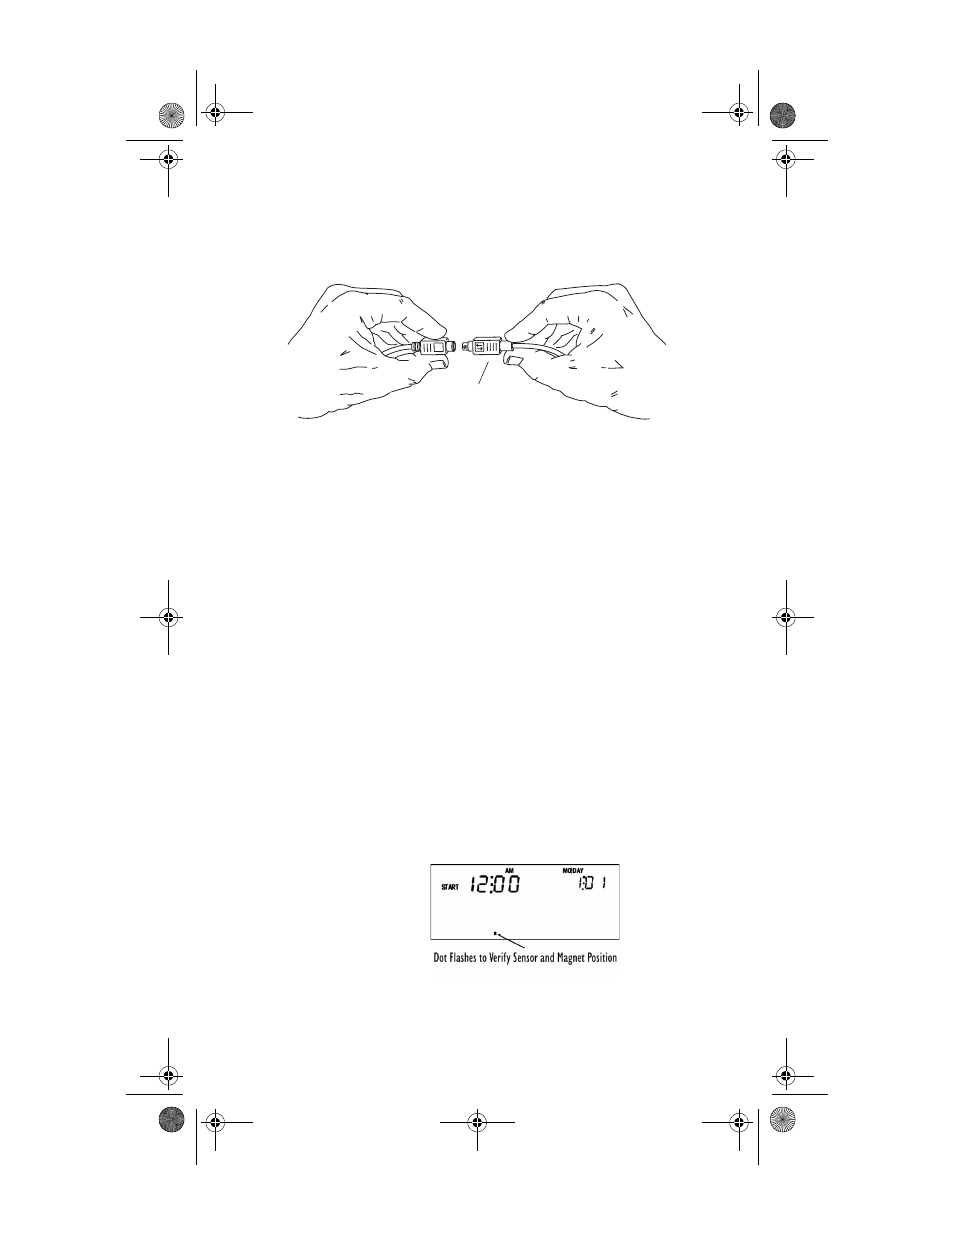
Then push the two connectors together. The connector housing on the
console cable slides back when you make the connection, allowing the
cables to lock together.
Note:
To disconnect the cables, hold the both cables by the connector housing
and pull apart. The sliding housing on the console cable connector will
release the lock and allow the cables to be separated.
#
When the two cables are connected, the “BAT” should disappear, indicating
that the unit is drawing power from the vehicle’s battery. A dot may appear to
the right of where BAT was. This dot will be used to verify the magnet
placement in the next step.
7HVW WKH 6SHHG 6HQVRU
Ir) The DriveRight comes with sample data pre-programmed into the log so you can use all
of the unit’s features immediately. As you use the unit, this data will automatically be
over-written by new data.
Ir) The DriveRight must be calibrated before it will display the correct speed. Look in the
DriveRight 600 User’s Guide for calibration instructions.
Roll the car forward slowly so the driveshaft or CV joint hub complete at least
one complete revolution. You should perform this test while the vehicle is on
the ground and not on the stand.
!
As the vehicle suspension takes up the weight of the vehicle, the driveshaft
and CV joint hub move. The sensor must be properly aligned with the
magnet in this normal condition.
"
The dot should appear and then disappear each time the magnet passes the
sensor. If the dot does not flash as described, consult the Troubleshooting
section.
#
Road test the DriveRight by driving around and observing the readings. You
will need two people for this test: one to drive and the other to operate and
read the DriveRight.
Sliding
Connector
Housing
Console Cable
Adapter Cable
To Connect Cables,
Hold as Shown Here
Dot Position at Bottom
of Screen
07395.043 DR GD Inst Rev D Body D146.fm Page 16 Monday, December 1, 2003 12:02 PM