Check sim sensor connections – DAVIS Vantage Pro ISS, 2003 & later User Manual
Page 6
Preparing the ISS for Installation: Check SIM Sensor Connections
4
3. Push the wind cups up onto
the anemometer’s stainless
steel shaft.
4. Slide the wind cups up the
shaft as far as possible.
5. Use the Allen wrench provided
to tighten the set screw on the
side of the wind cups. When
you let go of the wind cups,
they should drop slightly.
6. Spin the wind cups.
7. If the wind cups spin freely, the anemometer is ready and can be set aside while you
prepare the rest of the ISS for installation.
8. If the wind cups don’t spin freely, repeat steps 1, 2 and 3.
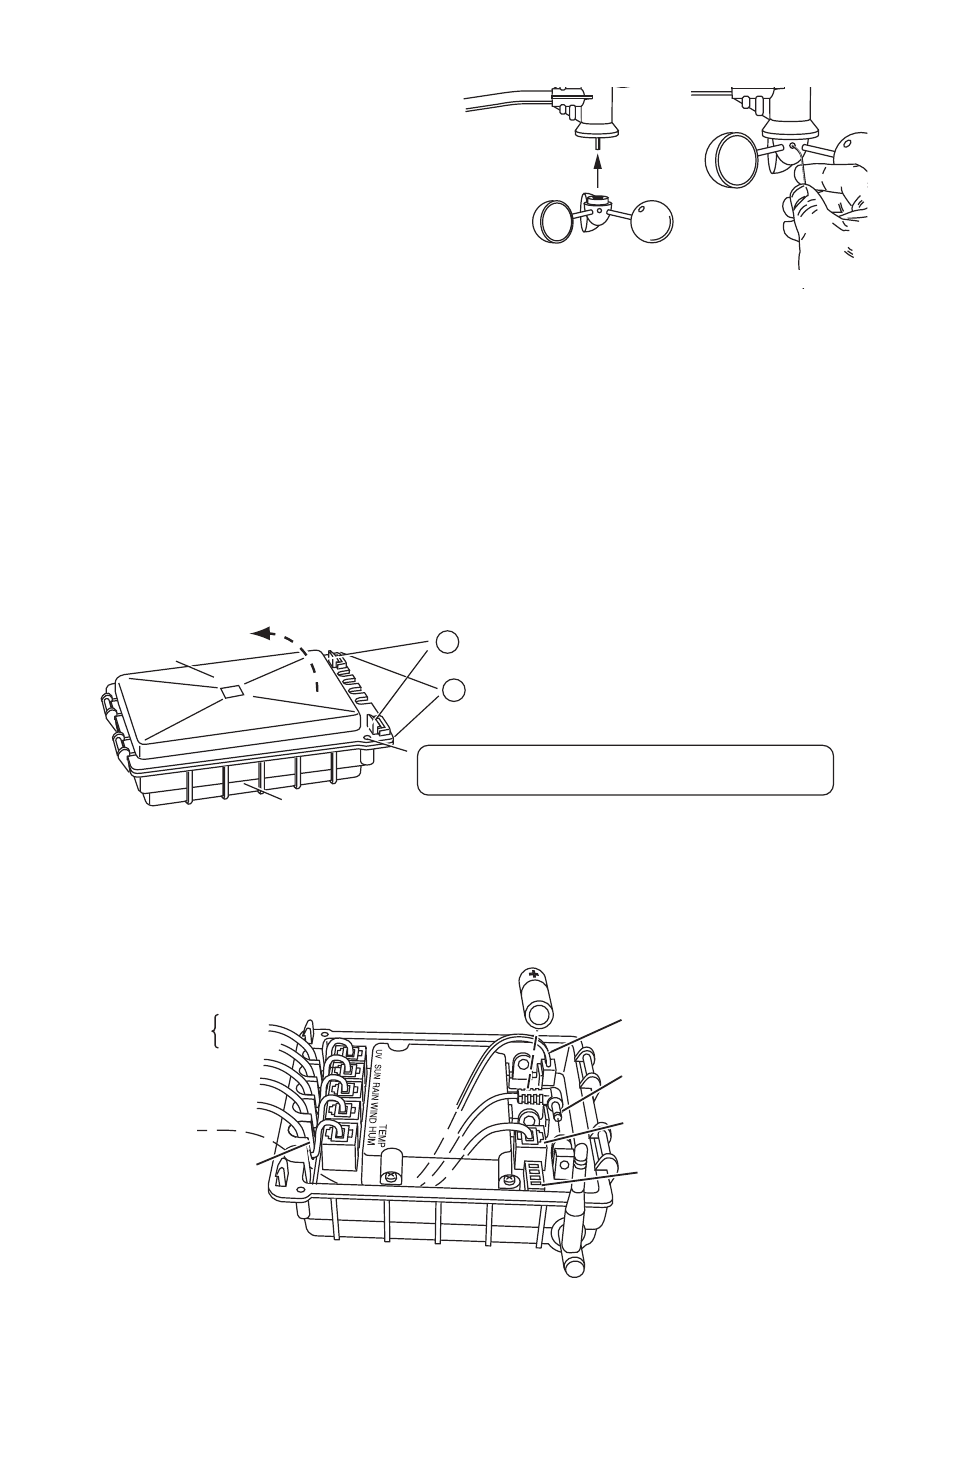
Check SIM Sensor Connections
Open the SIM Housing Cover
1. Turn ISS upside down with the rain collector cone on the bottom.
2. Push back on the two plastic latches to release the SIM cover, then open the cover.
You should now be able to see the SIM.
Check the Factory Installed Sensor Connections
1. Verify that the rain sensor and temp/hum sensor cables are plugged into the recepta-
cles labeled “RAIN” and “TEMP HUM” on the SIM.
2. If your station includes UV and/or solar radiation sensors, verify that the sensor
cables are plugged into the SIM.
Push cups onto
stainless steel
shaft
Tighten set
screw with
Allen wrench
Attaching Wind Cups
SIM Housing
SIM Cover
With the latches pushed back, use fingers to lift up
the corner edges of the cover.
2
Note: When closing SIM cover, secure it in place with
two #6 x 0.5" (3.5mm x 12 mm) self-threading screws.
Push back the two (2) plastic latches using thumbs.
1
Opening the SIM Housing Cover
Cable Channels
(press cables fully
into channel)
DIP Switches
(Wireless ISS Only)
Console Cable
(Cabled ISS Only)
Solar Panel Power
(Wireless ISS Only)
AC Power
(optional)
3-Volt Lithium Battery
(Wireless ISS Only)
UV
Optional
Solar
Rain Collector
Anemometer
Temp/Humidity
SIM Connections