Appendix c: re-orienting the wind vane – DAVIS Vantage Pro ISS, 2003 & later User Manual
Page 23
Appendix C: Re-orienting the Wind Vane: Other Accessories
21
Appendix C: Re-orienting the Wind Vane
Your Vantage Pro station is configured to register wind direction correctly if the
anemometer points to true North. If you are unable to mount the anemometer shaft
pointing to true North, use the following instructions to correct the wind vane orientation.
• Do not rely on a compass unless it is properly calibrated. In North America there
can be up to 15° variation between true North and a raw compass reading.
• You can also correct the wind direction readings by calibrating the wind direction
in the Vantage Pro console. See the Vantage Pro Console Manual for information.
• To orient the wind vane accurately, you will need to look at the console display.
You may wish to have a friend or family member on the ground do this for you.
• You can also re-orient the wind vane before you install the anemometer if you
know the direction in which the anemometer will be installed.
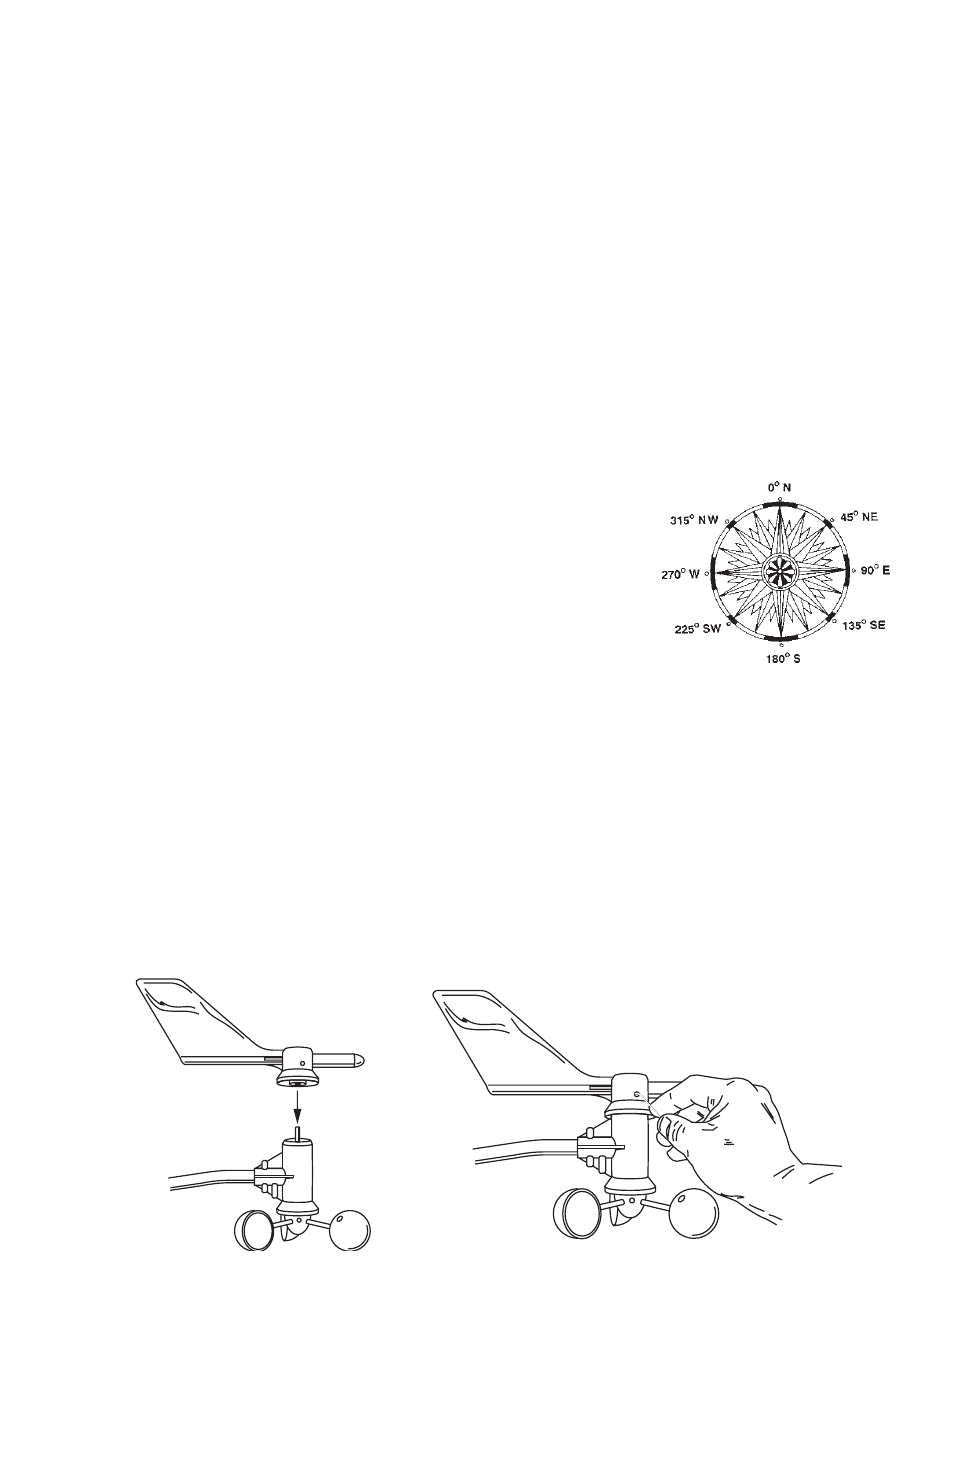
To re-orient the wind vane:
1. Loosen the Wind Vane set screw.
2. Pull the vane directly up and off the steel shaft on
which it turns.
3. Press WIND key on console to display current wind
direction in degrees.
4. Use a reliable map or a landmark to determine in
which direction (S, E, W, etc.) the anemometer arm is
now pointing.
5. Use the wind direction chart or compass markings to
find the degree reading which corresponds to that
direction.
6. Slowly turn the stainless-steel wind direction shaft with your fingers. Stop turning
when the display reaches the degree reading obtained in step 3.
Please allow the wind direction display approximately 5 seconds to stabilize after the
shaft is turned. You will have to turn the shaft, wait, and turn it again until the desired
wind direction is displayed on the console.
7. Being careful to keep the stainless-steel shaft from turning, place the wind vane on
top of shaft with the vane’s nose pointing in the same direction as the arm.
8. Slide the wind vane down the shaft as far as it will go.
9. Use the Allen wrench provided to tighten the set screw on the side of the wind vane.
10. Test your anemometer by pointing the wind vane in any direction and making sure
the console displays the correct wind direction. Remove and re-adjust the vane if it
does not. Allow the wind direction display approximately 5 seconds to stabilize after
turning the shaft.
Wind Direction Chart
Tighten set screw
with Allen wrench
Installing Wind Vane on Anemometer Shaft